

Pointing your device at Pi-hole
Initial Configuration
Setting Up Pi-hole DNS on Mac (IP: 192.168.1.112)
- Open System Settings:
- macOS Ventura or later: Go to System Settings > Network
- macOS Monterey or earlier: Go to System Preferences > Network
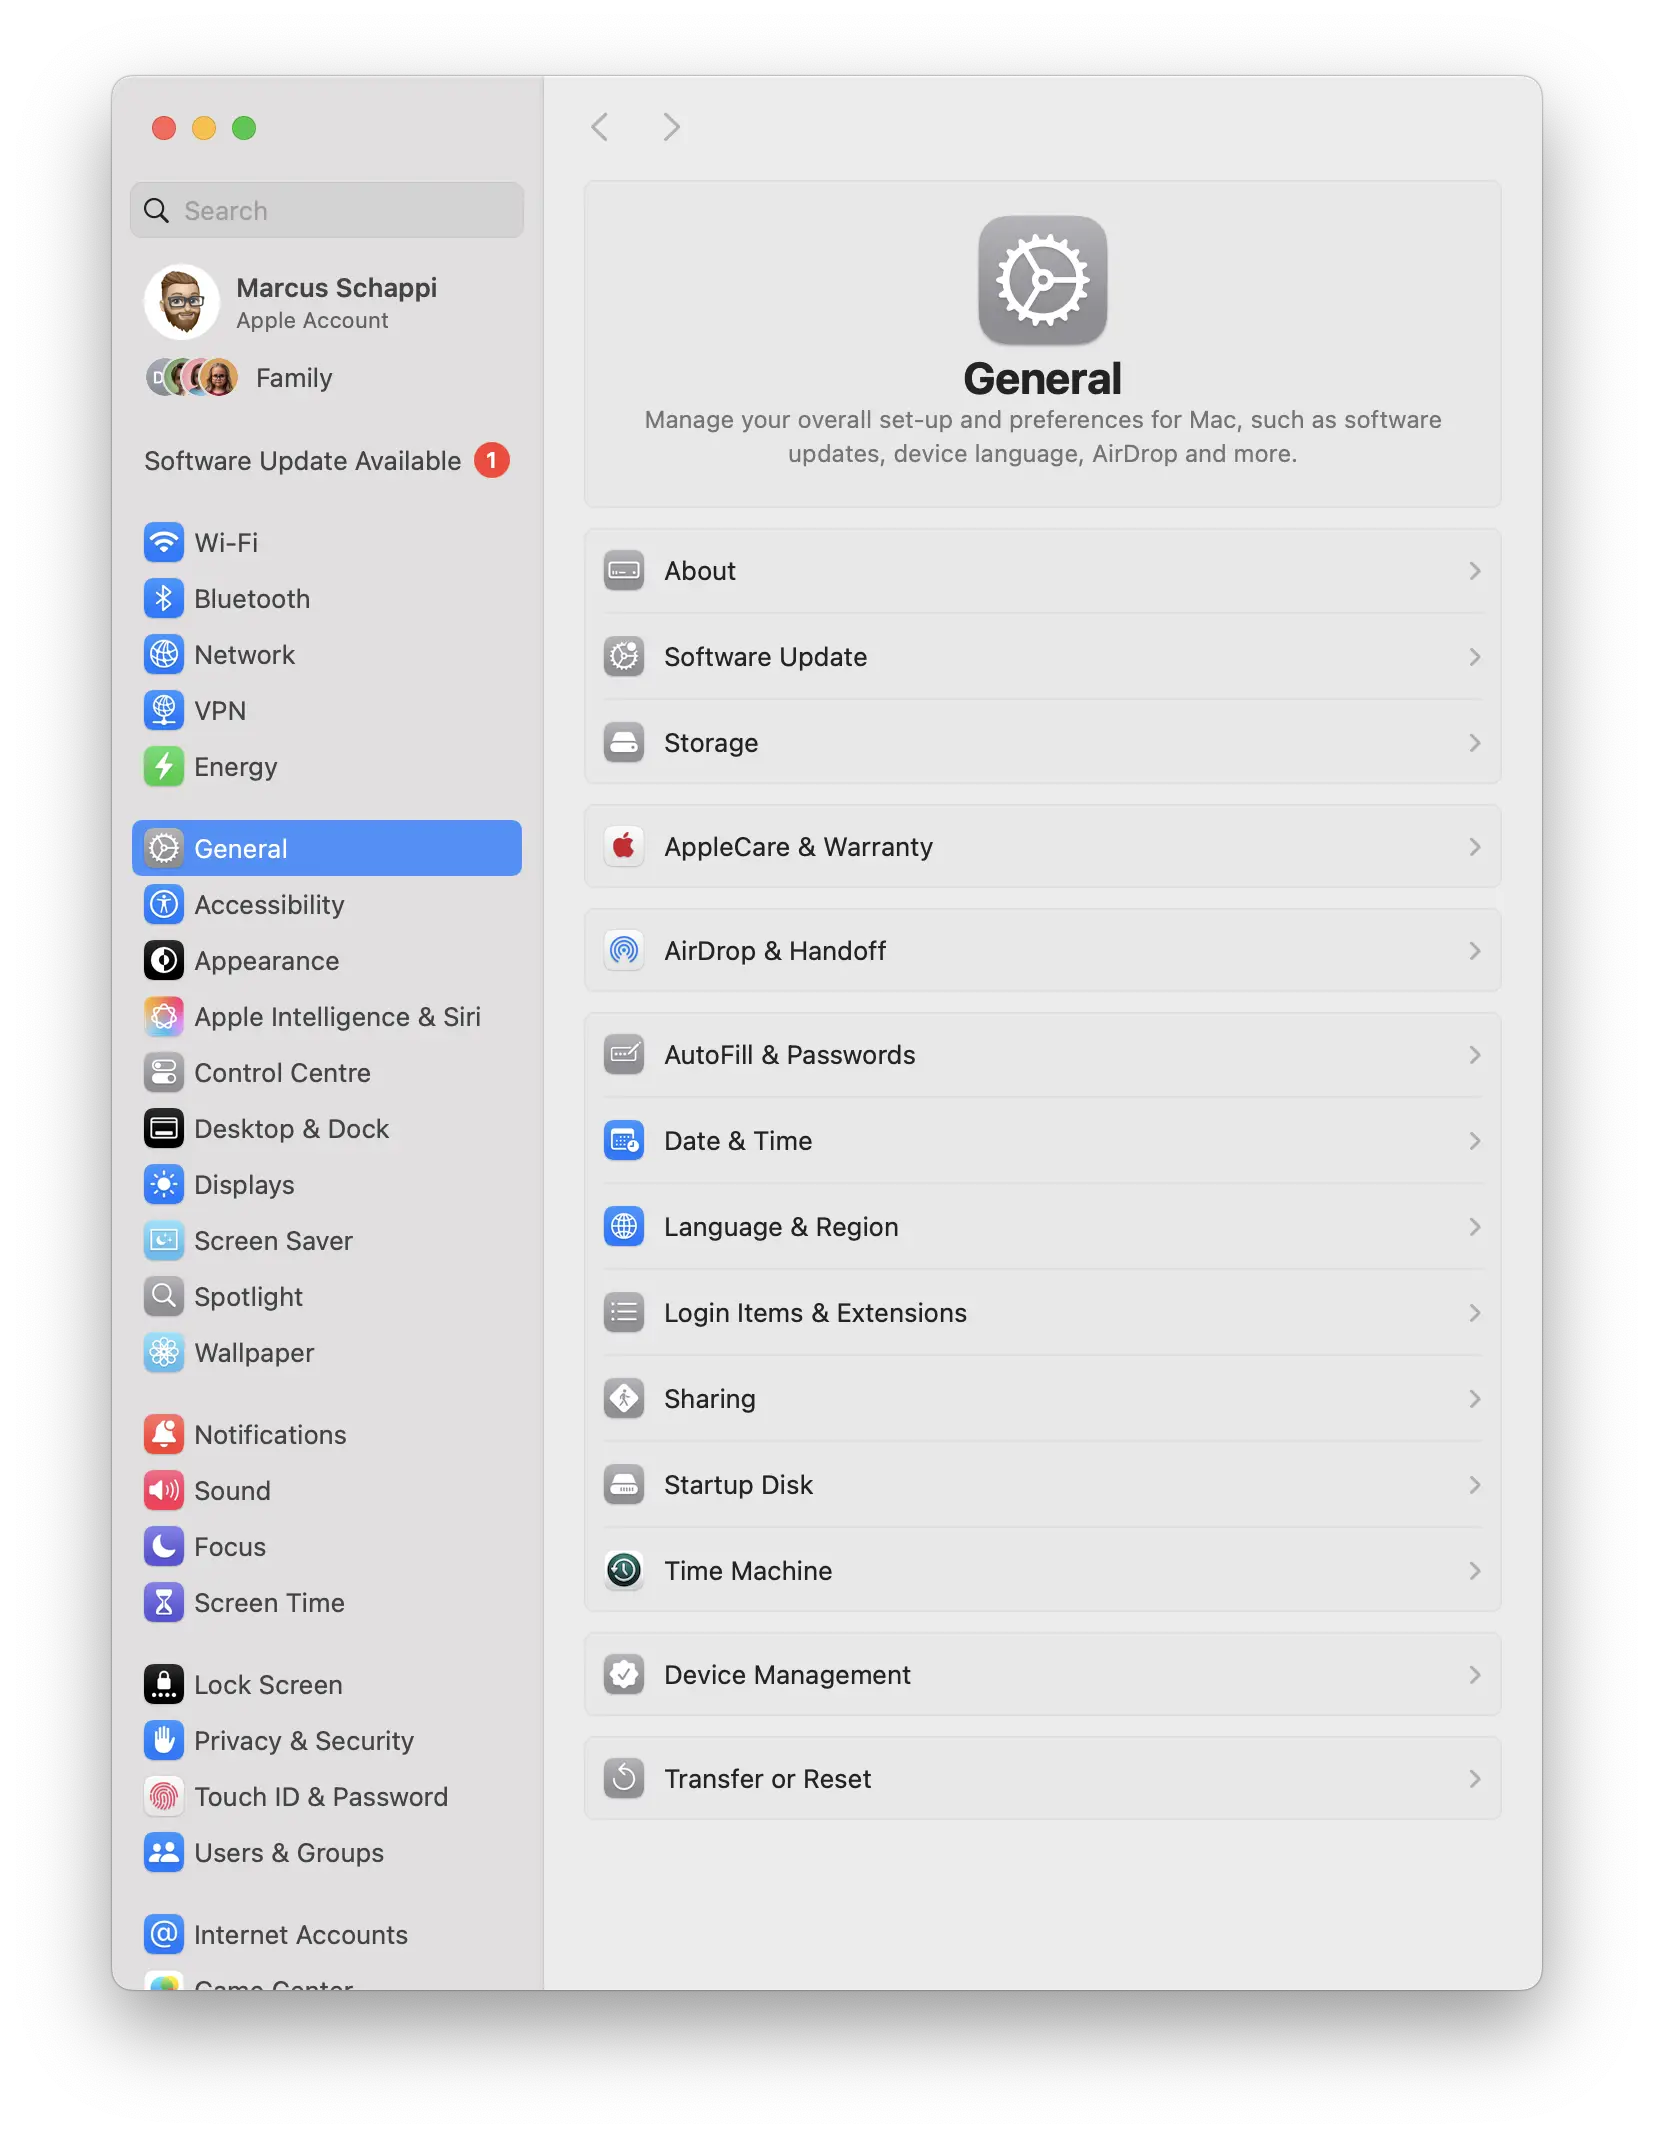
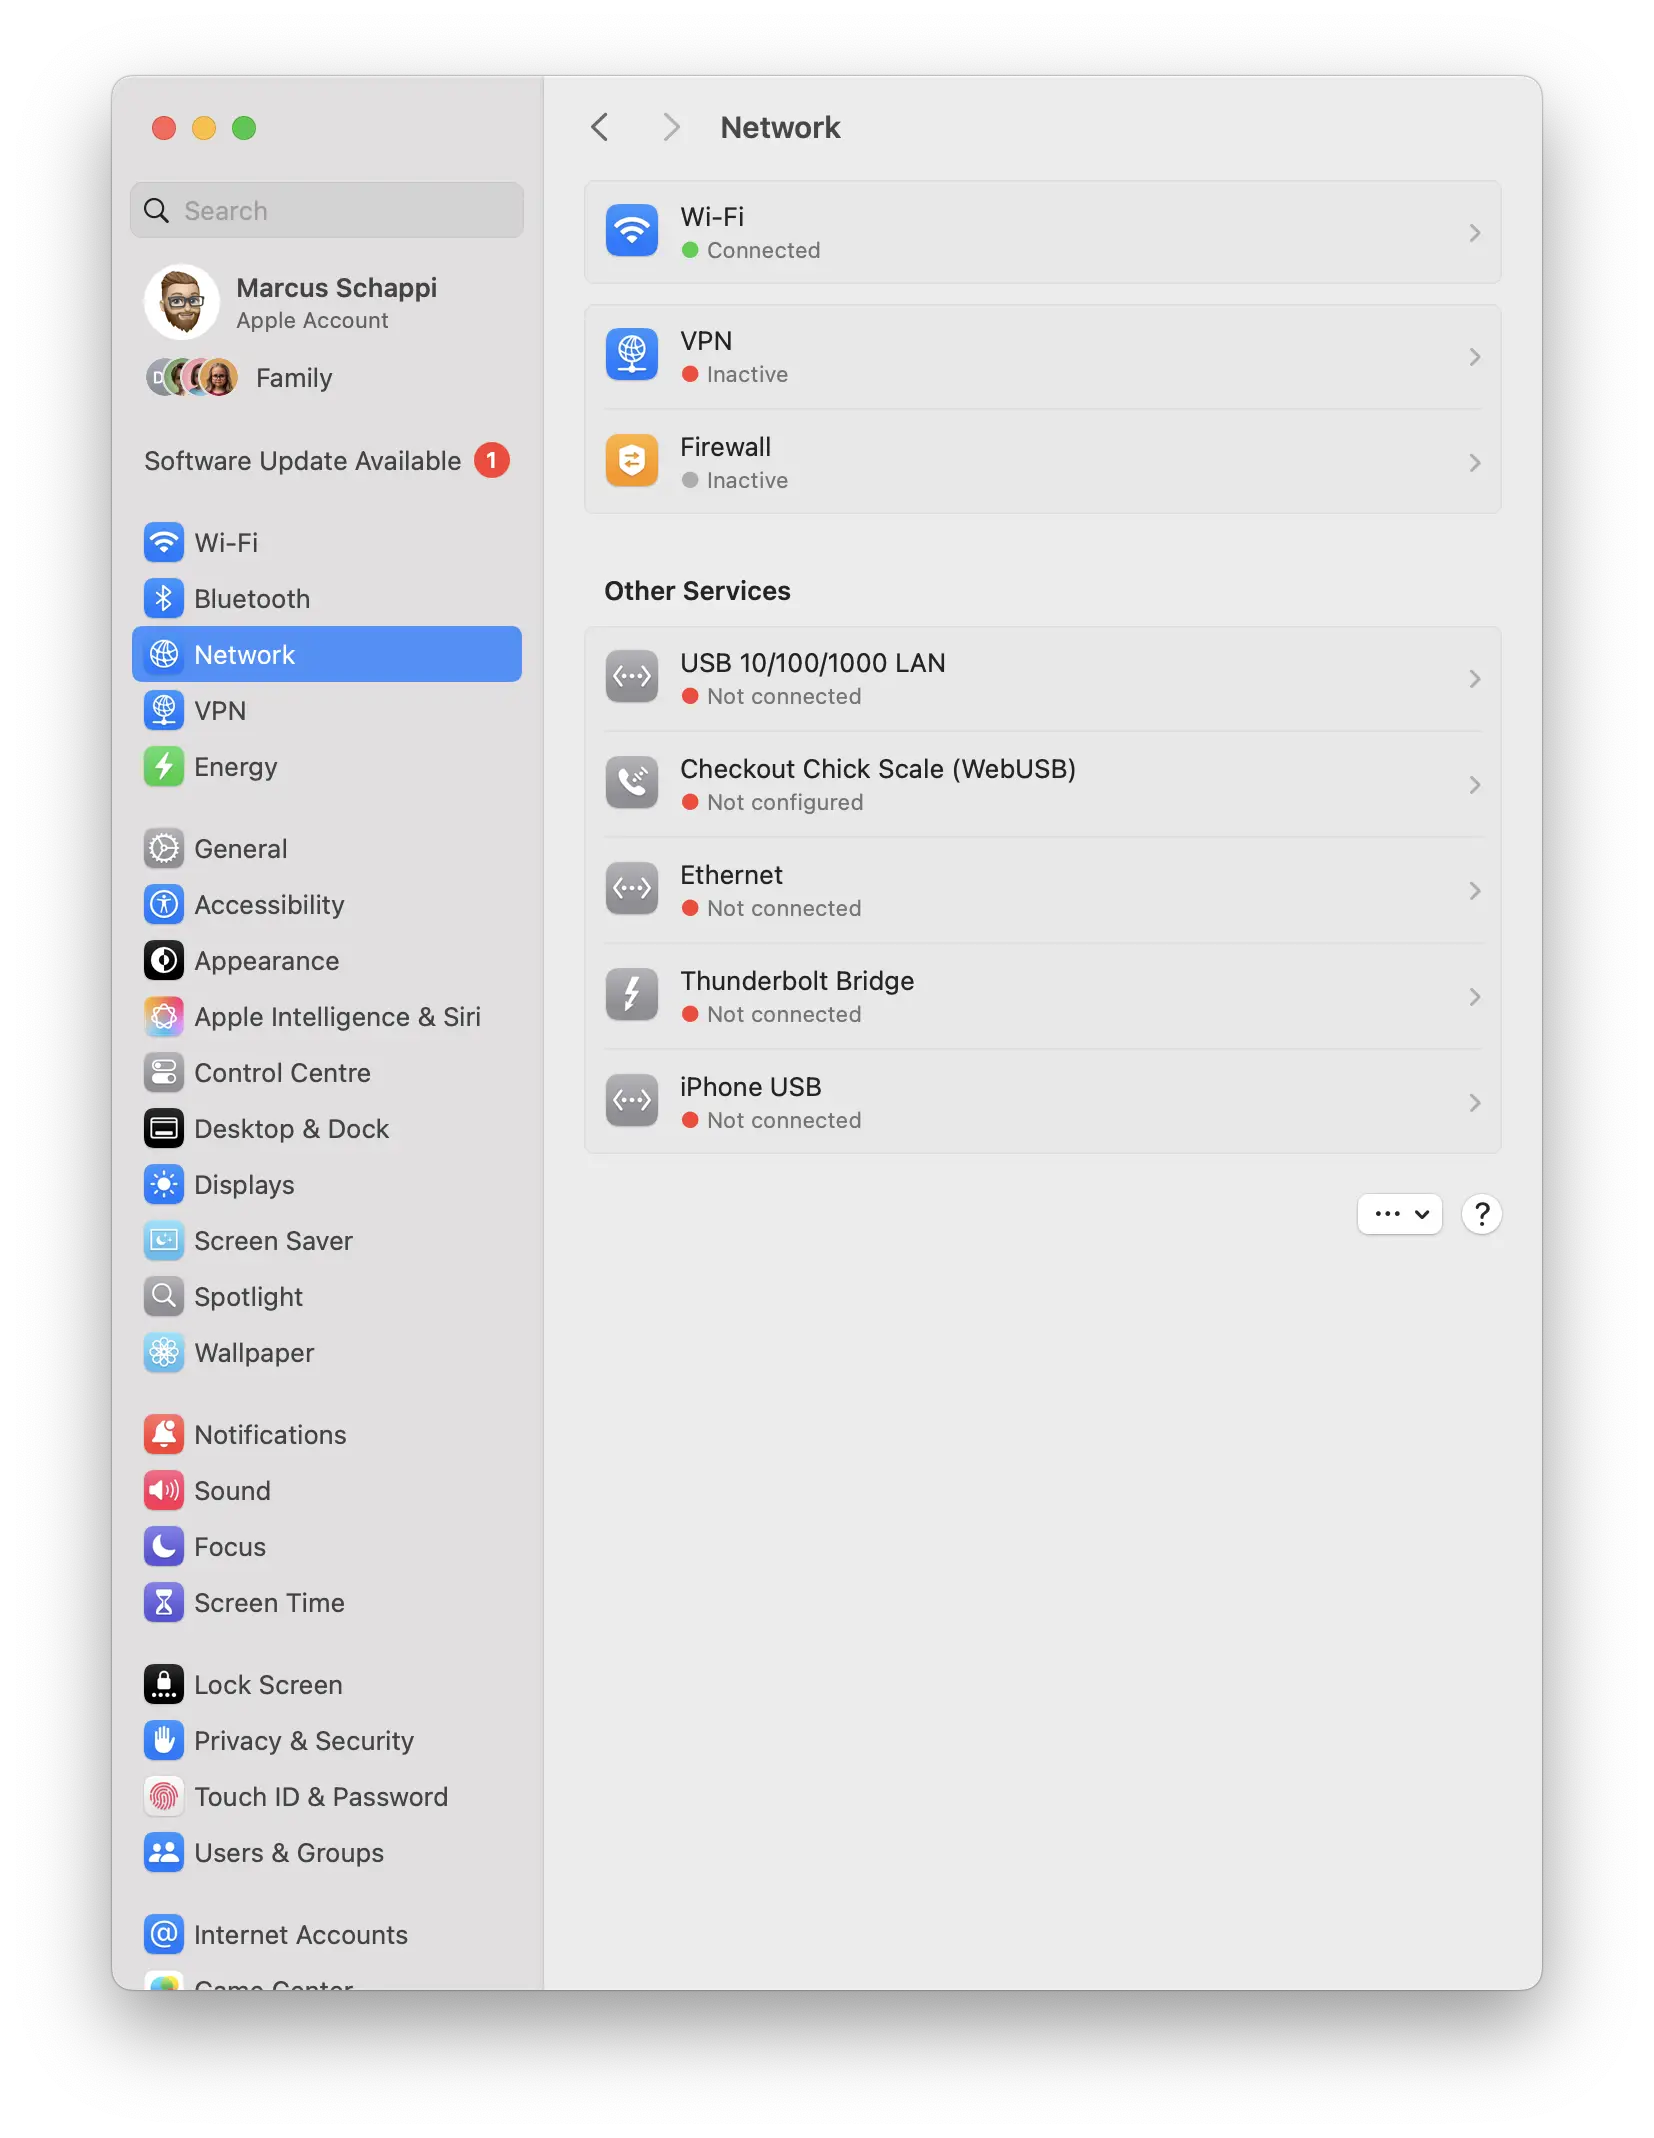
- Select Your Network Interface:
- Choose the network you are connected to (Wi-Fi or Ethernet)
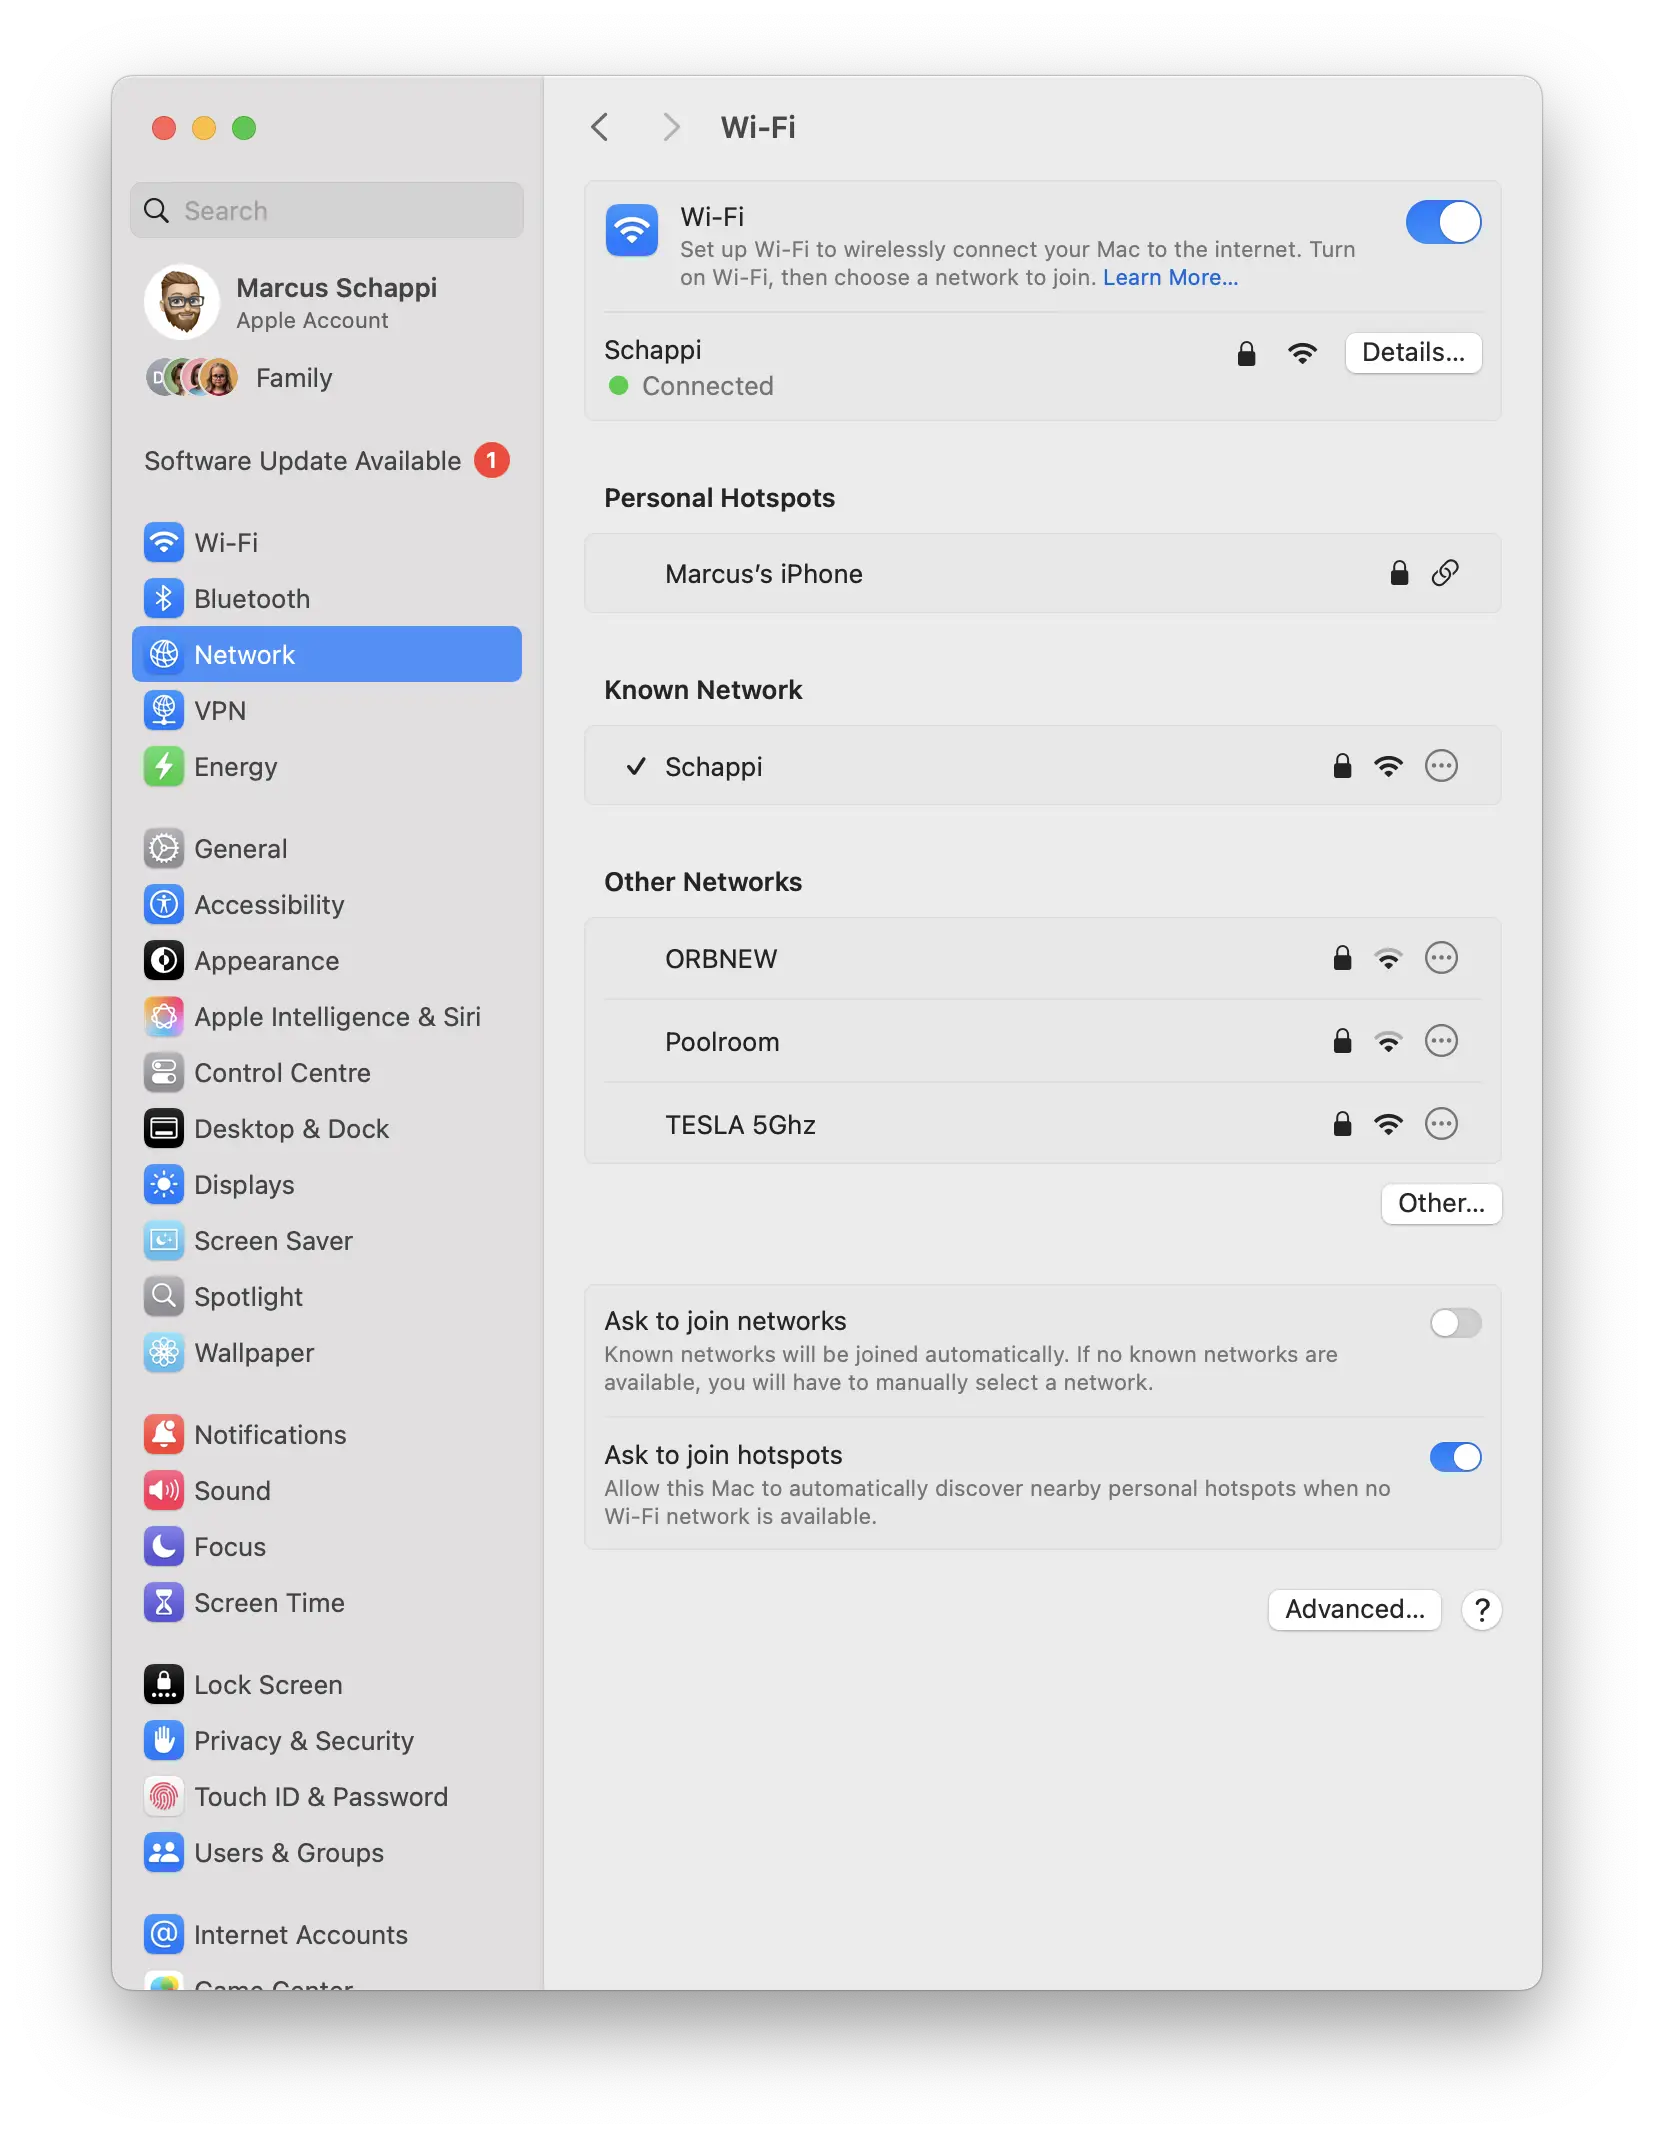
- Access Advanced Settings:
- Click Details… (Ventura) or Advanced… (Monterey)
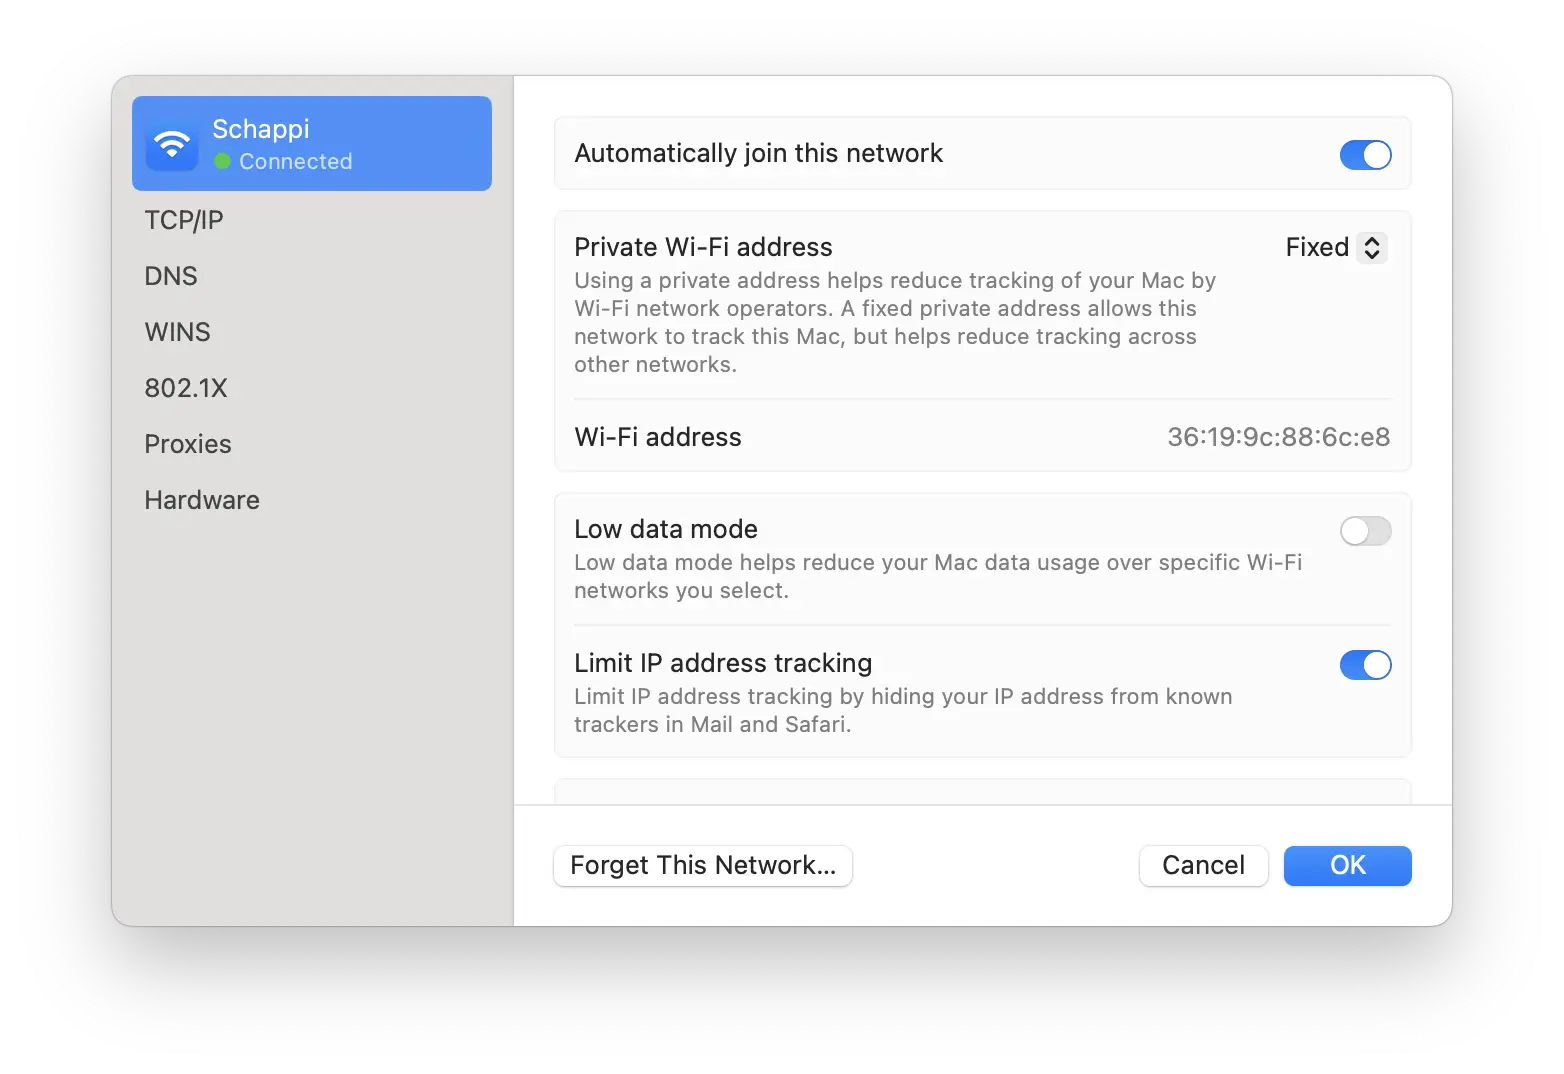
- Set DNS Servers:
- Go to the DNS tab
- Click the + button under DNS Servers
- Enter 192.168.1.112 and hit Enter
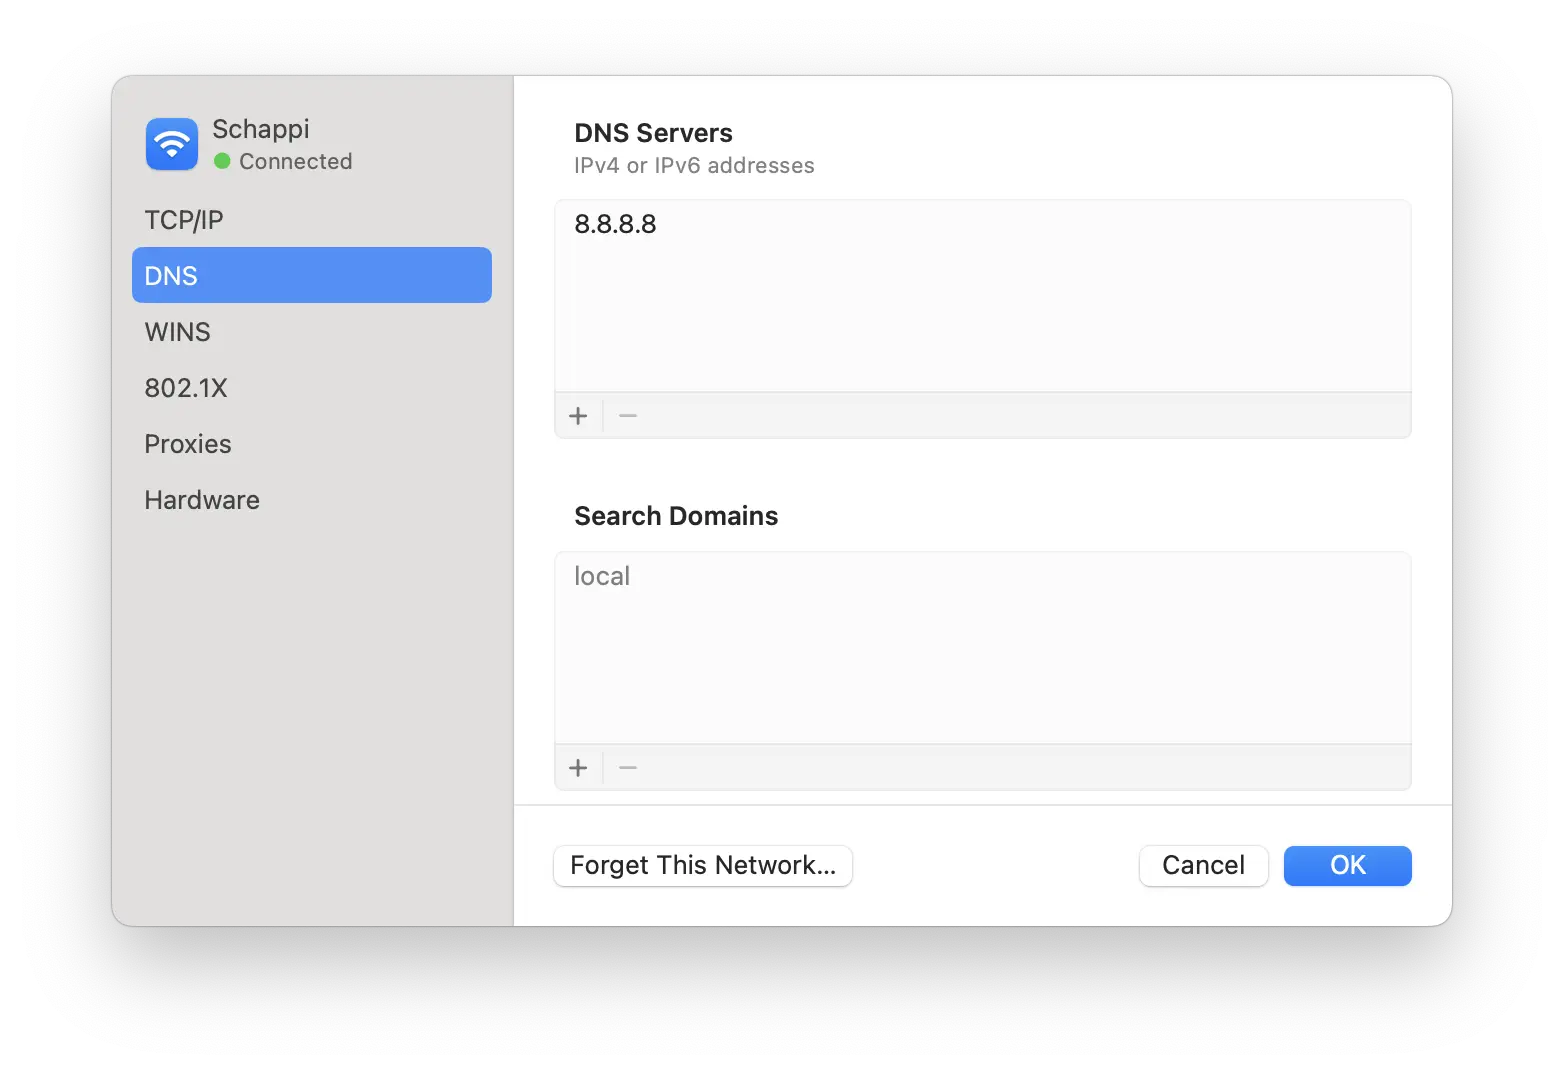
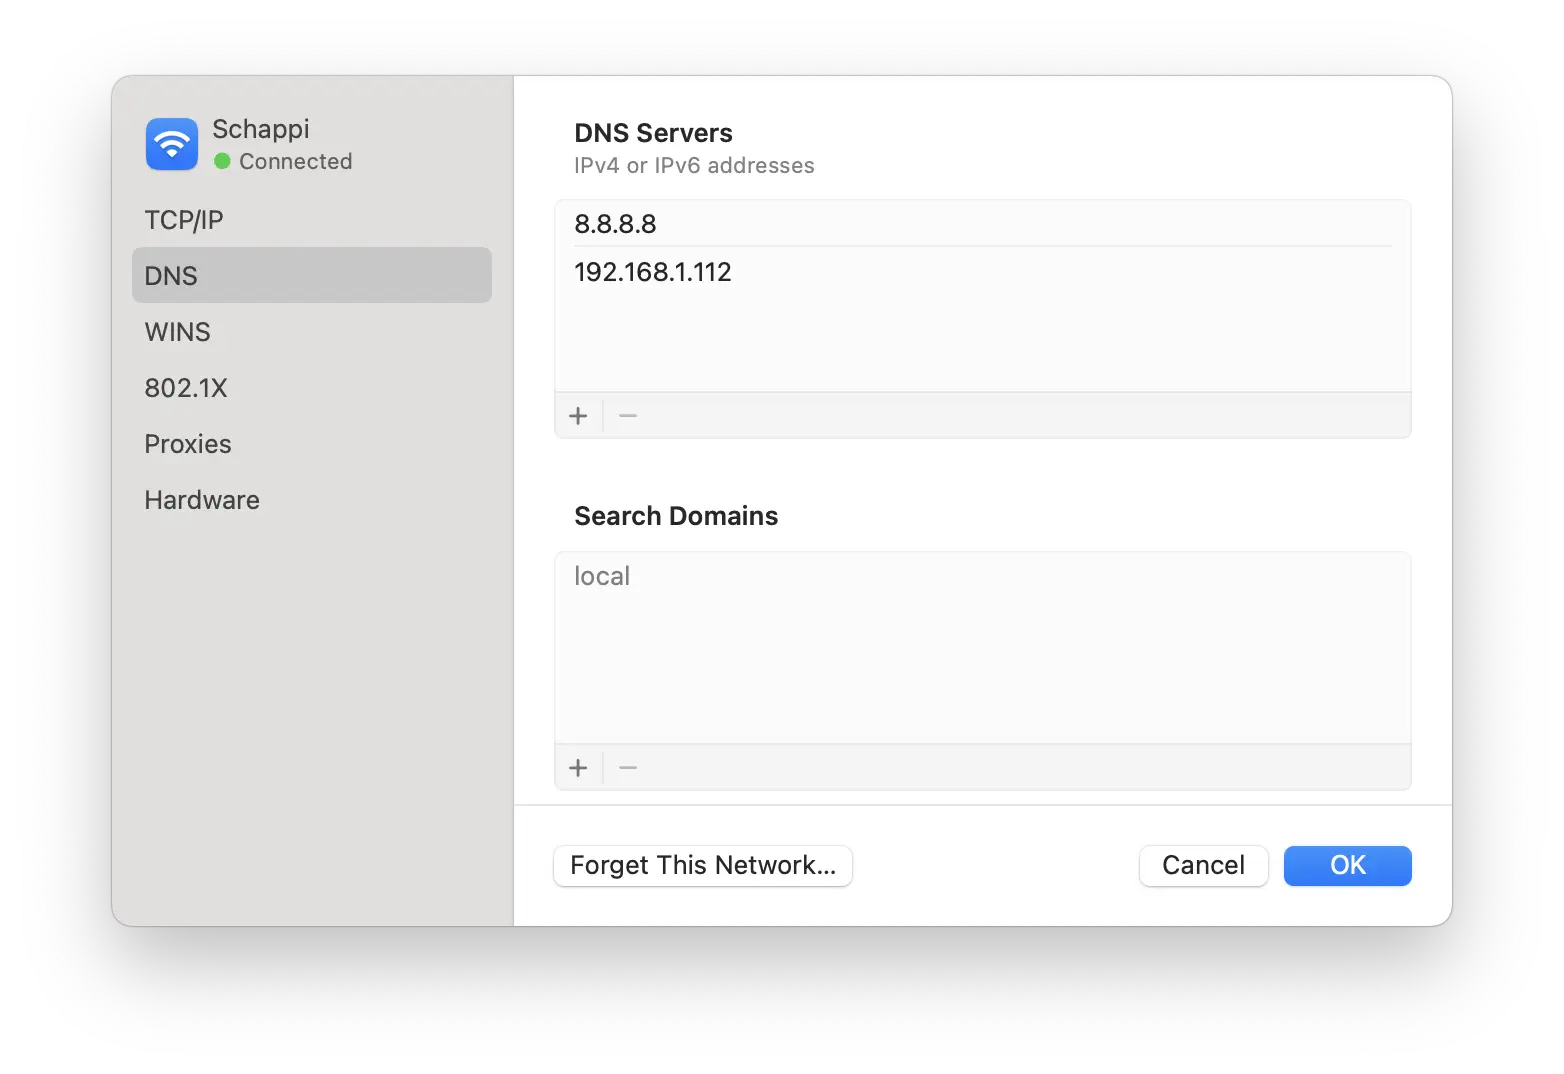
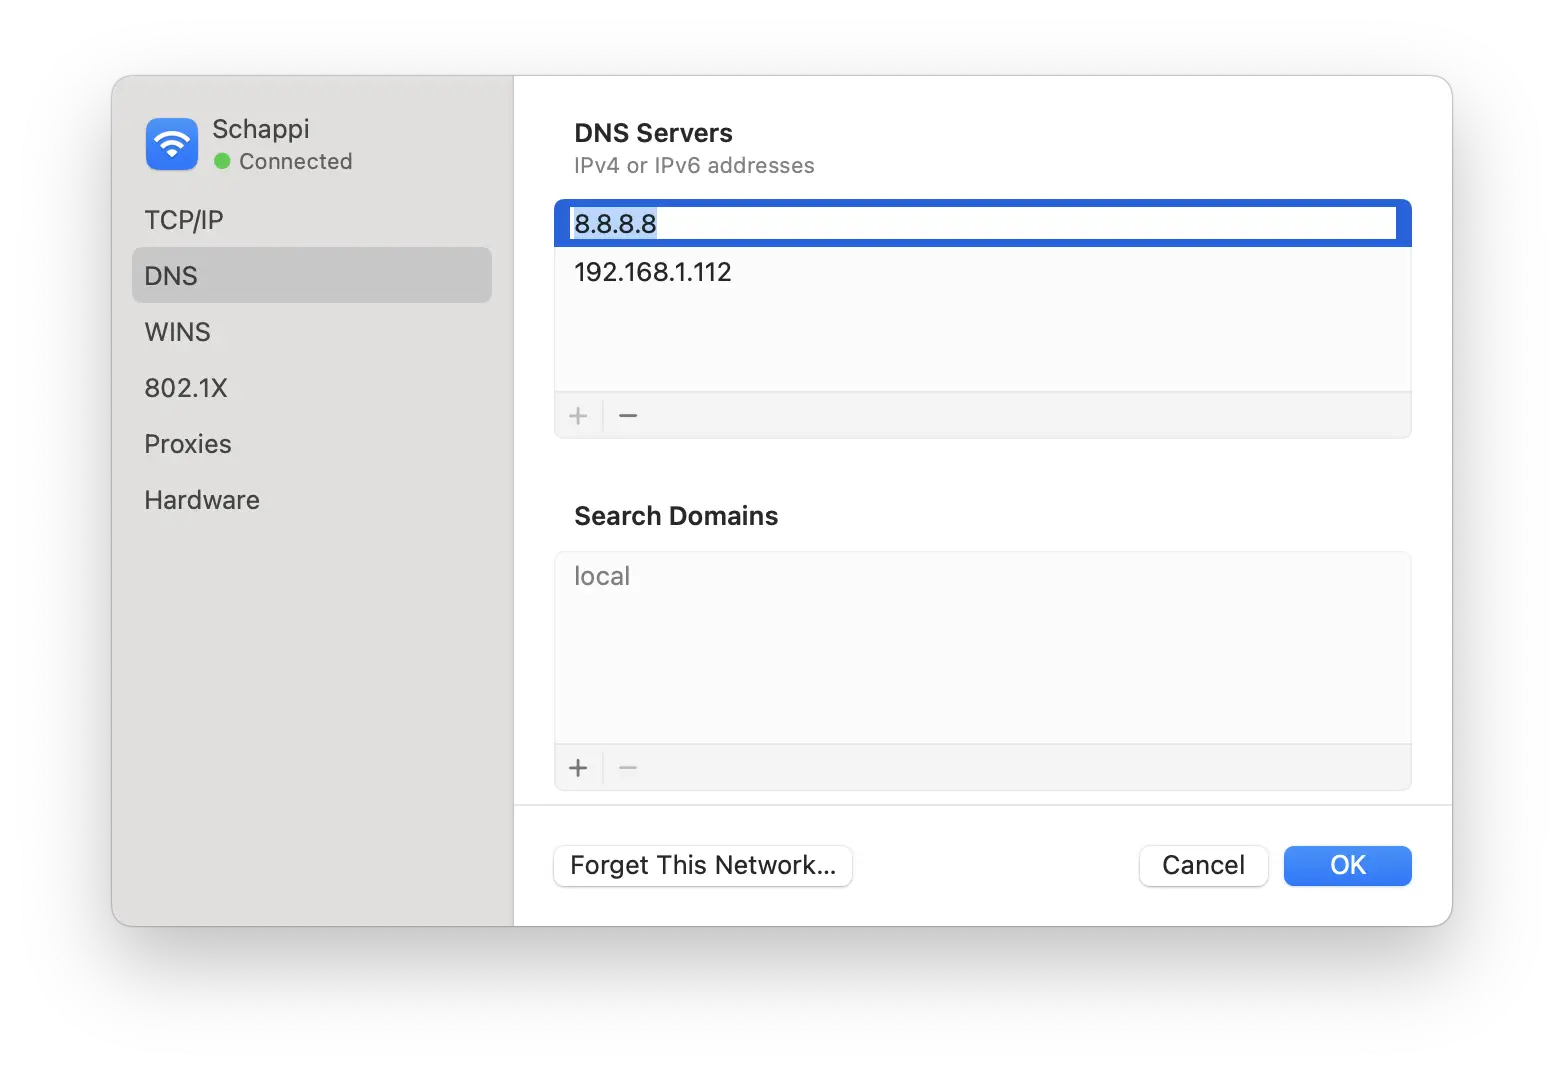
Be sure to remove any existing records by selecting them and clicking the - button under DNS Servers.
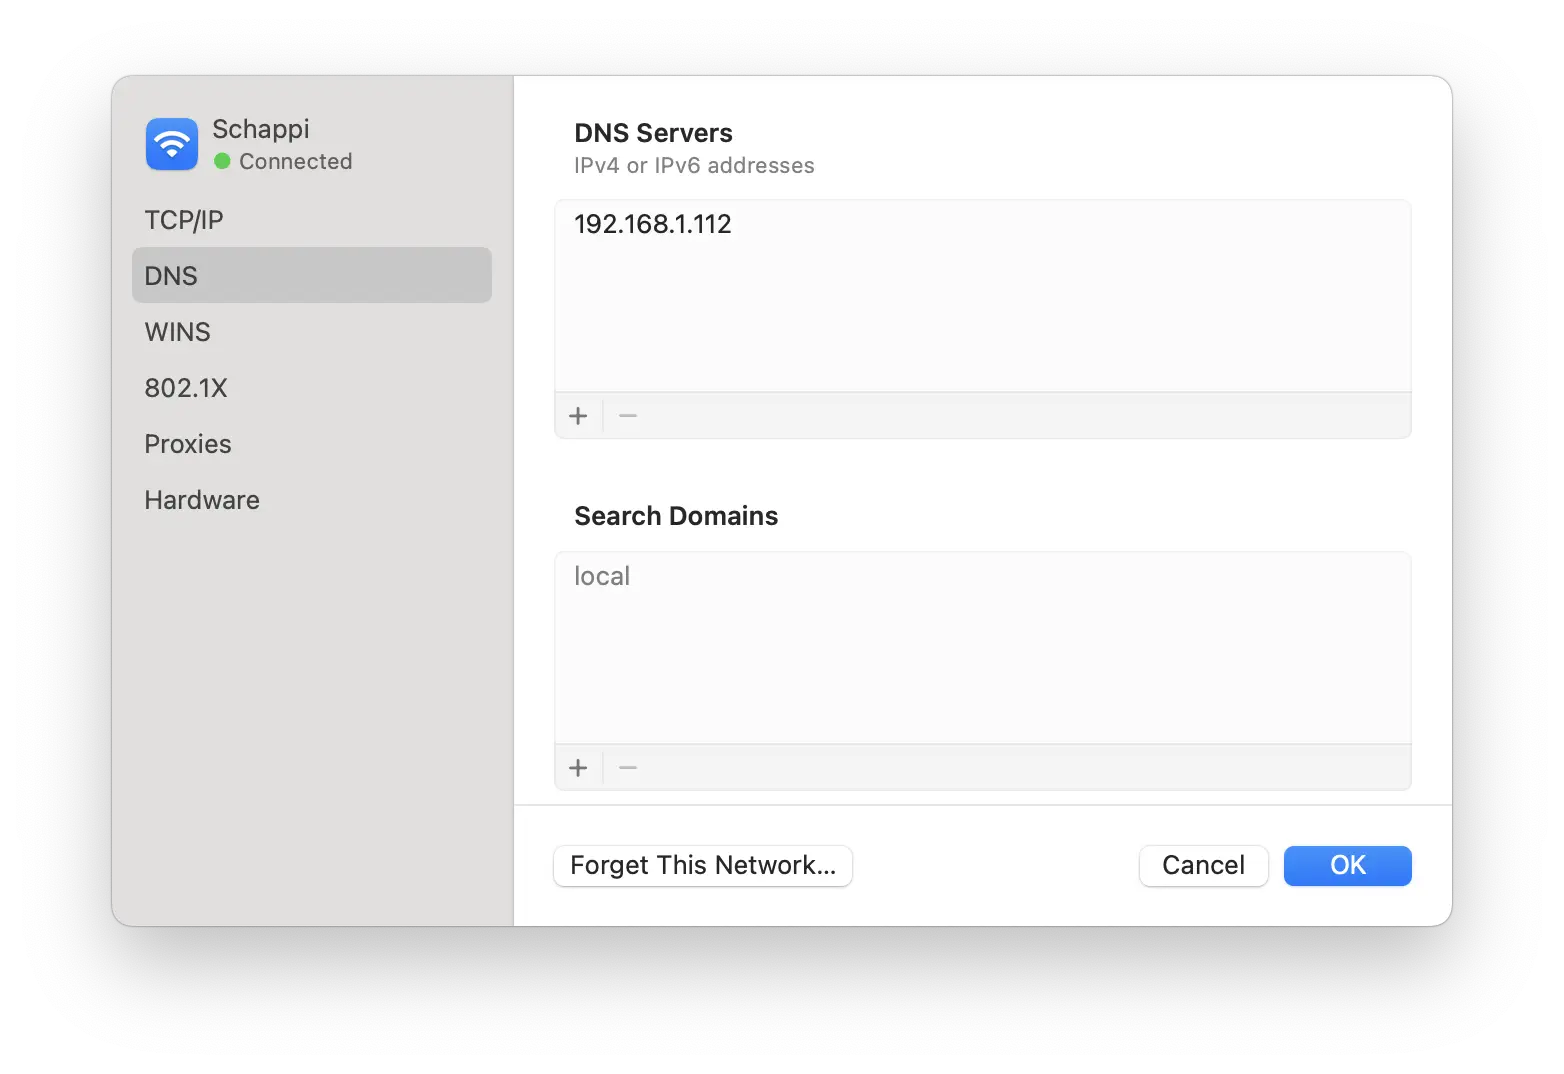
- Apply Changes:
- Click OK and then Apply to save the changes
Your Mac will now use the Pi-hole for DNS queries.
Setting Up Pi-hole DNS on Windows (IP: 192.168.1.112)
Open Network Settings:
- Right-click on the network icon in the taskbar
- Select Network & Internet settings
Access Network Properties:
- Click on your active network connection (Wi-Fi or Ethernet)
- Click View additional properties
Edit DNS Settings:
- Under "DNS server assignment," click Edit
- Switch from "Automatic (DHCP)" to Manual
- Turn on IPv4
- Enter 192.168.1.112 as the Preferred DNS
- Click Save
Verify Settings (Optional):
- Open Command Prompt as administrator
- Type
ipconfig /flushdnsand press Enter - Type
nslookup example.comto test DNS resolution
Your Windows PC will now use the Pi-hole for DNS queries.
You can also use the older Control Panel method if preferred:
- Open Control Panel → Network and Internet → Network and Sharing Center
- Click on your network connection
- Click Properties → Internet Protocol Version 4 (TCP/IPv4) → Properties
- Select "Use the following DNS server addresses" and enter 192.168.1.112
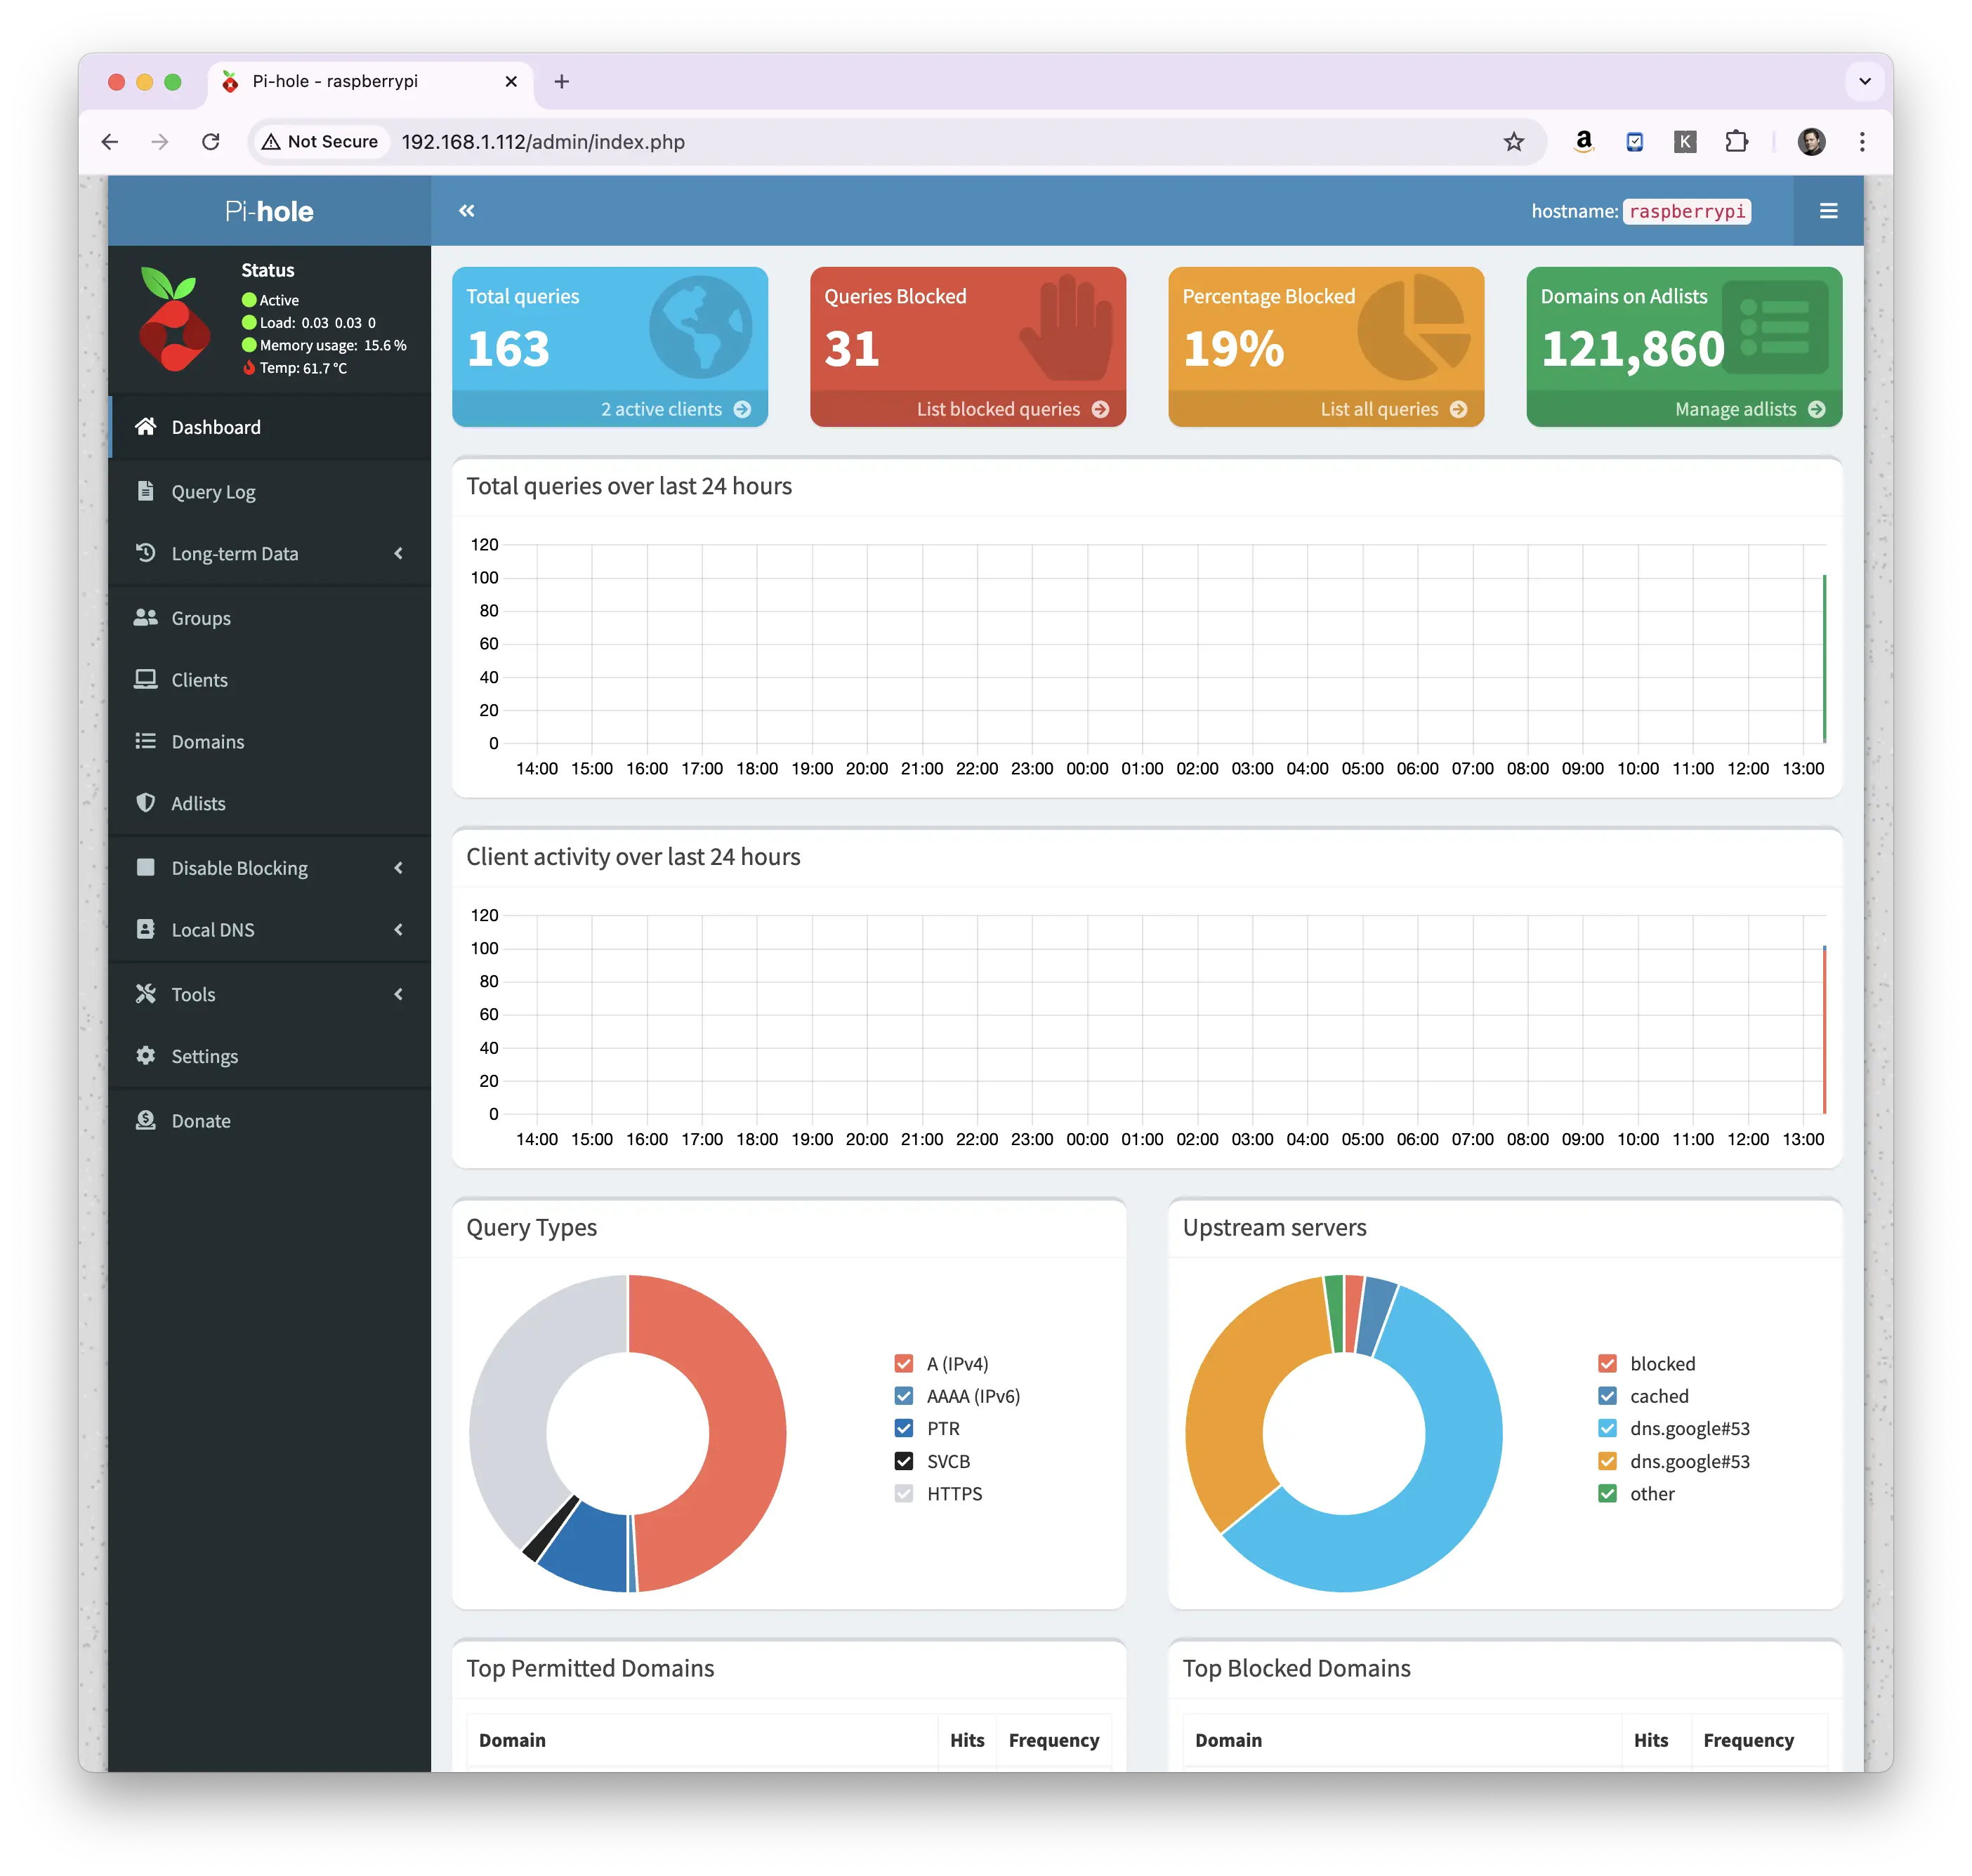
Once you've pointed your device at the Pi-hole you'll notice that the total number of queries and queries blocked will start to change.
Something here not working for you? Ask in the community — other makers and the Little Bird team read it.
