

Crack the Code · Interactive learning path
See it in 3D.
Build it step by step.
Bring your kit to life with 20 guided projects. Start with your first blinking LED, then explore sensors, sound and a working pedestrian crossing.
Explore the parts. Follow the steps. Make something happen.
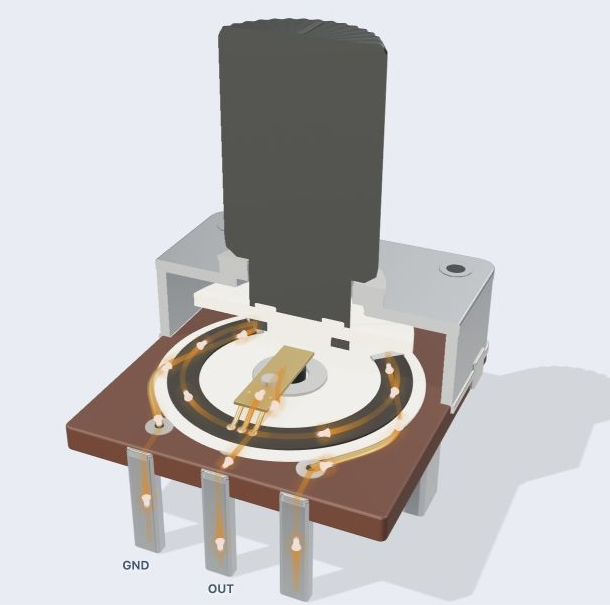
Electronics you can explore
Rotate the models, reveal their insides and watch components respond. Follow current through a knob, press a button or shine light on a sensor.
A clear next step, every time
Work through wiring, explained code and checks in order. Start with a working example, change something, then test your idea on the real kit.
Code in English. Upload in Chrome.
Use the English IDE to turn plain-English instructions into Arduino C++. Inspect the code, then Verify and Upload to your Uno from desktop Chrome.
Resources for your classroom
Pair the interactive projects with teaching documents, video tutorials and the Crack the Code curriculum. Use the learning path with students, and keep the resources below close at hand for lesson preparation.
Documentation
Video Tutorials
Introduction to the Arduino Uno and MAAS ThinkerShield
An introduction to the Arduino Uno and ThinkerShield showing the components and assembly
Connecting the Arduino
A guide to connecting the Arduino to the computer, configuring the Arduino IDE and uploading your first sketch.
Tracing the 01 Blink Sketch
An explanation of the blink sketch and an introduction to pseudocode.
Troubleshooting the Code
Troubleshooting some common problems with the Arduino sketch.
The if Statement
An introduction to variables and using if statements to include branching in your code.
Analogue Inputs
The difference between analogue and digital, using analogue inputs and the serial monitor.
Connecting the LED and Button to the Arduino
An introduction to using a breadboard to connect an LED and push button to the Arduino including a basic explanation of limiting and pull down resistors.
Connecting a Potentiometer to the Arduino
How to connect a potentiometer to the analogue inputs on an Arduino Uno.
An Introduction to Binary
An introduction to binary and how ASCII uses whole numbers to represent text.
Hardware Resources
Crack the Code Kit 2018 / 2019
SKU: LB-CTC-2018
Crack the Code V2.0 kit
SKU: LB-CTC-2-KIT
Crack the Code V2.0 kit no Arduino or Shield
SKU: LB-CTC-2-KIT-NO-ARDUINO
Crack the Code Kit 2018 - Replenishment
SKU: LB-CTCREP
Single Crack the Code Arduino with Crack the Code Shield and Case
SKU: LB-CTCSINGLE
Crack the Code Shield
SKU: LB-CTCTHINK

Ordering for your School?
We work with schools and educational institutions across Australia. Purchase orders accepted.
NSW DET Vendor ID: 100135487
