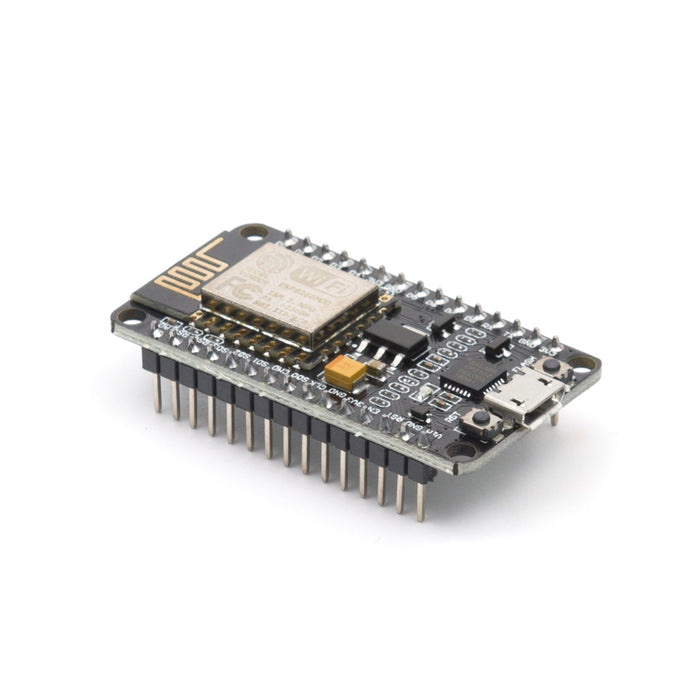
Material: Experimental Board + Mixed Alloy
Color: Black
Chip Module: CP2102
Working Temperature: -40 ℃ ~ +125 ℃
Power Input: 4.5V ~ 9V (10VMAX), USB-powered
Drive Type: Dual high-power H-bridge driver
Current: continuous transmission ≈70mA (200mA MAX)
Standby: <200uA
Size: (L)X(W)4.8X2.5cm/1.89''X0.98''(appr.)
Features:
A great set of tools to develop ESP8266.
ESP8266 has IO Pin.
ESP8266 full IO mouth leads directly download without resetting.
Open-source, interactive, programmable, low cost, simple, smart, WI-FI enabled.
Greatly speed up your IOT application developing process.
Package included:
1 x ESP8266 CP2102 Development Board
Required Drivers
Please note: This is the LUA version as such does not work out of the box with the Arduino IDE although it is possible with a firmware upgrade.
Updating the firmware on a NodeMCU board with an ESP8266 WiFi module, such as the ESP-12E, typically involves flashing new firmware onto the device. Here are the general steps to update the firmware on a NodeMCU board:
1. Install Required Software:
Before you start, you'll need to install some software tools:
-
Arduino IDE: You can download it from the official Arduino website.
-
ESP8266 Board Manager: If you haven't already, you'll need to install the ESP8266 board support for the Arduino IDE. Go to "File" > "Preferences" in Arduino IDE, and add this URL to the "Additional Boards Manager URLs" field: http://arduino.esp8266.com/stable/package_esp8266com_index.json. Then, go to "Tools" > "Board" > "Boards Manager" and install the "esp8266" package.
2. Connect Hardware:
Make sure your NodeMCU board is connected to your computer via USB and that you have the appropriate drivers installed for the CP2102 USB-to-Serial converter, which is commonly used on NodeMCU boards.
3. Select Board and Port:
Open the Arduino IDE and go to "Tools" > "Board" and select the appropriate NodeMCU board (e.g., "NodeMCU 1.0 (ESP-12E Module)"). Also, make sure you've selected the correct COM port under "Tools" > "Port."
4. Download Firmware:
You'll need to find and download the firmware you want to flash onto your NodeMCU. You can use firmware from the official ESP8266 GitHub repository (
https://github.com/esp8266/Arduino) or other sources, depending on your project's requirements.
5. Flash Firmware:
To flash the firmware, follow these steps:
- Open the firmware sketch in the Arduino IDE (it's usually a
.ino file).
- Verify that the settings in the sketch match your NodeMCU board and your project's requirements.
- Click the "Upload" button (the right-facing arrow) to flash the firmware to the NodeMCU.
6. Monitor Serial Output (Optional):
You can open the Arduino IDE's Serial Monitor to view debug output from the NodeMCU board. Set the baud rate to match the firmware's serial output settings (usually 115200 baud).
7. Verify and Test:
Once the firmware is uploaded, you can disconnect and reconnect the NodeMCU board to your computer. Your updated firmware should now be running on the device. You can test its functionality according to your project requirements.
Please note that different firmware versions and custom firmware may have specific instructions, so be sure to check the documentation provided with the firmware you're using for any additional steps or requirements.
Also, exercise caution when flashing firmware, as incorrect firmware or flashing procedures can potentially brick your device. Make sure to double-check your settings and read the documentation for the specific firmware you're using.


