0.96" 7pin 128X64 OLED Display Module White
We have ✅ 45 available of the LB-LR0085 in our Sydney warehouse.
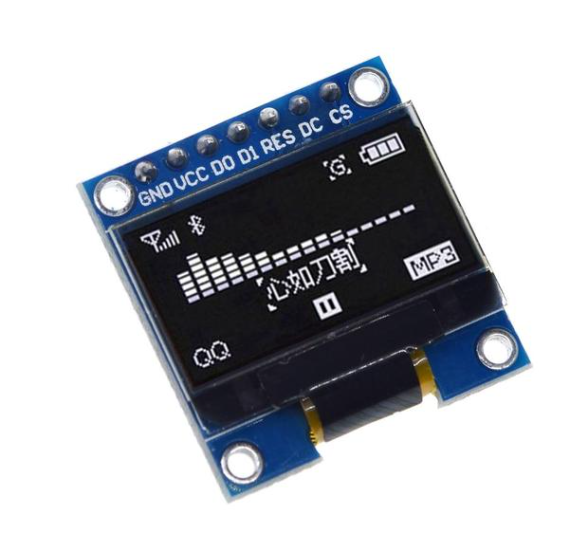
The 0.96″ 128×64 OLED Display Module delivers crisp, high-contrast visuals in a compact 27 × 27 mm package. Driven by the SSD1306 controller over I2C, it requires only two I/O pins and operates across a wide 3.3–5V range, making it compatible with Arduino, STM32, ESP32, and other popular microcontroller platforms.
With a wide viewing angle of over 160° and ultra-low 0.04W power consumption during normal operation, this display is an excellent choice for battery-powered projects, sensor readouts, status displays, and compact embedded interfaces.
Key Features
- 0.96″ OLED Display – 128×64 pixel resolution with white graphics
- SSD1306 Driver IC – Widely supported with Arduino and CircuitPython libraries
- I2C Interface – Requires only 2 I/O pins (SCL and SDA)
- 3.3–5V Compatible – Works with both 3.3V and 5V logic levels
- Ultra-Low Power – 0.04W during normal operation
- Wide Viewing Angle – Over 160°
Specifications
- Display Size: 0.96″
- Resolution: 128×64 pixels
- Colour: White
- Driver IC: SSD1306
- Interface: I2C (7-pin header, also supports SPI)
- Voltage: 3.3–5V DC
- Power Consumption: 0.04W (normal operation)
- Viewing Angle: >160°
- Working Temperature: −30 °C to +80 °C
- Dimensions: 27 × 27 × 4.1 mm
Pinout (7-Pin Header)
- GND – Ground
- VCC – Power supply (3.3V or 5V)
- D0 (SCL) – I2C clock line
- D1 (SDA) – I2C data line
- RES – Reset (connect to a digital pin)
- DC – Data/Command (not used in I2C mode)
- CS – Chip select (not used in I2C mode)
Arduino Wiring (I2C Mode)
- GND → GND
- VCC → 5V (or 3.3V)
- D0 (SCL) → A5 (Uno/Nano)
- D1 (SDA) → A4 (Uno/Nano)
- RES → D4 (or any digital pin)
Getting Started
Install the Adafruit SSD1306 and Adafruit GFX libraries via the Arduino IDE Library Manager, then use the following example to display text:
Troubleshooting
- No display – Check power and I2C wiring (SCL/SDA)
- Flickering – Add 4.7 kΩ pull-up resistors on SCL and SDA lines to VCC
- Not initialising – Verify the OLED_RESET pin matches your wiring
Ideal For
- Sensor data readouts and status displays
- Battery-powered and IoT projects
- Arduino, ESP32, and STM32 projects
- Menu interfaces and compact dashboards
Package Contents
- 1× 0.96″ 128×64 OLED Display Module (White, 7-Pin)
The 0.96" 7pin 128X64 OLED Display Module White appears in the following collections:


