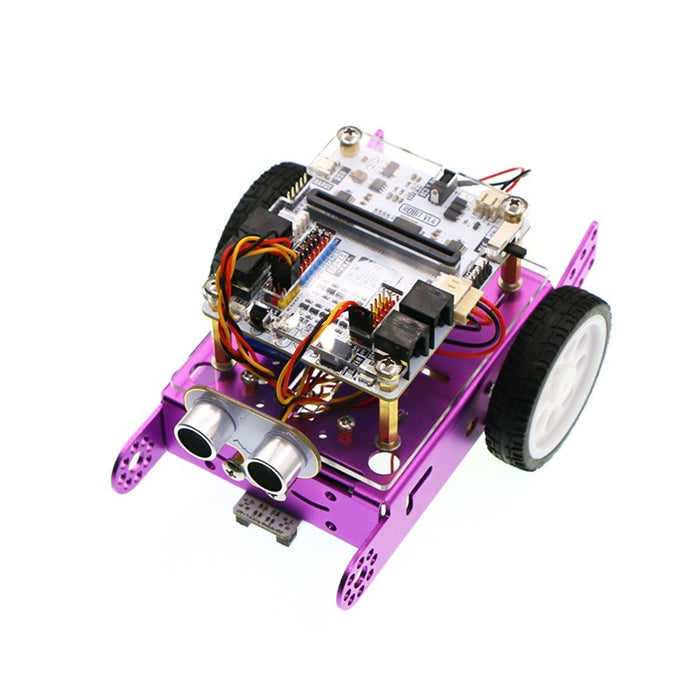
Micro:bit Robit Smart Car(without micro:bit board)
100 units available with a short lead time.
*note colour may vary
Learning about electronics and programming can be simple and fun! The Robit Smart Car is an ideal starting point for those new to electronics and programming.
This gentle introduction to robotics uses the beginner-friendly BBC Micro:bit, a tiny programmable computer used by millions of children worldwide. Getting it to move and interact is simple with block-based programming. Besides the BBC Micro:bit, it uses a Robit motherboard by ElecFreaks, compatible with both BBC Micro:bit and MBot. With the Robit motherboard, more sensors, motors, servos and other add-ons can be easily added to your robot car buddy!
Children and adults alike can learn to build a robot car while developing their logic and design skills. Experience the joys of creating with the Robit Smart Car!
More details on its characteristics can be found below.
Characteristics
Support 4 channels of DC motor and 2 channels of stepping motors.
With 8-way PWM signal output connectors.
With 8-way G-5V-S digital signal connectors(for OCTOPUS electric brick).
With 4-way G-5V-S analog signal connectors(for OCTOPUS electric brick).
DC power supply input voltage: DC 3.7V-6V.
Lithium battery power supply input voltage: DC 3.7-4.2V.
Diagram for Installment of Chassis
Step 1: Install TT motor with four M3*25 countersunk screws

Step 2: Stick the hook side of the Hook&Loop to the acrylic board(functioned as a adapter plate), and install four M4*25mm bi-pass copper cylinders.

Step 3: Install 4 M3*4+4 single-pass copper cylinders on the upper side of the aluminum chassis.

Step 4 : Install the acrylic board to the chassis with four M3*5 screws.

Step 5: Install ElecFreaks Robit to the chassis with four M3*5 single-pass copper cylinders.

Step 6: Install the Fender with M4*5 screws.

Step 7: Install the universal wheel and line-following module with 2 M4*10 countersunk screws.

Step 8: Install the wheels.

Step 9: Install 2 M4*6+6 single-pass copper cylinders on the head of the car.

Step 10: Install sonar module with 2 M4*5 screws.

Step 11: Stick the loop side of the Hook&Loop onto the battery.

Finished Products

The Micro:bit Robit Smart Car(without micro:bit board) appears in the following collections:


