ElecFreaks
iot:bit for micro:bit
IOT:bit is an expansion board based on IoT for micro:bit. It uses ESP8266 as WIFI expansion board and serial port to communicate with micro:bit. It also has ...
IOT:bit is an expansion board based on IoT for micro:bit. It uses ESP8266 as WIFI expansion board and serial port to communicate with micro:bit. It also has extended all available IO port of the micro:bit which is leaded by GVS and you can extent various 3V E-blocks as LED, photosensitive and servo by using it. At the same time, the IOT:bit with an on-board buzzer for outside sound. Let's creating your own IoT by makecode!

Features
- Intergrated ESP12F WiFi、RTC and passive buzzer module
- Extended most IO ports by GVS
- Silk-screen indication onboard main components
- Separately lead IIC interface, directly plug in OLED, BME280 and IIC,etc
- Intergrated buzzer and earphone jack
- Adaptive for LEGO (4 standard spacing Lego fixed holes)
NOTE - the Coin Cell battery for RTC is not for use in Australia
Size & Installation
- Product size:71mm x 63mm x 23mm
- PCB thickness:1.5mm
- Hole diameter:2.4mm

Parameters
Pin interface drawing
 Introduction of main module

Software support
- Coding:Makecode/Micropython/JavaScript/
Makecode block
- Coding developed by Microsoft and mainly publiced by micro:bit offical.
- https://makecode.microbit.org

JavaScript
- Click on `JavaScript` of the `makecode` for `JavaScript` coding.
- https://makecode.microbit.org

MicroPython
- Using `MU` for advanced coding method`MicroPython`
- https://codewith.mu/

Easy start
Hardware connection
- Fisrt, install CR1220 button cell for power supply to the RTC timing.
- Plug the micro:bit to the Iot:bit.
- Using single USB for power supply to expansion board and switch on.
Coding
Coding Platform
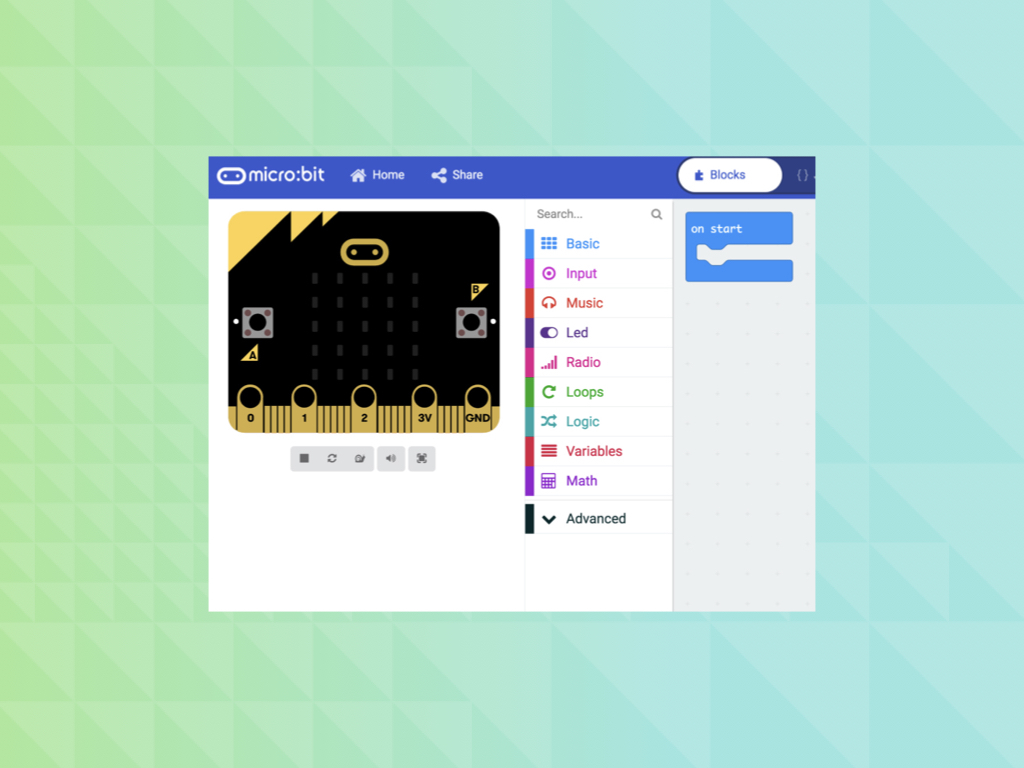
- makecode:https://makecode.microbit.org
Add codebase
- Click on "Advanced" in the MakeCode Drawer to see more code sections.

- We need to add an extension for coding to the IOT. Click on the “Extension” at bottom of coding drawer, then Search for “IOT” and click on the IOT package to add it to your project. (As below picture)

Note: If you get a warning telling you some packages will be removed because of incompatibility issues, either follow the prompts or create a new project in the Project file menu.
How to drive the buzzer
- There is on-board buzzer on the IOT:bit as below picture. Let the buzzer be connected to the PO of the micro:bit to play music by the `music` of the makecode.

- When button A be pressed in the "input", play a bit of music.

- Program link:[https://makecode.microbit.org/_4j6PCeV087AW](https://makecode.microbit.org/_4j6PCeV087AW)
How to use RTC
- There is on-board DS1307RTC timing on the IOT:bit as below picture. RTC timing need a CR1220 button cell for lasting power supply. We need the RTC timing keep accuracy in the event of a power outage.

- Press button A to set the time to the set time. On start with RTC function and the minutes be displayed on the 5*5 allay.
- Turn off the power after turning off the power for one minute, and the dot matrix display will show the number of minutes after another 1 minute.

- Program link:[https://makecode.microbit.org/_e9d3vW96bPe2](https://makecode.microbit.org/_e9d3vW96bPe2)
How to use the internet function
- The most important function of IOT:bit is WIKI. The onboard `ESP-12F`WIFI module can connect WIFI and send information. To use port for communication with the micro:bit and the pin `RX-P8`,`TX-P12` is special for IoT.
- Using thingspeak as cloud to coding and data uploding.

- On start, initialize ESP8266 to default connection with P8 & P12.
- Connect your own WiFi, input the key and the password.
- Under foever loop, connect the thinkspeak and set date to send, then pause.

- Program link:[https://makecode.microbit.org/_JAXAmmHq4FhW](https://makecode.microbit.org/_JAXAmmHq4FhW)
Download code
- Let your micro:bit be connected to one side of the USB, the other side to your computer.(Inserting on the expansion board may cause the micro:bit connection to be abnormal or damaged.)

- Then copy your documents to the micro:bit.
- Now, here is your observing time!

Jargon buster
Plain-language definitions for the technical terms used above.
- IoT
- Short for Internet of Things, meaning physical devices that connect to networks or the internet to send data or be controlled remotely. It matters if you want projects such as connected sensors, remote controls or classroom data-logging activities.
- LED
- A light-emitting diode is a small electronic component that lights up when current flows through it in the correct direction. In this kit, LEDs create the flashing effect, so polarity and correct soldering matter for the project to work.
- MicroPython
- A version of the Python programming language made to run on microcontrollers. It matters because it lets beginners write readable code to control LEDs, sensors, motors and displays without needing to start with lower-level languages.
- OLED
- OLED stands for organic light-emitting diode, a display type where each pixel produces its own light. It matters because OLED screens are thin, high-contrast and easy to read for small status displays, but they can be more sensitive to image burn-in than some other display types.
- PCB
- A printed circuit board is a rigid board with copper tracks that connect electronic parts without loose wires. For this kit, the PCBs also form the airplane shape, so they are both the circuit base and part of the finished model.
- RTC
- A Real-Time Clock keeps track of time even when the main processor is asleep or powered down, usually with a small backup battery. It matters for data logging and tracking projects that need accurate timestamps.
- servo
- A servo is a motor with built-in position control, usually told to move to a specific angle by a control signal. It matters when you need repeatable movement, such as steering, arms, flaps, or linkages, rather than continuous spinning.
Find this product in
Connectivity
Digital Technologies
Related Tutorials
Free guides on learn.littlebird.com.au