
Beginner
Use a Tilt Sensor with Arduino
Read when an object is being tilted
By Cherie Tan
A tilt sensor allows the detection of orientation, and are tiny, inexpensive and low-power components used in plenty of Arduino projects.
In this guide, we will learn to use a ball tilt sensor with the 100% Arduino compatible development board, Little Bird Uno R3, so that when the sensor is tilted, it opens the circuit. When the switch is vertical, the switch is ON.
After completing this guide, you will be able to use tilt sensors in your next projects!
Connect Pin 2 to the Tilt Switch.
The Tilt Switch isn't polarised, so you can plug it into either of the legs.
Step 1 — Connect Pin 2 to the tilt switch
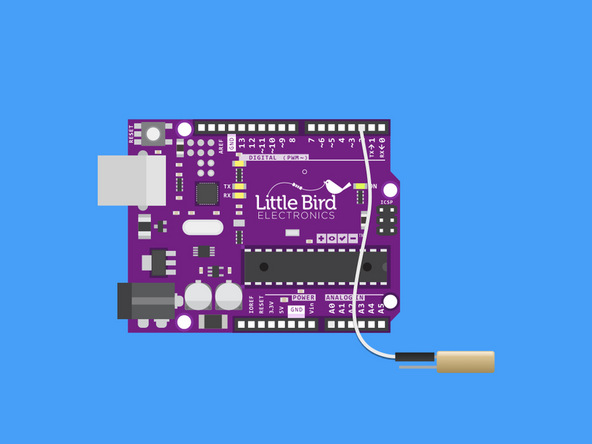
Connect Pin 2 to the Tilt Switch.
The Tilt Switch isn't polarised, so you can plug it into either of the legs.
Step 2 — Connect Ground to the tilt switch
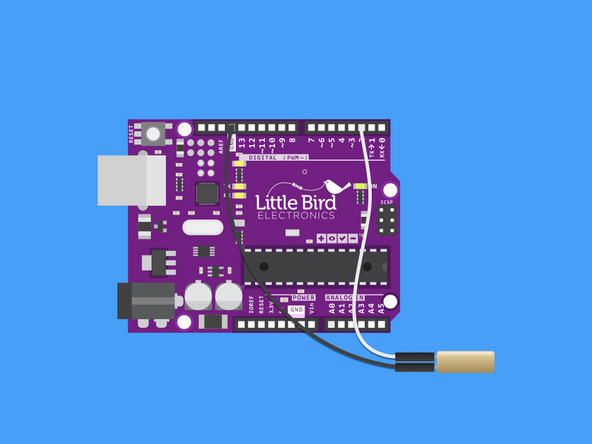
Connect the other leg of the Tilt switch to ground.
Step 3 — Upload the code
const int ledPin = 13;// we will turn the Pin 13 light on
void setup()
{
  pinMode(ledPin,OUTPUT);
  pinMode(2,INPUT);
  digitalWrite(2, HIGH);
}
/******************************************/
void loop()
{
  int digitalVal = digitalRead(2);
  if(HIGH == digitalVal)
  {
    digitalWrite(ledPin,LOW);//turn the led off
  }
  else
  {
    digitalWrite(ledPin,HIGH);//turn the led on
  }
}
Copy this code and upload it to your Arduino.
Now when you move the sensor up and down, the ball will roll and the built-in LED (on pin 13) should turn on
Step 4 — This is what your circuit should look like
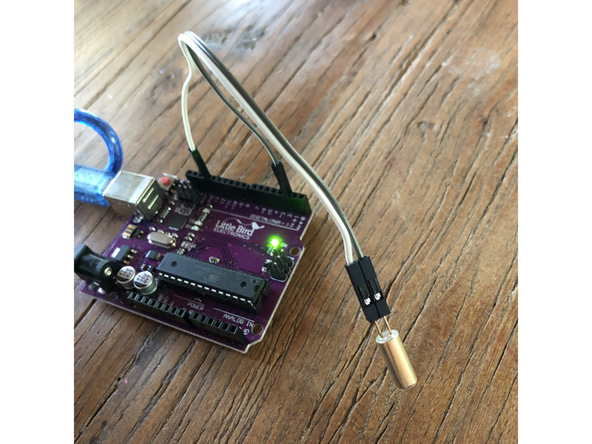
As the ball inside the tube rolls - the ball inside rolls down and touches the two contacts.
Parts List
Optional Extras (2)

Project Summary
2 parts total
Required parts
$0.00
Optional extras
+$26.65
Total (required)
$0.00
Unavailable items will be skipped
