
Beginner
Use an Arduino to Control a Relay
Learn to turn high power devices on and off
By Cherie Tan
A relay is a device that is activated by a current in one circuit to open or close another circuit.
In this guide, we will learn to use a relay to turn an LED on and off. In this guide, a Little Bird Uno R3 board, the 5V 1-Channel relay board module is used. Please see parts list for a complete list of components required.
After learning to use the 5V 1-Channel relay component, you can use it to turn off lamps, fans, and other appliances up to 250 VAC.
Connect an Arduino Ground Pin to the Ground Pin of your relay.
Step 1 — Connect Relay to ground
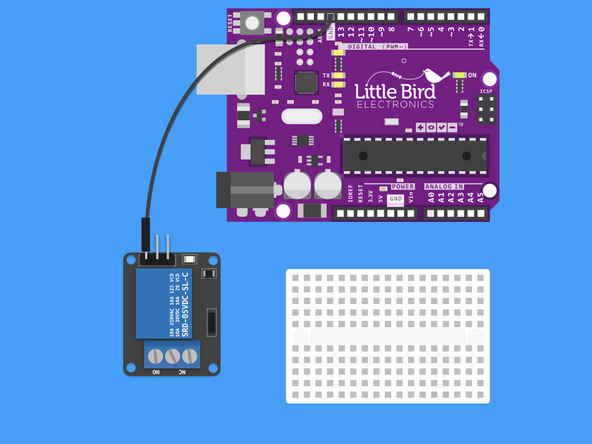
Connect an Arduino Ground Pin to the Ground Pin of your relay.
Step 2 — Connect Relay to 5V
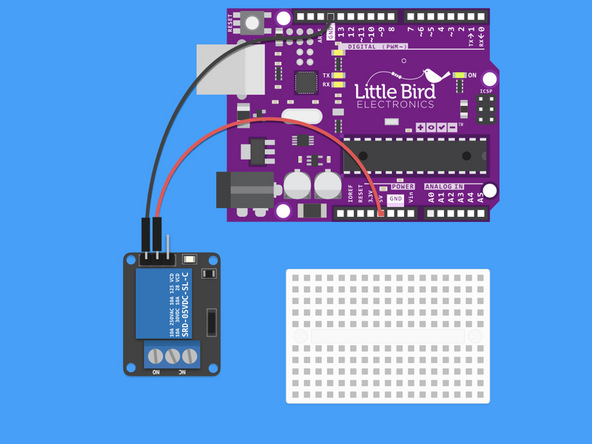
Connect the Arduino 5V pin to the Relay's middle pin.
Step 3 — Connect Pin 13 to the Relay
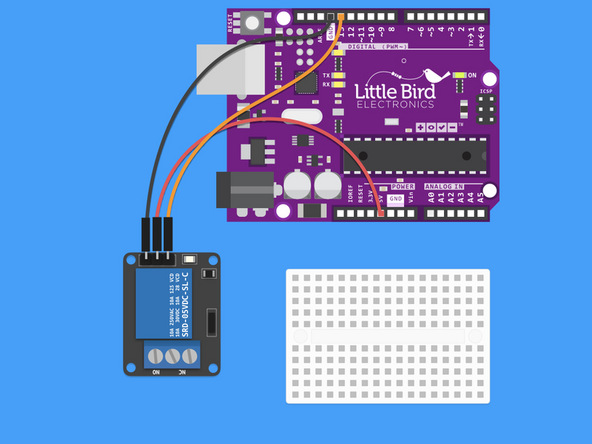
Connect Pin 13 to the Relay's Signal pin.
Step 4 — Insert LED into Breadboard

Insert the LED into the bread board so that the Cathode (shorter pin) is on the left hand side.
Step 5 — Insert 200 Ohm Resistor into the breadboard
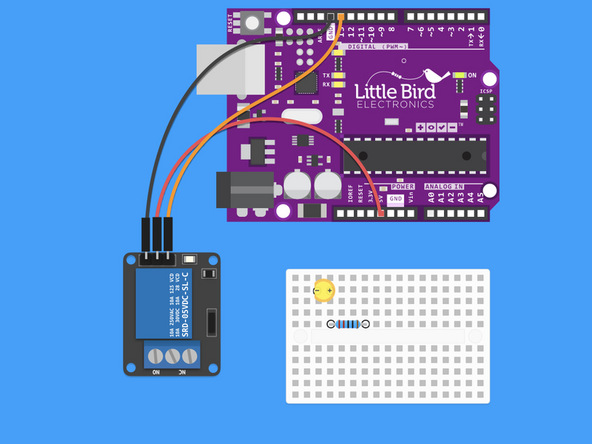
Insert a 220 Ohm Relay so that one pin is in line with the LED's Anode (longer leg)
The 220 Ohm Relay has the bands: Red, Red, Black, Black, Brown.
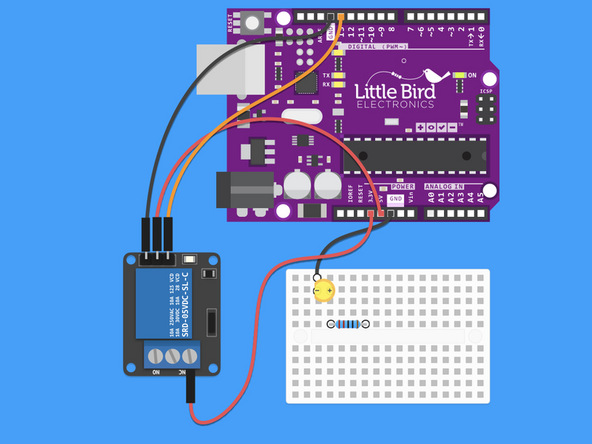
Step 6 — Connect LED to Ground
Connect the Cathode to a Ground pin on the Arduino.
The Cathode is the negative (shorter) leg of the LED.
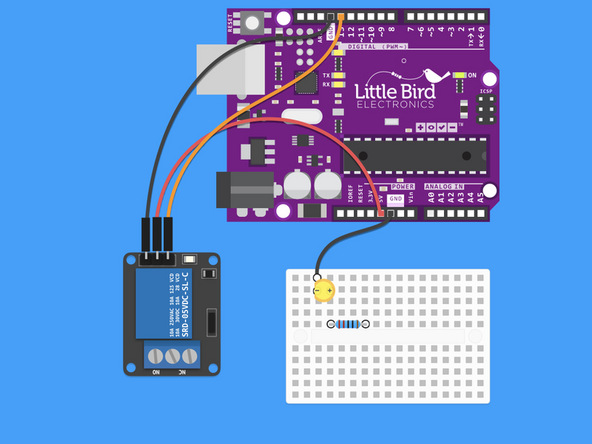
Step 7 — Connect the 3.3V Arduino Pin to the Relay
Connect the 3.3V Arduino Pin to the Relay.
The 3.3V jumper should go to the NC side of the screw socket.
Step 8 — Connect the Relay to the Resistor

Connect COM on the relay to the other side of the resistor.
Step 9 — Upload the code for your Relay
int relay = 13; // Plug the relay into Digital Pin 13

void setup() {
  pinMode(relay, OUTPUT);
}

void loop() {
  digitalWrite(relay, HIGH); // Turn the relay on
  delay(1000); // Wait 1 second
  digitalWrite(relay, LOW); // Turn the relay Off
  delay(1000); // Wait 1 second
}
Grab the code and upload it to your board.
You should start to hear the click, click of the relay switching on and off. There is also a red light on the module to tell you when it switches.
The Relay can be use to control up to 250VAC but we DO NOT recommend you play with this sort of voltage / current unless you are an electrician!
Step 10 — In action!
This is what a working relay looks (and sounds) like!
Parts List
Optional Extras (2)

Project Summary
2 parts total
Required parts
$0.00
Optional extras
+$24.25
Total (required)
$0.00
Unavailable items will be skipped
