Thermal Imaging Camera with Raspberry Pi
Build a handheld thermal imaging camera using an IR sensor array and a Raspberry Pi with display.
Overview
This project combines a thermal imaging sensor with a Raspberry Pi to create a portable thermal camera. Visualize heat signatures in real-time with a colour-mapped display.
What You Will Learn
- Working with thermal (LWIR) sensor arrays
- Processing and interpolating thermal image data
- Creating real-time colour-mapped visualizations with Python
- Building a complete embedded device
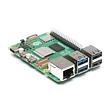
Step 1: Connect the Sensor
The IR thermal imaging module connects via I2C to the Raspberry Pi. Wire SDA, SCL, 3.3V and GND. The MLX90640 sensor provides an 80x62 pixel thermal array.
Step 2: Install Dependencies
- Install the adafruit-circuitpython-mlx90640 library
- Install numpy and pygame for visualization
- Enable I2C and set the baud rate to 1MHz for faster frame rates
Step 3: Build the Viewer
Write a Python script that reads the 80x62 thermal array, interpolates it to a higher resolution, applies a colour map (e.g. ironbow), and displays it on screen. Add temperature readout at the cursor position.
Step 4: Optional Enhancements
Add image capture (save thermal snapshots), temperature logging, or even a 3D-printed enclosure to make it truly portable.
Parts List
Required Parts (3)

Default Title
80x62 resolution
x1
$125.65
In stock
Optional Extras (2)

Alternative higher-res sensor
Optional$166.10

Portable display for the Pi
Optional$307.95
Project Summary
5 parts total
Unavailable items will be skipped
