
Beginner
Temperature Sensing with ShakeUp
Log temperature data into a Google sheet with ShakeUp
By Cherie Tan
Did you know that your ShakeUp has an in-built temperature sensor?
In this guide, we'll show you how to get started with data logging using the Arduino IDE and Google Sheets.
Complete this guide to start logging temperature data with your ShakeUp!
You will need the Arduino IDE downloaded and installed on your computer. Already got the Arduino IDE installed and set up for the ShakeUp? Move on to the next step! If not, please follow our guide on how to set up the Arduino IDE for ShakeUp.
Step 1 — Arduino IDE

You will need the Arduino IDE downloaded and installed on your computer. Already got the Arduino IDE installed and set up for the ShakeUp? Move on to the next step! If not, please follow our guide on how to set up the Arduino IDE for ShakeUp.
Step 2 — Example sketch
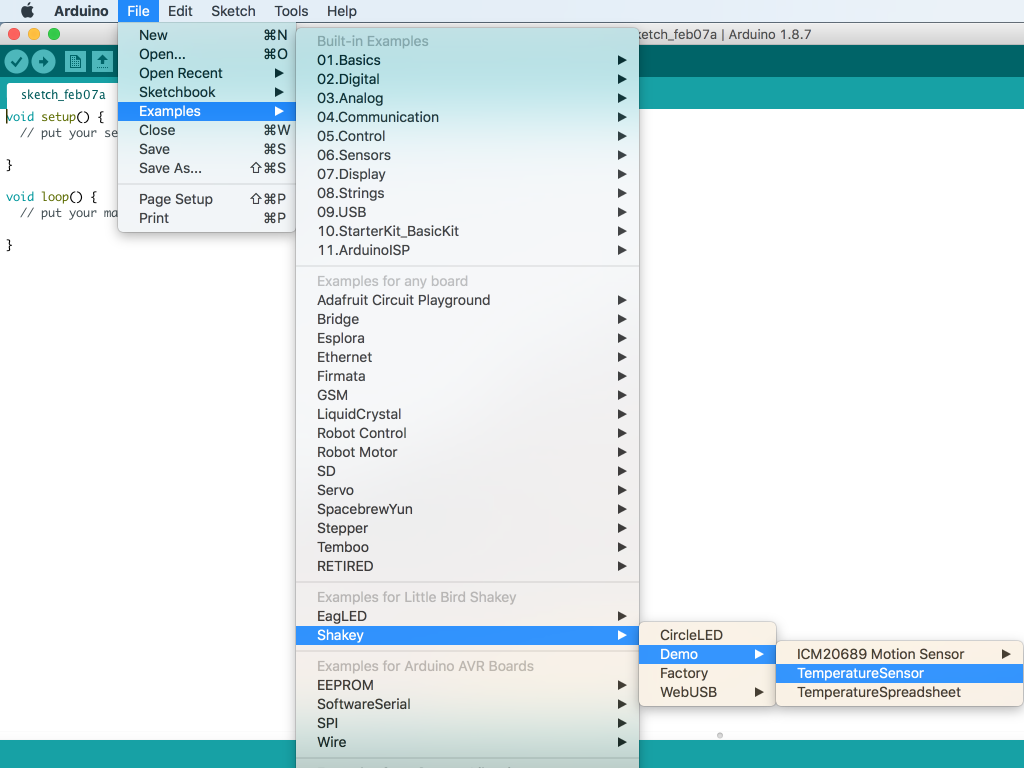
Open up the example sketch for the temperature sensor by clicking on:File > Examples > Shakey > Demo > TemperatureSensor
Step 3 — Serial Monitor
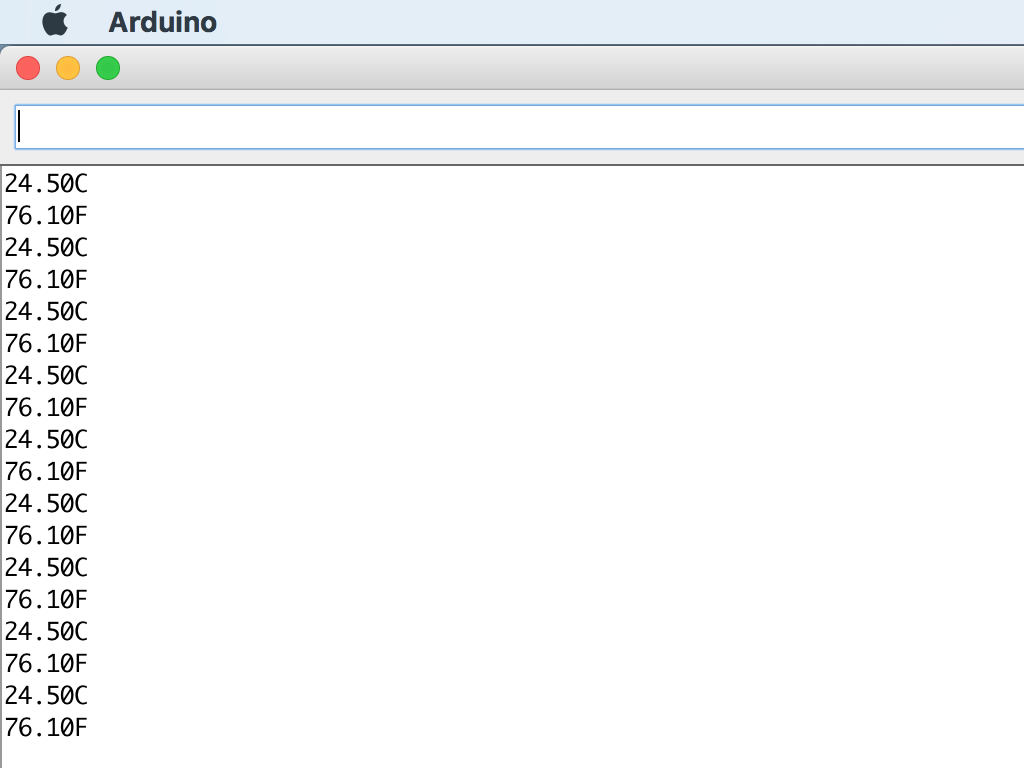
Click on Tools > Serial Monitor
If it's successfully working, you should see the temperature being printed (in degrees Celsius and degrees Fahrenheit) to the serial monitor.
Step 4 — TemperatureSpreadsheet example
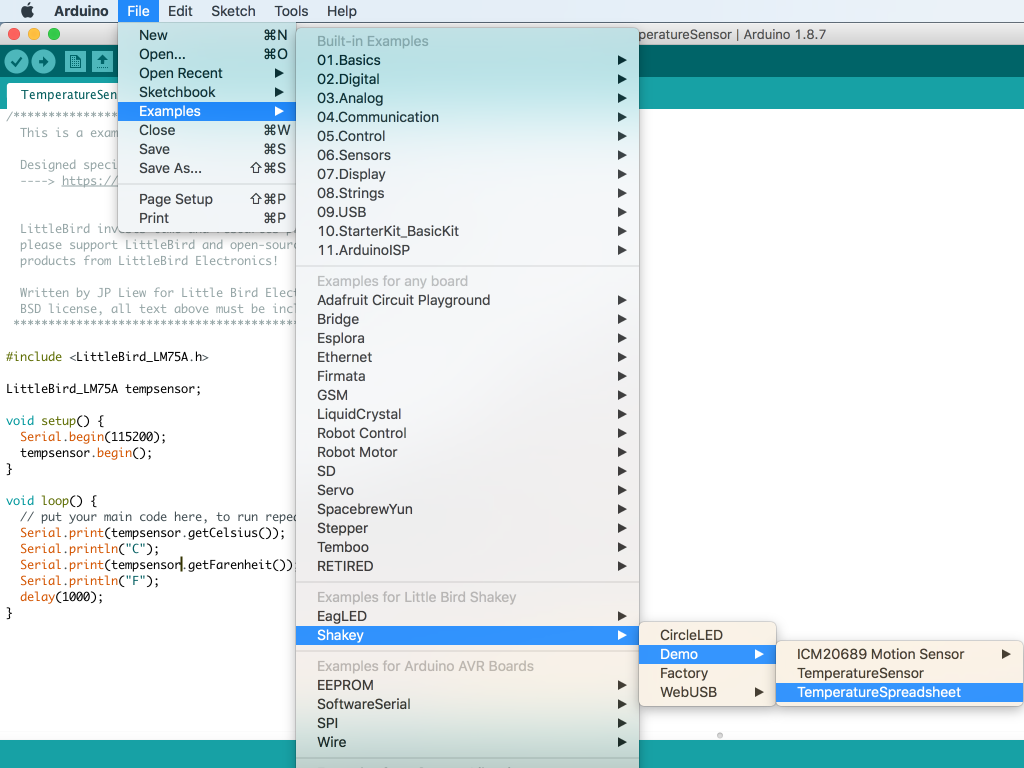
In the previous sketch, the temperature was printed every 1 second. To start data logging, we need to go beyond printing it to the serial monitor. Go ahead and open up the next sketch by clicking on: File > Examples > Shakey > Demo > TemperatureSpreadsheet
Upload this sketch to the ShakeUp by clicking on the 'Upload' button on the top left-hand corner in Arduino IDE.
Step 5 — Create google sheet
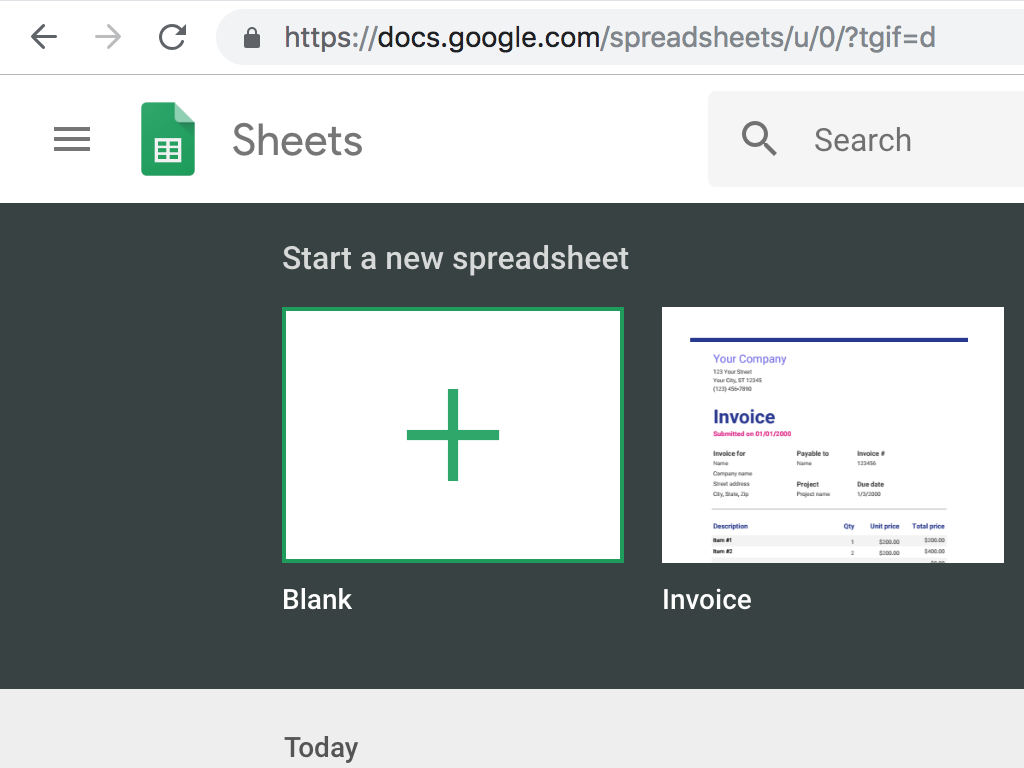
Now head to Google Sheets and click on 'Blank' to create a new Google Sheet.
Step 6 — Connect alligator clip to Earth and Space
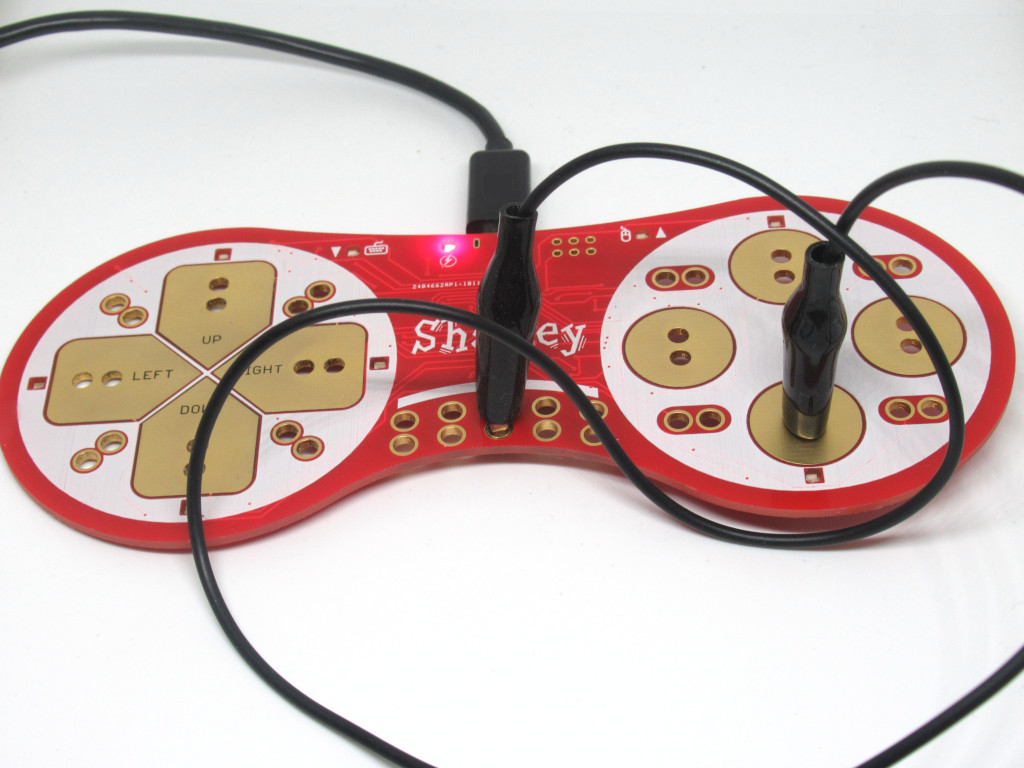
Connect an alligator clip from 'Earth' to 'Space' on the ShakeUp.
Step 7 — Watch the temperature log
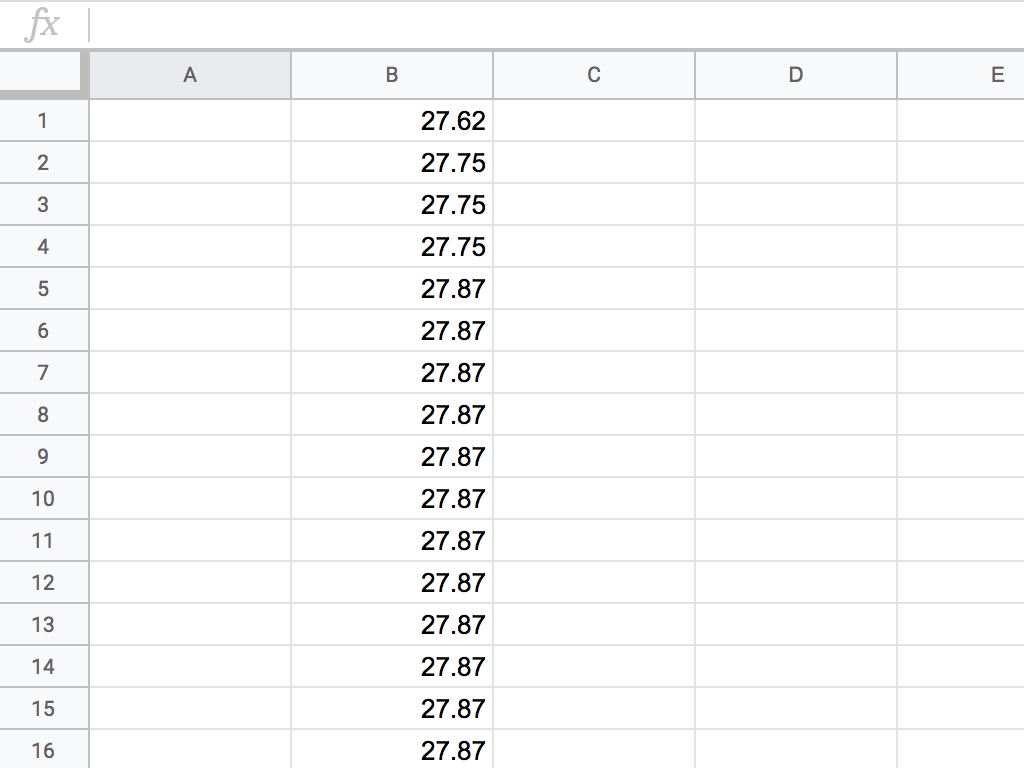
Once you've got the spreadsheet open and the code uploaded to the ShakeUp, you'll notice that the temperature will be logged automatically into the Google sheet. Nice work!
