RGB LED Light Show with Pico
Create a dazzling programmable LED strip light show controlled by a Raspberry Pi Pico.
Overview
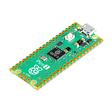
Use a Raspberry Pi Pico to control an RGB LED strip and create custom lighting animations. This is a great first project for learning about microcontrollers and addressable LEDs.
What You Will Learn
- Programming a Raspberry Pi Pico with MicroPython
- Controlling WS2812B (NeoPixel) LED strips
- Creating animation patterns and colour effects
Step 1: Wire It Up
Connect the LED strip data pin to GPIO pin 0 on the Pico. Connect the strip power to VBUS (5V) and ground to GND. For longer strips, use an external 5V power supply.
Step 2: Flash MicroPython
Download the MicroPython UF2 firmware for the Pico. Hold BOOTSEL while plugging in via USB, then drag the UF2 file to the drive that appears.
Step 3: Code Your Animations
Using Thonny IDE, write MicroPython scripts to create rainbow cycles, colour chases, breathing effects, and more. The neopixel module is built into MicroPython.
Parts List
Required Parts (3)


Optional Extras (1)

Project Summary
4 parts total
Unavailable items will be skipped
