
Beginner
Get Started With the DHT11 Humidity and Temperature Sensor
Read the temperature and humidity with DHT11 and Arduino
By Cherie Tan
Sometimes, you will want to be able to read both the temperature and humidity in your surroundings.
Doing so will enable you to progress onto working on further projects such as a greenhouse control device or a DIY weather station.
Insert the DHT11 Into the Breadboard
Step 1 — Insert the DHT11 Into the Breadboard
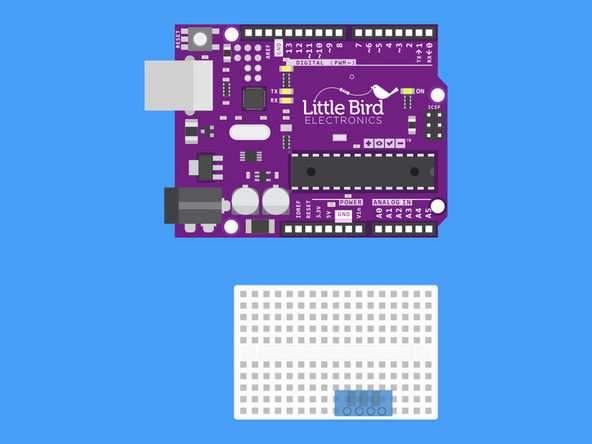
Insert the DHT11 Into the Breadboard
Step 2 — Bridge DHT11 Pin 1 and Pin 2 with a 10K Resistor
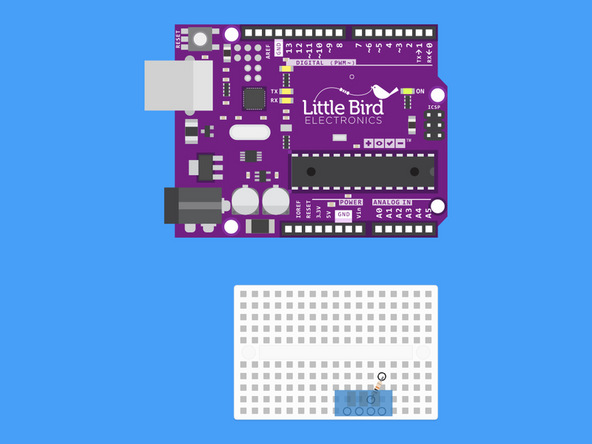
Bridge DHT11 Pin 1 and Pin 2 with a 10K Resistor.
This resistor will pull up the signal line.
Step 3 — Connect Ground to the DHT11
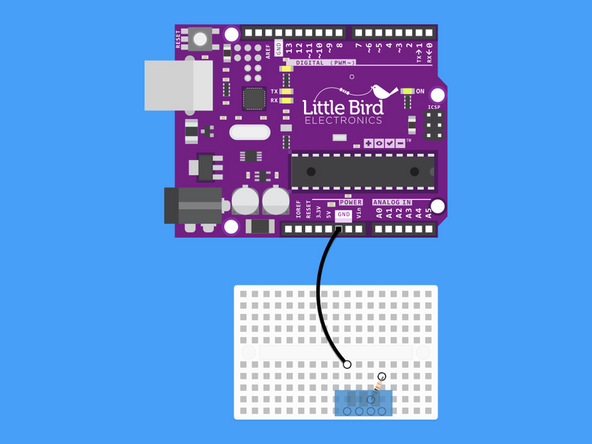
Connect Ground to the DHT11
Step 4 — Connect 5V to the DHT11
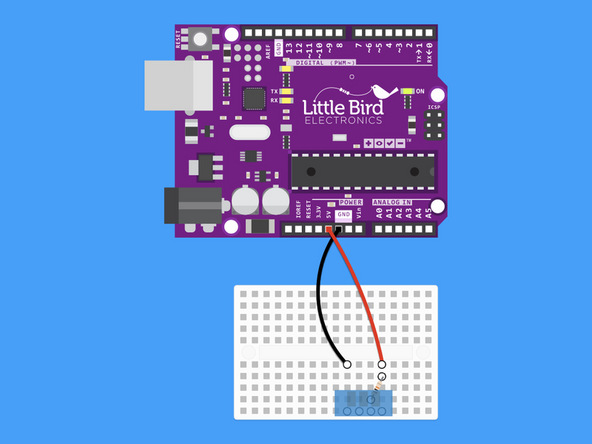
Connect 5V to the DHT11
Step 5 — Connect the DHT11 to Digital Pin 2
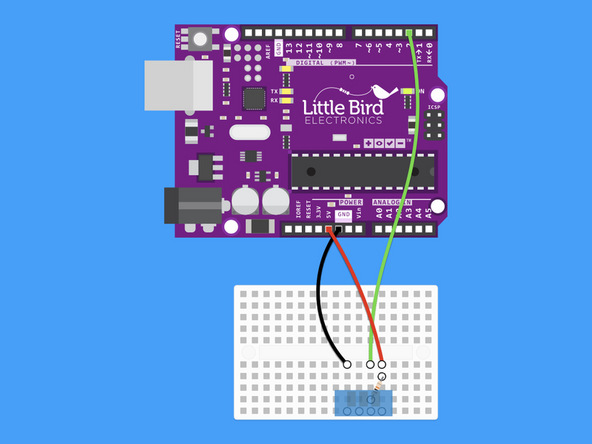
Connect the DHT11 to Digital Pin 2
Step 6 — Install the SimpleDHT Library
Install the SimpleDHT Library.
Step 7 — Upload the code
#include <SimpleDHT.h>

// for DHT11,
//      VCC: 5V or 3V
//      GND: GND
//      DATA: 2
int pinDHT11 = 2;
SimpleDHT11 dht11;

void setup() {
  Serial.begin(9600);
}

void loop() {
  // start working...
  Serial.println("=================================");
  Serial.println("Sample DHT11...");

  // read without samples.
  byte temperature = 0;
  byte humidity = 0;
  int err = SimpleDHTErrSuccess;
  if ((err = dht11.read(pinDHT11, &temperature, &humidity, NULL)) != SimpleDHTErrSuccess) {
    Serial.print("Read DHT11 failed, err="); Serial.println(err);delay(1000);
    return;
  }

  Serial.print("Sample OK: ");
  Serial.print((int)temperature); Serial.print(" *C, ");
  Serial.print((int)humidity); Serial.println(" H");

  // DHT11 sampling rate is 1HZ.
  delay(1500);
}
Upload this code to your Arduino
Step 8 — Open the Serial Port
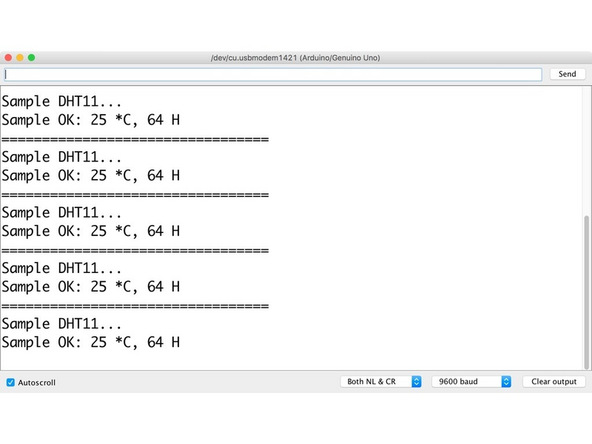
Open your Serial Port and look at the Temperature and Humidity!
Be sure to be using a Baud rate of 9600.
Breath on your Sensor and look at what happens!
Parts List
Optional Extras (1)

Project Summary
1 part total
Required parts
$0.00
Optional extras
+$5.05
Total (required)
$0.00
Unavailable items will be skipped
