
Beginner
Using the Built-in Sensors on micro:bit
Learn to use the built-in light sensor, temperature sensor, accelerometer & compass on the micro:bit
By Cherie Tan
The micro:bit has a number of built-in sensors which include an ambient light sensor, a temperature sensor, an accelerometer, and a compass.
In this guide, you will learn the basics on how to use these sensors with the MakeCode editor.
In this guide, you will learn the basics on how to use these sensors with the MakeCode editor.
Complete this guide to get started with using these sensors.
Ambient light sensor: The micro:bit's 5x5 LED matrix display can also be used as a light sensor!
Temperature sensor: The temperature sensor on the micro:bit will provide a rough estimate of how hot or cold the surroundings are, as it actually measures the temperature of its processor.
The accelerometer measures acceleration along three axises which are x and y axes (the horizontal planes), and the z axis (the vertical plane). The acceleration values are in mG (milliG). 1000mG = 1G.
The on-board compass is based on the NXP/Freescale MAG3110, which is a three-axis magnetometer sensor that can be accessed via the I2C bus. The compass can also act as a metal detector!
For more information on the micro:bit and its features, check out 'Meet the micro:bit'.
Step 1 — The sensors
Ambient light sensor: The micro:bit's 5x5 LED matrix display can also be used as a light sensor!
Temperature sensor: The temperature sensor on the micro:bit will provide a rough estimate of how hot or cold the surroundings are, as it actually measures the temperature of its processor.
The accelerometer measures acceleration along three axises which are x and y axes (the horizontal planes), and the z axis (the vertical plane). The acceleration values are in mG (milliG). 1000mG = 1G.
The on-board compass is based on the NXP/Freescale MAG3110, which is a three-axis magnetometer sensor that can be accessed via the I2C bus. The compass can also act as a metal detector!
For more information on the micro:bit and its features, check out 'Meet the micro:bit'.
Step 2 — Using the light level block
Let's first take a look at how you can program the light sensor on the micro:bit. Open the MakeCode editor.
Click on 'New Project'
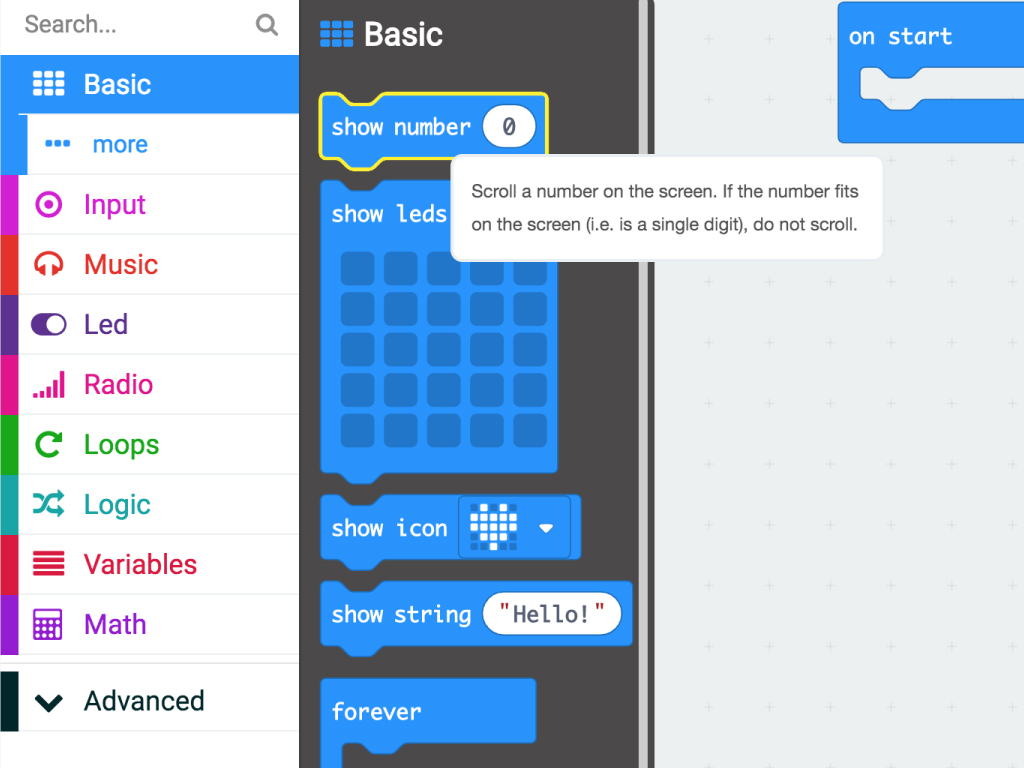
Click on the 'Basic' tab and grab a 'show number ...' block.
Next, click on the 'Input' tab. This is where you'll find the 'light level' block which we'll use in this example.
Step 3 — MakeCode for light sensor
basic.forever(function () {
    basic.showNumber(input.lightLevel())
    basic.pause(100)
})
We've placed the 'light level' block within 'show number ...' and added a 'pause (ms) 100' block underneath it. Since they are placed in the 'forever' block, it will repeatedly measure the light level as long as the micro:bit is powered on.
By using the 'light level' block, you can measure how bright or dark the surroundings are. The 'light level' block will produce a value from 0 to 255, where 0 means darkness and 255 will mean bright light. How is this done? The micro:bit measures the light around it by using some of the LEDs on the LED matrix display.
Jump to the final step of this guide to upload the code to the micro:bit, and test it out.
When using it for the first time, this 'light level' block will produce a value of 0. Afterwards, it will produce the real light level. This is because the light sensor has to be turned on first.
Step 4 — Using the temperature sensor
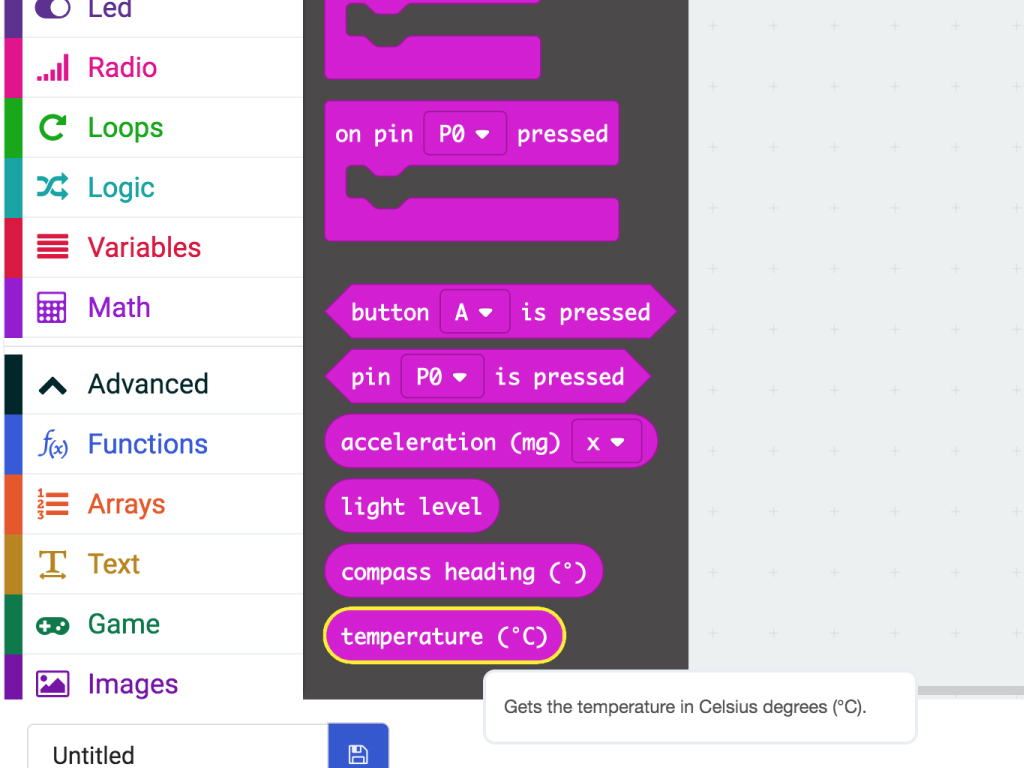
Programming the temperature sensor on the micro:bit is simple. Click on the 'Input' tab and drag and drop a 'temperature (°C)' block into the editor.
Use another 'show number ...' block and attach it to it.
Step 5 — MakeCode for temperature sensor
basic.forever(function () {
    basic.showNumber(input.temperature())
    basic.pause(100)
})
Copy and paste this code into the Javascript interface.
The micro:bit measures the temperature by checking how hot its computer chip is. Therefore, this is an estimate and not a precise measurement of the temperature in your surroundings. Again, you can jump to the final step of this guide for instructions on how to upload the code to the micro:bit!
Step 6 — Using the accelerometer
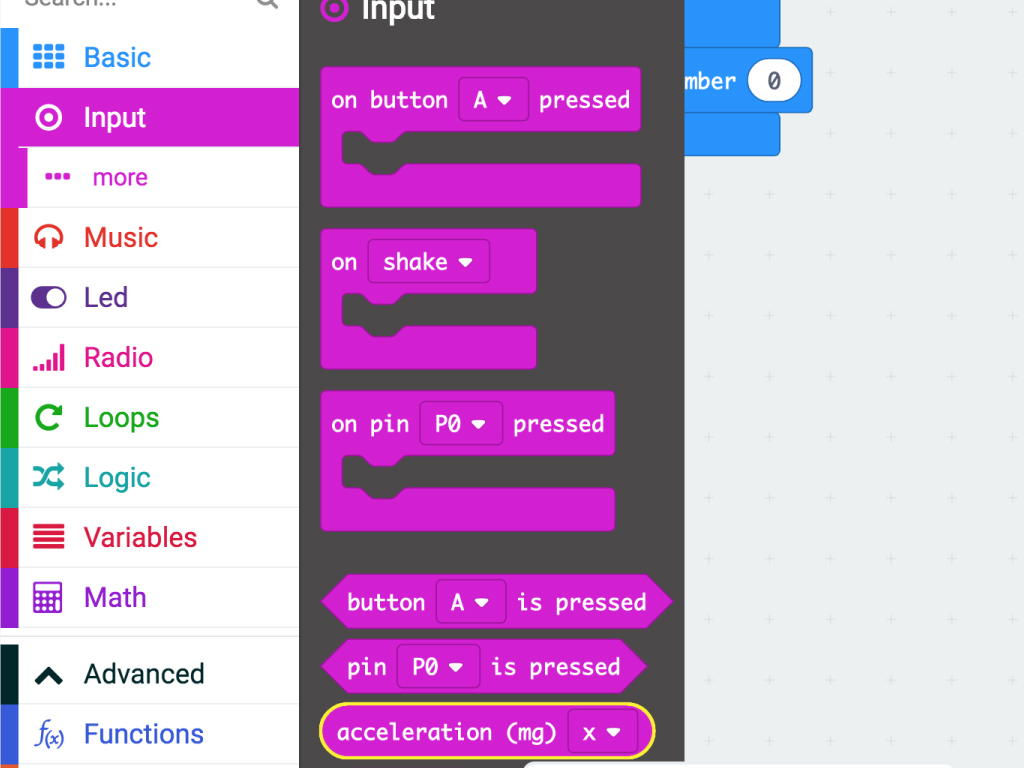
What is acceleration? Acceleration is the rate of change in velocity, that is to say, it is a fancy word for things speeding up! The micro:bit's built-in accelerometer can be accessed in MakeCode by using the 'acceleration (mg) ...' block.
We can measure the acceleration along the x-axis, y-axis, z-axis, or the resulting strength of acceleration from all three directions. In this example, select 'strength' on the 'acceleration (mg) ...' block.
Step 7 — MakeCode for accelerometer
basic.forever(function () {
    basic.showNumber(input.acceleration(Dimension.Strength))
    basic.pause(100)
})
The equivalent code in MakeCode Blocks can be seen by clicking on the 'Blocks' button in the MakeCode editor
Copy and paste this code into the Javascript interface, replacing the existing code.
Go ahead and jump to the final step for instructions on uploading this code to the micro:bit and test it out.
Step 8 — Using the compass
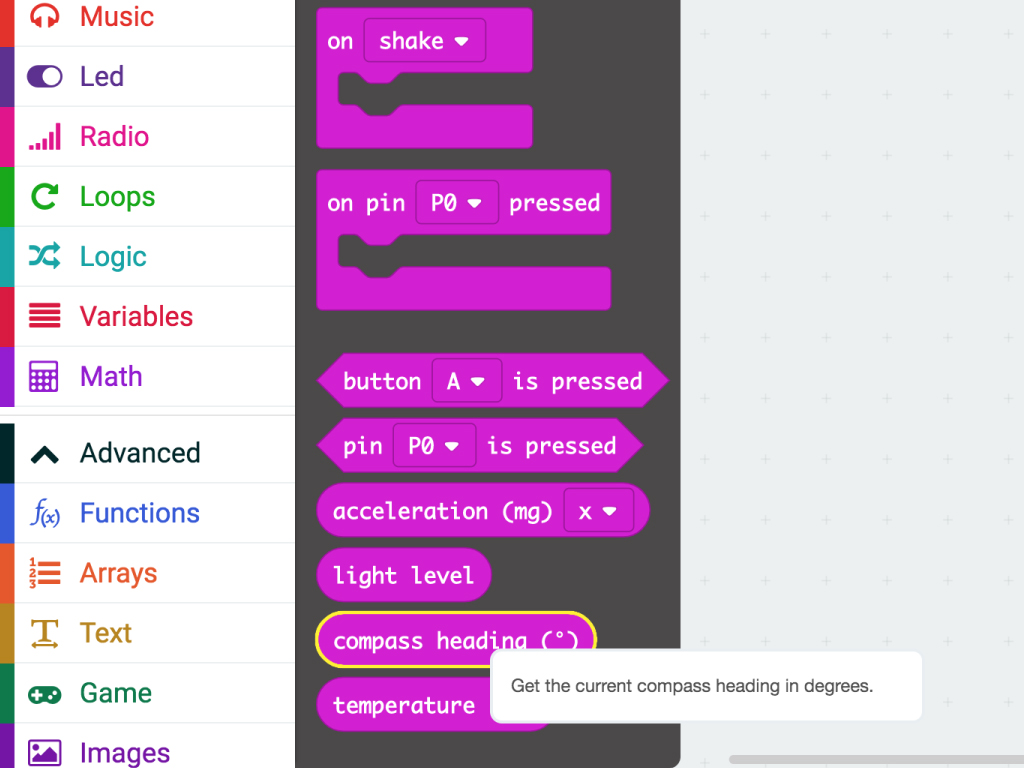
The 'compass heading' block produces a value from 0 to 359 degrees with its magnetometer chip. Different numbers mean north, east, south, and west.
Step 9 — MakeCode for compass
let degrees = 0
basic.forever(function () {
    degrees = input.compassHeading()
    if (degrees < 45) {
        basic.showArrow(ArrowNames.North)
    } else if (degrees < 135) {
        basic.showArrow(ArrowNames.East)
    } else if (degrees < 225) {
        basic.showArrow(ArrowNames.South)
    } else if (degrees < 315) {
        basic.showArrow(ArrowNames.West)
    } else {
        basic.showArrow(ArrowNames.North)
    }
})
Find which direction on a compass the micro:bit is facing with the following code. Copy and paste this into the Javascript interface.
Alternatively, if you prefer to use the Blocks interface:
First, create a variable called 'degrees' and set it as 'compass heading ()'.
First, create a variable called 'degrees' and set it as 'compass heading ()'.
Then create conditional statements to determine whether it is facing north, east, south, or west. If it meets the condition, it will show an arrow pointing to the north, east, south, or west.
If degrees < 45, show arrow North
else if degrees < 135, show arrow East
else if degrees < 225 then show arrow South
else if degrees < 315 then show arrow West
else show arrow North
If degrees < 45, show arrow North
else if degrees < 135, show arrow East
else if degrees < 225 then show arrow South
else if degrees < 315 then show arrow West
else show arrow North
Step 10 — Upload to micro:bit

Click the download button in the bottom left corner of the screen. This will download a hex file (computer program file) which the micro:bit can read
Next, plug in your micro:bit, this will reveal a USB on your computer
Lastly copy across the downloaded file to the micro:bit by dragging and dropping it into the MICRO:BIT drive
The micro:bit will flash as the code is being uploaded. Once done, unplug the micro:bit.
