Little Bird Quadcopter
Materials List

Quadcopter:
- Quadcopter Body
- Main Flight Controller
- Motors:
- 2 with RED and BLUE cable
- 2 with BLACK and WHITE cable
- Propellers:
- 2 labelled A2
- 2 labelled B2
- 2 spare A2 and B2
- Battery
- Battery compartment
- Camera
- Camera Compartment
- Double sided tape
- Charging Cable
Transmitter (controller)
- Transmitter
- 2 Joystick Caps
- 2 AA Batteries
Optional
- Propeller guard
- Steel tool
Assembly Guide
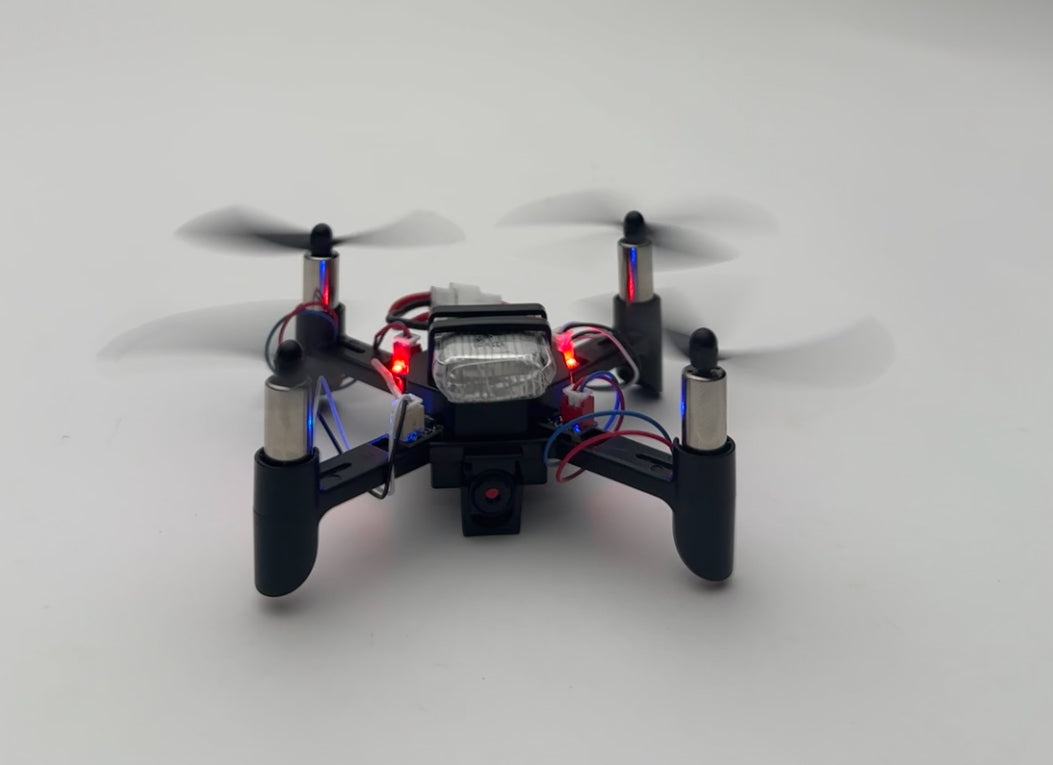
First, Attach the flight controller "X" shaped chip to the top of the body in the orientation shown below.


Then, place each motor in each arm slot as shown below. Make sure that the RED and BLUE cable motors are at the top left and bottom right, and the BLACK and WHITE cable motors are at the top right and bottom right.


Wrap the cables once around their arm before connecting to the flight controller as shown above. If done correctly, the RED and BLUE cables should be on arms labeled "A", and BLACK and WHITE cabled should be on arms labeled "B".
Then attach the propeller to motor (A2 to A) and (B2 to B) as shown on the drone arm 
Next, insert the battery into the battery compartment until it is fully seated. 
Then place this onto the flight controller body, ensuring it is aligned correctly with the flight controller’s wires.
Using the camera and the camera compartment, slide the camera into place, ensuring it is seated correctly and facing the right direction. Ensure antenna is correctly fitted into compartment 
Turn the drone over and place a piece of double-sided tape in the centre of the frame.
Peel off the backing to expose the other adhesive side, then position the camera compartment onto the tape, ensuring the camera is aligned with the front of the drone.

Next, remove the propellers. attach the motors guards, making sure each guard is fully seated.
 Attach the propellers back onto the drone.
 Then attach the two joystick caps onto the transmitter, pressing them down firmly until they click into place.
Turn the transmitter over and slide the battery compartment cover downward to reveal the battery slots.
Insert the batteries into the battery slots.

Place the battery cover back onto the transmitter and slide it into position until it locks securely. Connect all the wires on the drone. You should see a flashing red and blue signal.
Then slide the power switch on the transmitter upward, you’ll hear a beep and see a flashing red light. Once paired, the lights on both the transmitter and the drone will stop flashing.
Transmitter Controls

Pairing instructions

App Operating Instructions
Install Mobile Client - Scan QR code to download app


IOS Android
Add a device
- Power on the device manually.
- On the designated phone, open Settings.
- Go to Wi-Fi and connect to the network that starts with “KY4K”.
Head Interface
- Open the app.
- Press Start
