Create a micro:bit Robot with Grove Zero
Learn to use the Grove Zero Bit Kit
Written By: Cherie Tan
Difficulty
Easy
Steps
7
This guides goes into basic details on how to use the Grove Zero motor add-on.
In this guide, you will learn how to transform your micro:bit into a robot with the motor add-on. This micro:bit robot will be fully programable by you.
After completing this guide, you will understand how to program a robot using MakeCode and have a fully functional robot.
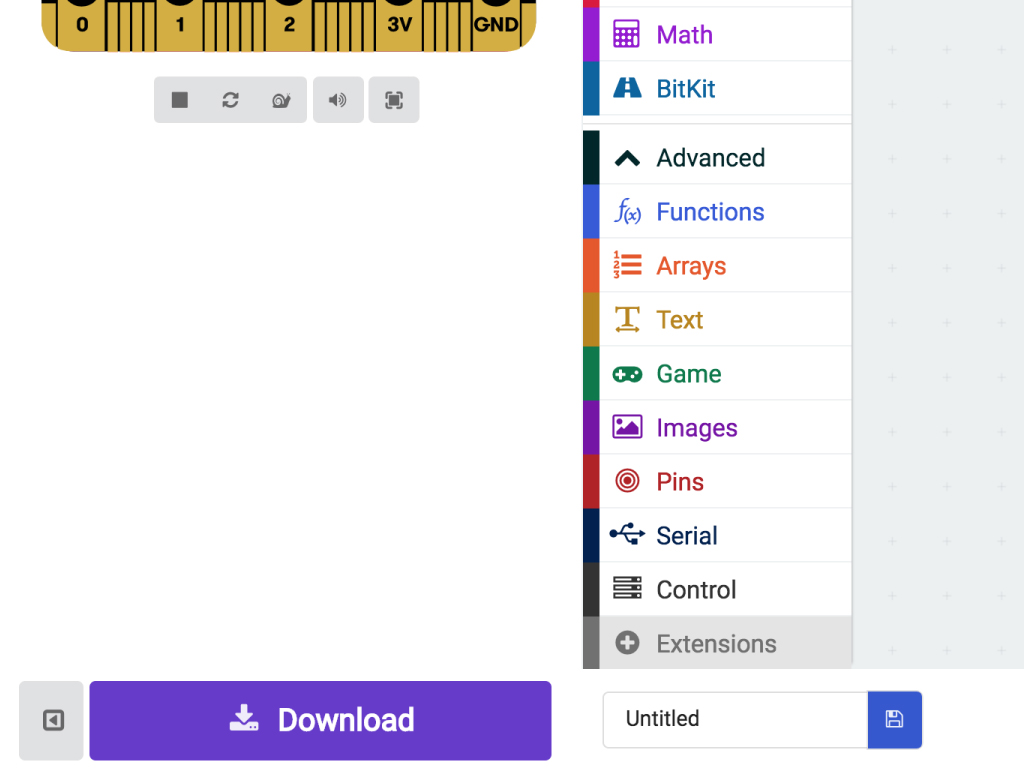
Open up the MakeCode Editor.
Click on 'New Project'.
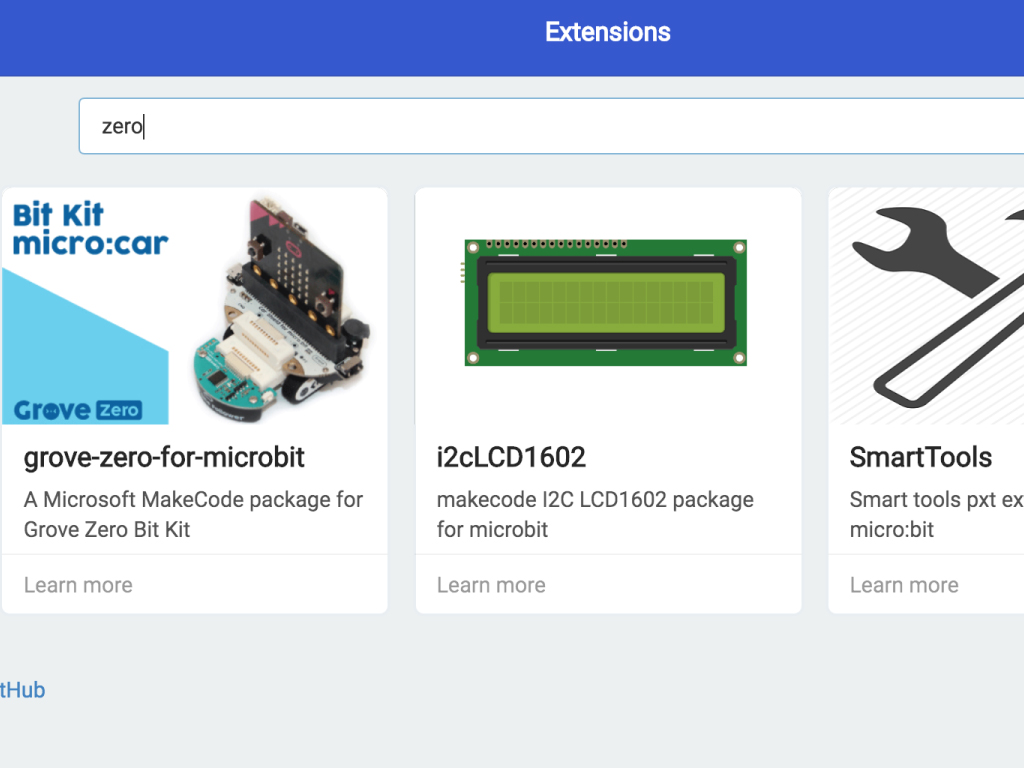
Before we can program the Grove Zero Bit kit micro:car, we'll need to add the extension package for it in MakeCode. So click on the 'Advanced' tab which will expand, then click on 'Extensions' tab.
Type 'zero' in the search field.
Click on 'grove-zero-for-microbit' package.
When starting a new project, you will be greeted with two blocks 'on start' and 'forever'.
Anything in the 'on start' block will only run once when the micro bit starts up; this is useful for commands which are needed to set up the environment.
Anything in the 'forever' block will run in a continuous loop through the order which it is placed. This is where the bulk of your code will go.
Anything in the 'on start' block will only run once when the micro bit starts up; this is useful for commands which are needed to set up the environment.
Anything in the 'forever' block will run in a continuous loop through the order which it is placed. This is where the bulk of your code will go.
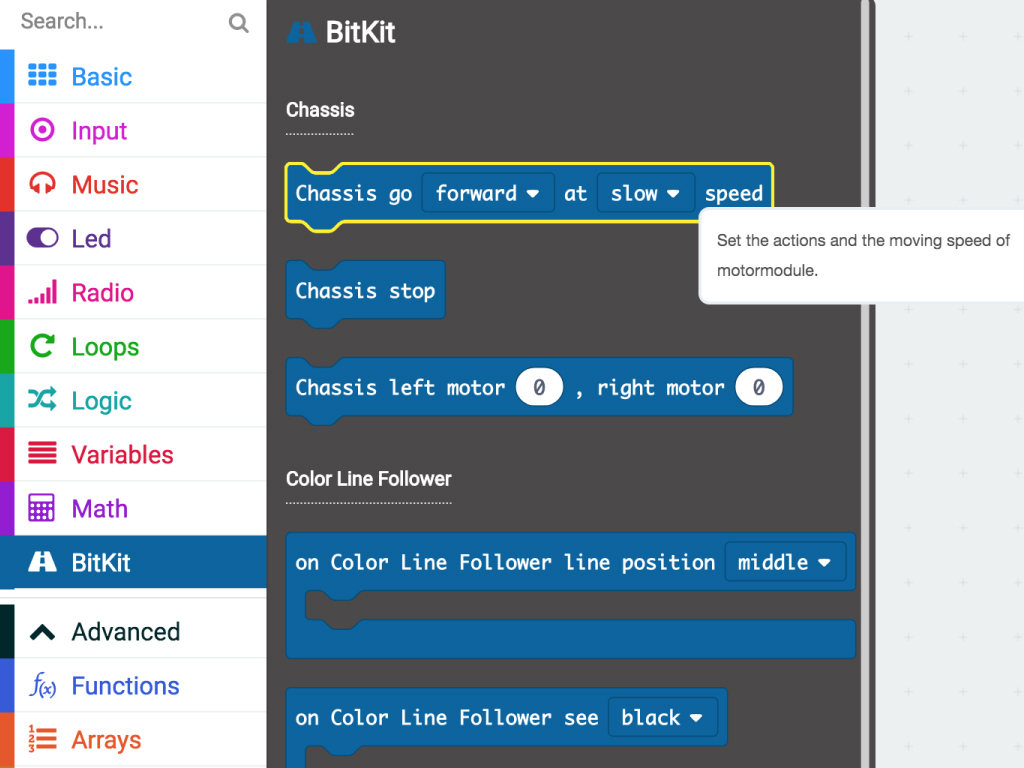
To begin, place the 'Chassis go forward at slow speed' block from the 'BitKit' tab into the 'on start' block. You can set the direction and speed from the two pull down menus.
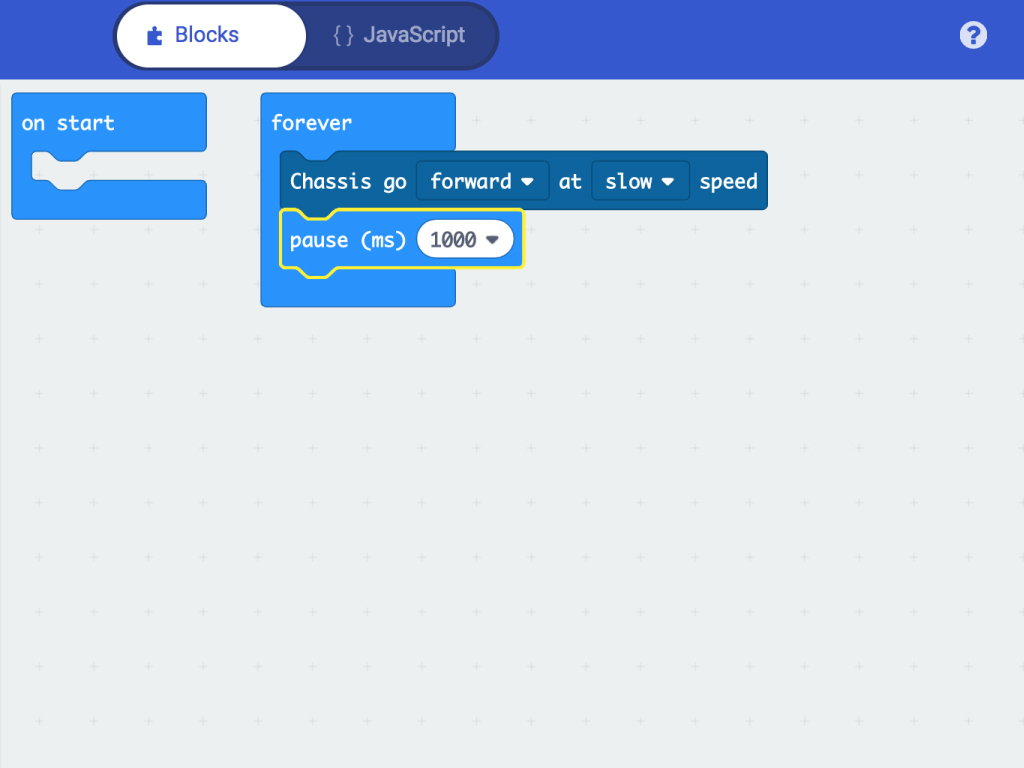
Add the block 'pause (ms) ...' from the 'Basic' tab, underneath the 'Chassis go ... at ... speed' block.
Set the pause to 1000 ms.
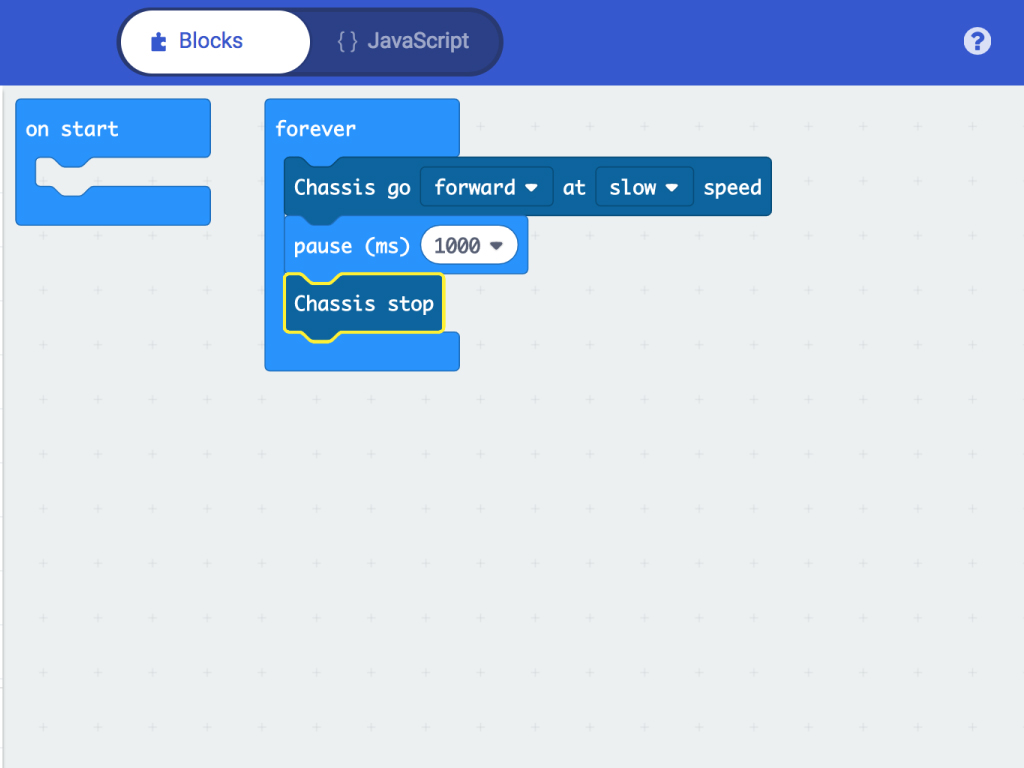
If we left the micro:bit as is with the current code, it will just keep on moving! We need to add a 'stop' command. The 'Chassis stop' block is found within the 'BitKit' tab. Place this block under the 'pause' block within the 'on start' loop.
After going forward at a slow speed, and pausing for a second, the stop block tells the motor to stop moving.
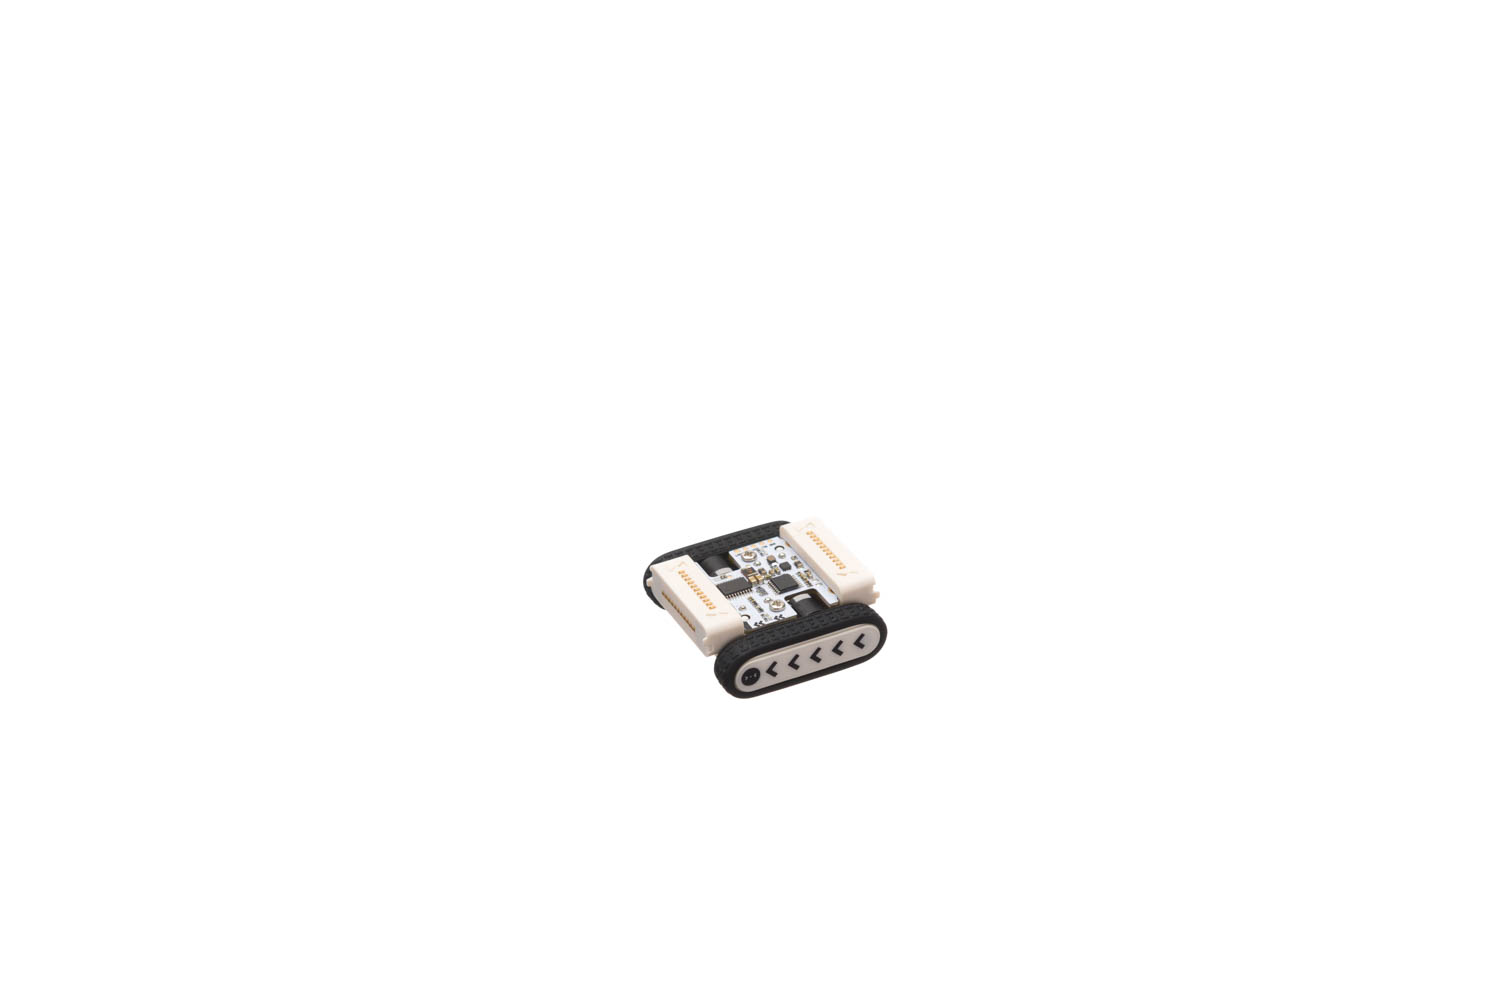
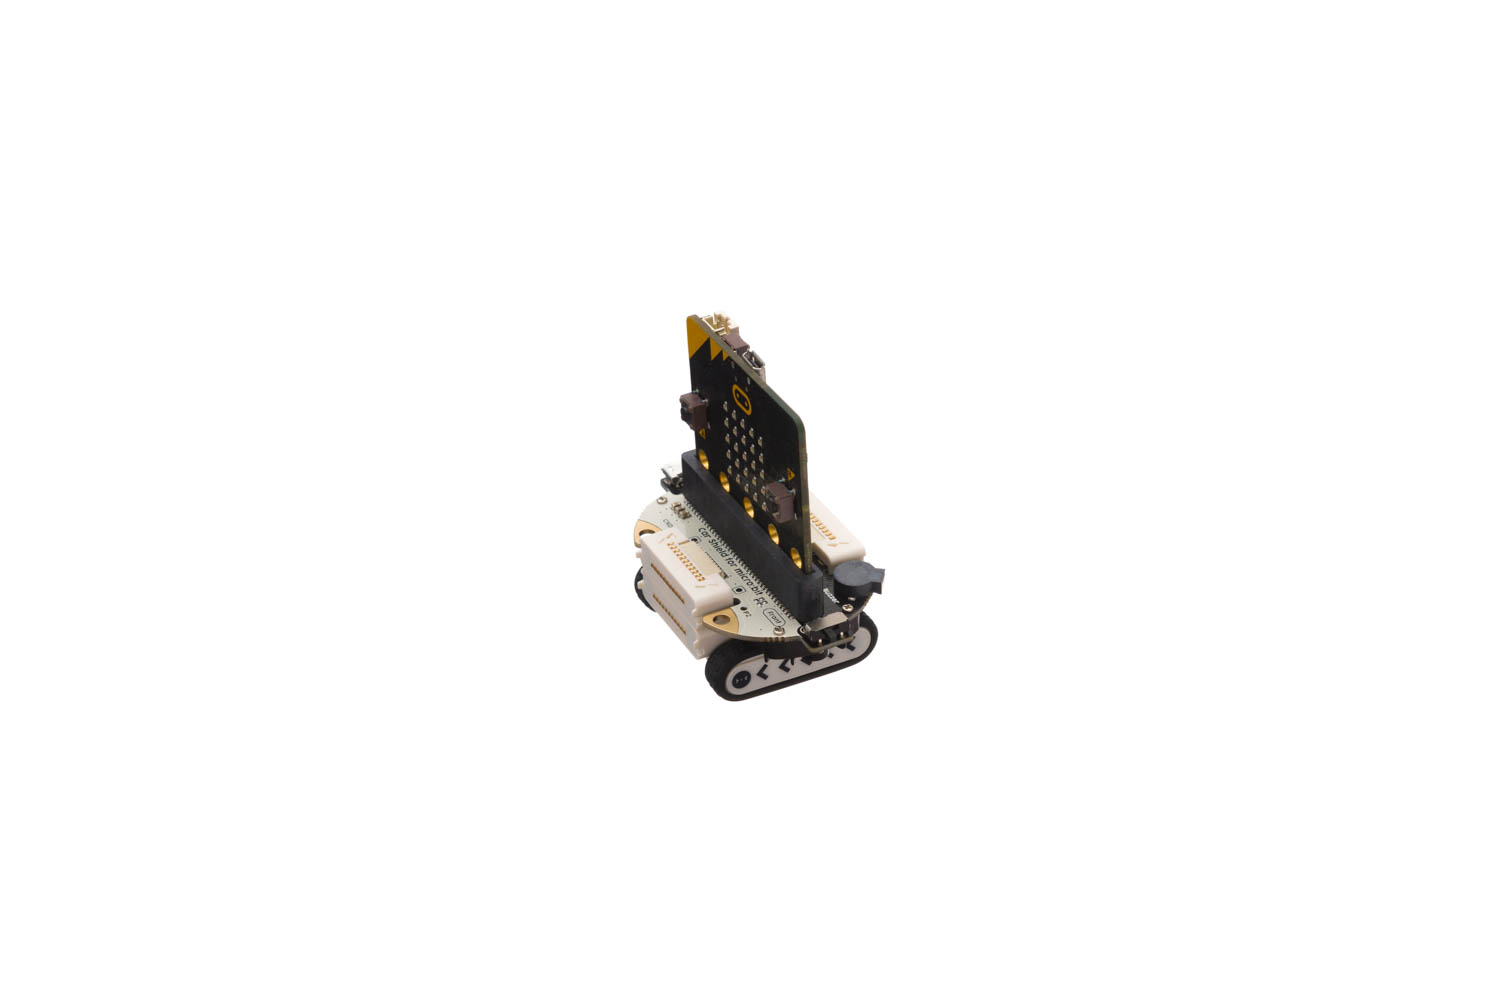
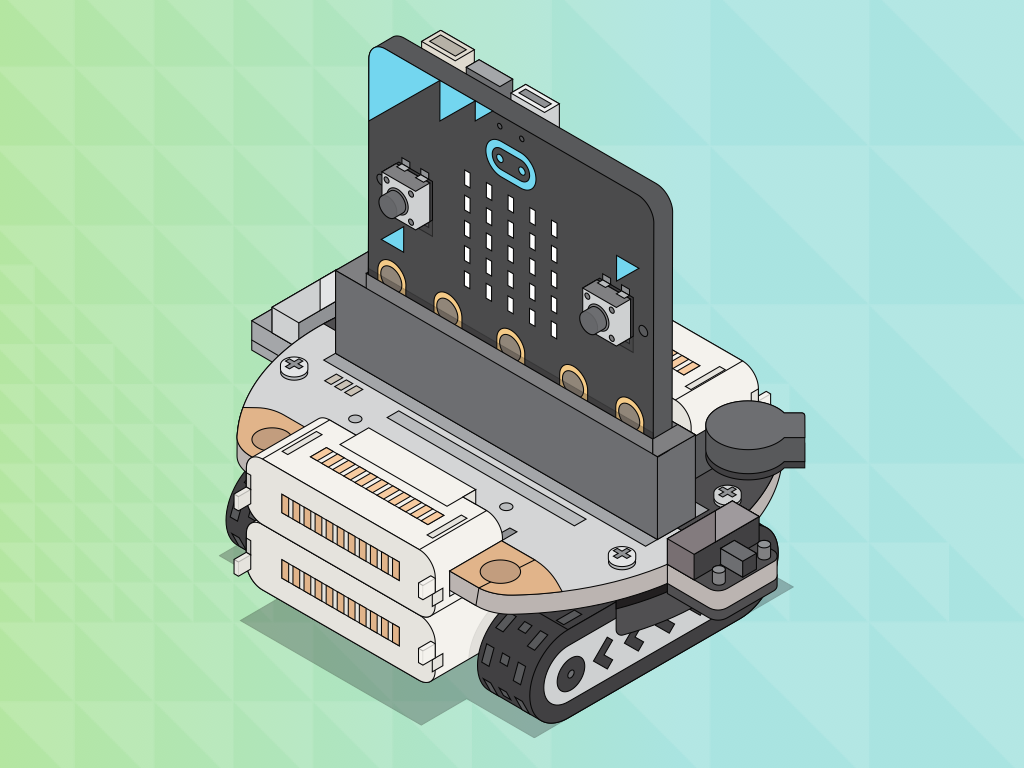
Begin by getting the motor base (the one with the tracks) and connecting the battery/micro:bit mount on-top.
Note that this piece is dependent on the orientation.
The white part of the board must face the front of the robot (the direction of the arrows on the side are pointing).
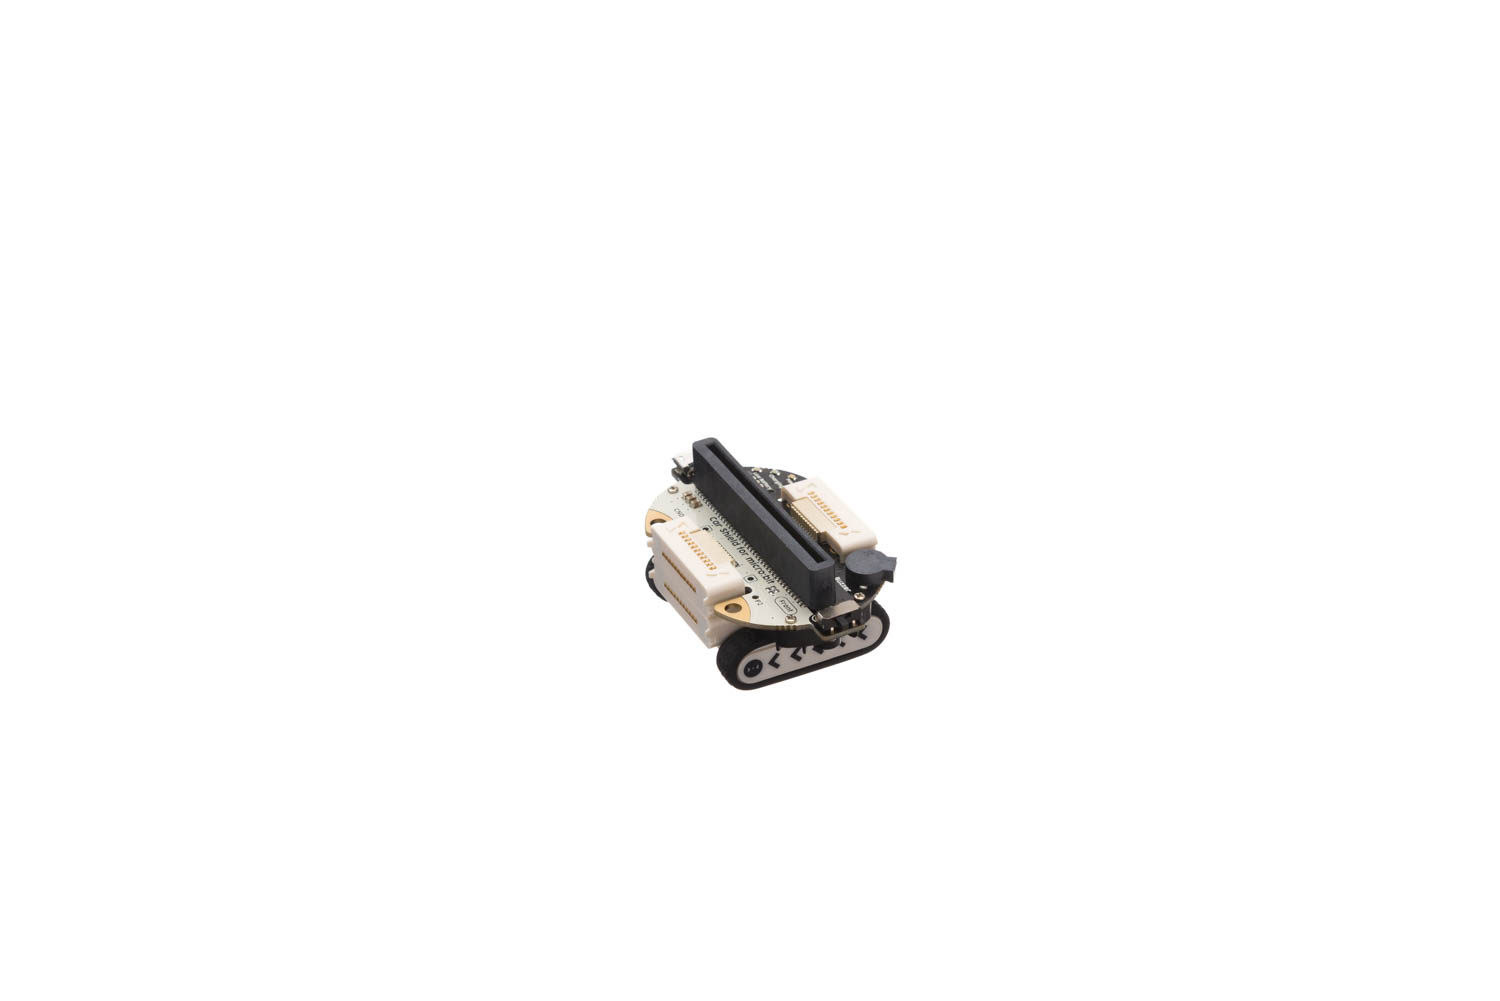
Without the correct orientation, the robot will not do anything!
The battery is located underneath the board and is surrounded by black plastic.
Next, place the micro:bit into the slot.
Lastly, turn on the power switch on the left hand side of the mounting board
basic.forever(function () {
    BitKit.setMotormoduleAction(DirectionTpye.Forward, SpeedTpye.Slow)
    basic.pause(1000)
    BitKit.setMotormoduleAction(DirectionTpye.Left, SpeedTpye.Slow)
    basic.pause(1000)
    BitKit.setMotormoduleAction(DirectionTpye.Right, SpeedTpye.Slow)
    basic.pause(1000)
    BitKit.setMotormoduleAction(DirectionTpye.Backward, SpeedTpye.Slow)
    basic.pause(1000)
    BitKit.stopMotormodule()
})
You can add more directions after certain times with the 'basic.pause' and 'BitKit.setMotormoduleAction()'
Copy and paste this code into the Javascript interface
Copy and paste this code into the Javascript interface


