
Beginner
Joystick module with micro:bit
Learn to use a joystick module and play pong with it!
By Cherie Tan
The dual-axis joystick module has two independent potentiometers, one per axis, and can be easily connected to the breadboard!
In this guide, we will create a fast reaction-time game with the micro:bit, and use the joystick module as a controller.
After completing this guide, you will have learned how to program a basic game as well as its controls.
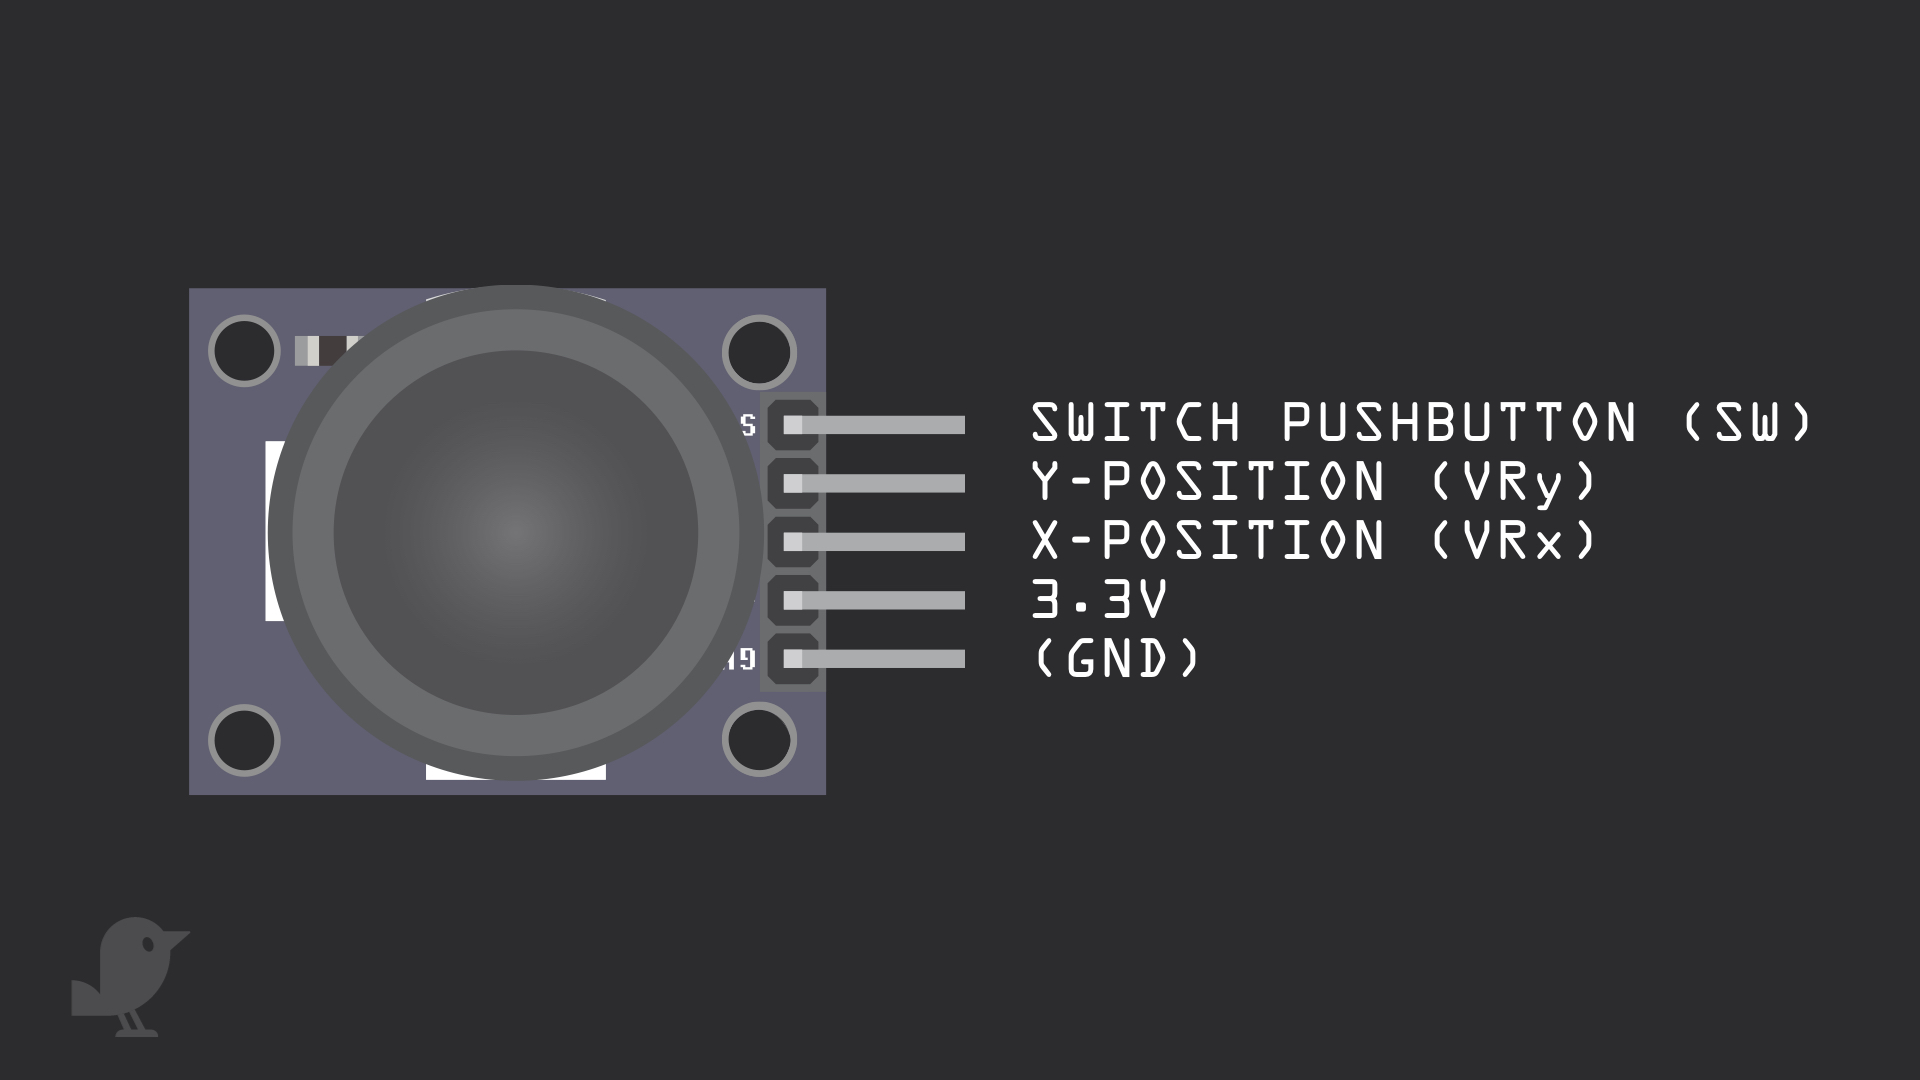
First, let's take a closer look at the joystick module. It has 5 pins:
SW: Switch pushbutton
VRy: Y-position
VRx: X-position
3.3V : While this pin is labelled '+5V', we'll connect it to 3.3V on the micro:bit
GND: In electronics, we define a point in a circuit to be a kind of zero volts or 0V reference point, on which to base all other voltage measurements. This point is called ground or GND.
Voltage is the difference in potential between two points. As it is difficult to talk about voltage without a reference point, we need another point to compare it to.
Please use the M-F jumper wires included in the kit to connect this module to the breadboard. We will also be connecting the joystick module to 3.3V instead of 5V.
Step 1 — The Module
First, let's take a closer look at the joystick module. It has 5 pins:
SW: Switch pushbutton
VRy: Y-position
VRx: X-position
3.3V : While this pin is labelled '+5V', we'll connect it to 3.3V on the micro:bit
GND: In electronics, we define a point in a circuit to be a kind of zero volts or 0V reference point, on which to base all other voltage measurements. This point is called ground or GND.
SW: Switch pushbutton
VRy: Y-position
VRx: X-position
3.3V : While this pin is labelled '+5V', we'll connect it to 3.3V on the micro:bit
GND: In electronics, we define a point in a circuit to be a kind of zero volts or 0V reference point, on which to base all other voltage measurements. This point is called ground or GND.
Voltage is the difference in potential between two points. As it is difficult to talk about voltage without a reference point, we need another point to compare it to.
Please use the M-F jumper wires included in the kit to connect this module to the breadboard. We will also be connecting the joystick module to 3.3V instead of 5V.
Step 2 — Connect GND to GND
Step 3 — Connect to 3.3v
Step 4 — Connect VRx to P3
Step 5 — Connect VRy to P4
Step 6 — Connect SW to P5
Step 7 — Joystick values
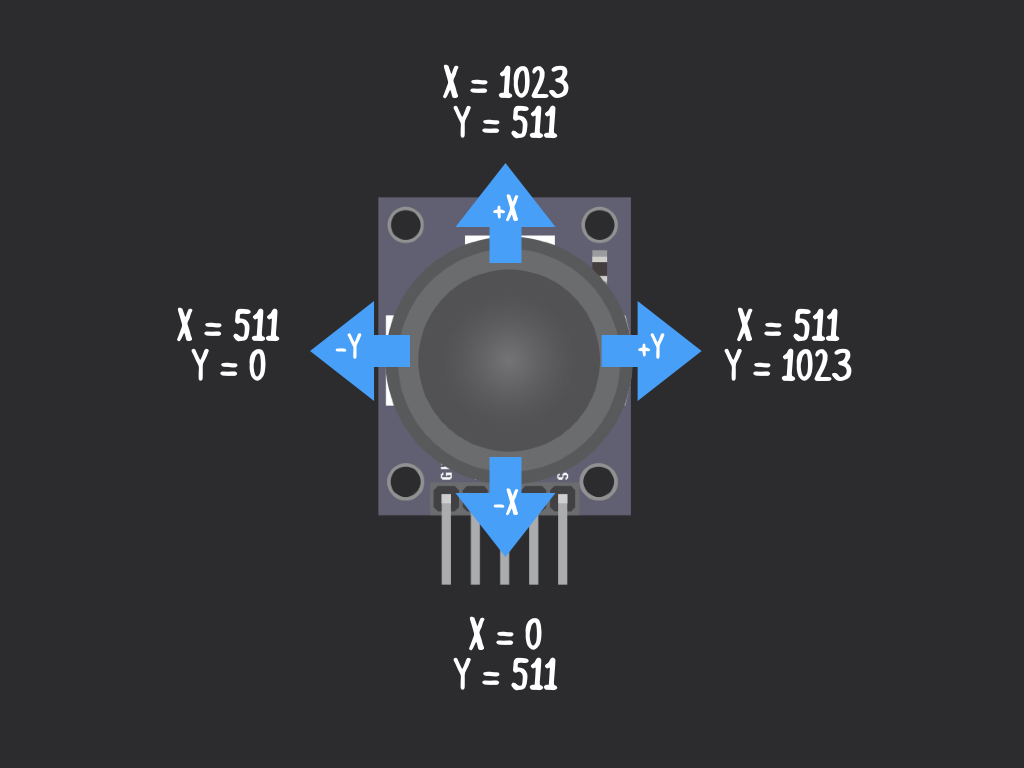
The output values sent to the micro:bit via VRx and VRy changes depending on how it is moved along the axis
The joystick has two axises and at its untouched position it is at x:511 and y:511.
Step 8 — Test the controller
let yVal = 0
let xVal = 0
basic.forever(function () {
    xVal = pins.analogReadPin(AnalogPin.P0)
    yVal = pins.analogReadPin(AnalogPin.P1)
    if (xVal > 600) {
        basic.showLeds(`
            . . # . .
            . # . . .
            # # # # #
            . # . . .
            . . # . .
            `)
    } else if (xVal < 400) {
        basic.showLeds(`
            . . # . .
            . . . # .
            # # # # #
            . . . # .
            . . # . .
            `)
    } else if (yVal < 400) {
        basic.showLeds(`
            . . # . .
            . . # . .
            # . # . #
            . # # # .
            . . # . .
            `)
    } else if (yVal > 600) {
        basic.showLeds(`
            . . # . .
            . # # # .
            # . # . #
            . . # . .
            . . # . .
            `)
    }
})
It's time to test the dual-axis joystick. Copy and paste this code into the Javascript interface, replacing the previous code.
When the joystick value, x is at 511 and y is 511, the joystick is at rest.
When the joystick is tilted to the left, xVal > 600
When the joystick is tilted to the right, xVal < 400
When the joystick is tilted downwards, yVal < 400
When the joystick is tilted upwards, yVal > 600
When the joystick is tilted to the left, xVal > 600
When the joystick is tilted to the right, xVal < 400
When the joystick is tilted downwards, yVal < 400
When the joystick is tilted upwards, yVal > 600
Step 9 — On start
let globalScore = 0
globalScore = 0
basic.showString("'Start!'")
First, we will create a variable, 'globalScore', to store the score.
Then we'll display some text on start up with the line of code: basic.showString("'Start!'")
This will display once when your micro:bit boots up before you play the game.
Step 10 — Controller function
let xVal = 0
let yVal = 0
let state = 0

function controller() {
    xVal = pins.analogReadPin(AnalogPin.P0)
    yVal = pins.analogReadPin(AnalogPin.P1)

    if (state == 0 && xVal > 600) {
        basic.showLeds(`
            . . # . .
            . # . . .
            # # # # #
            . # . . .
            . . # . .
        `)
    } else if (state == 1 && xVal < 400) {
        basic.showLeds(`
            . . # . .
            . . . # .
            # # # # #
            . . . # .
            . . # . .
        `)
    } else if (state == 2 && yVal < 400) {
        basic.showLeds(`
            . . # . .
            . . # . .
            # . # . #
            . # # # .
            . . # . .
        `)
    } else if (state == 3 && yVal > 600) {
        basic.showLeds(`
            . . # . .
            . # # # .
            # . # . #
            . . # . .
            . . # . .
        `)
    }
}

basic.forever(function () {
    // You can change this logic if needed to update 'state' dynamically
    // Example: cycle through states periodically or based on another input

    controller()
})
Copy and paste this code into the Javascript interface.
We've created a function called 'controller'
Two variables, 'xVal' and 'yVal' are also created and hold the analog values of the pins P0 and P1 respectively.
The conditions for the conditional statements:
If state = 0 (showing left arrow) and xVal > 600 (indicates joystick moved left)
Else if state = 1 (showing right arrow) and xVal < 400 (indicates joystick moved right)
Else if state = 2 (down arrow), and yVal < 400
Else if state = 3 (up arrow), and yval > 600
If state = 0 (showing left arrow) and xVal > 600 (indicates joystick moved left)
Else if state = 1 (showing right arrow) and xVal < 400 (indicates joystick moved right)
Else if state = 2 (down arrow), and yVal < 400
Else if state = 3 (up arrow), and yval > 600
Finally, we need to call the function, so add the 'call function controller' block within the 'for loop', just after the 'if ... then ...' loop
Step 11 — Upload the hex file
To upload the code to the micro:bit. Connect your computer to the micro:bit with a microUSB cable
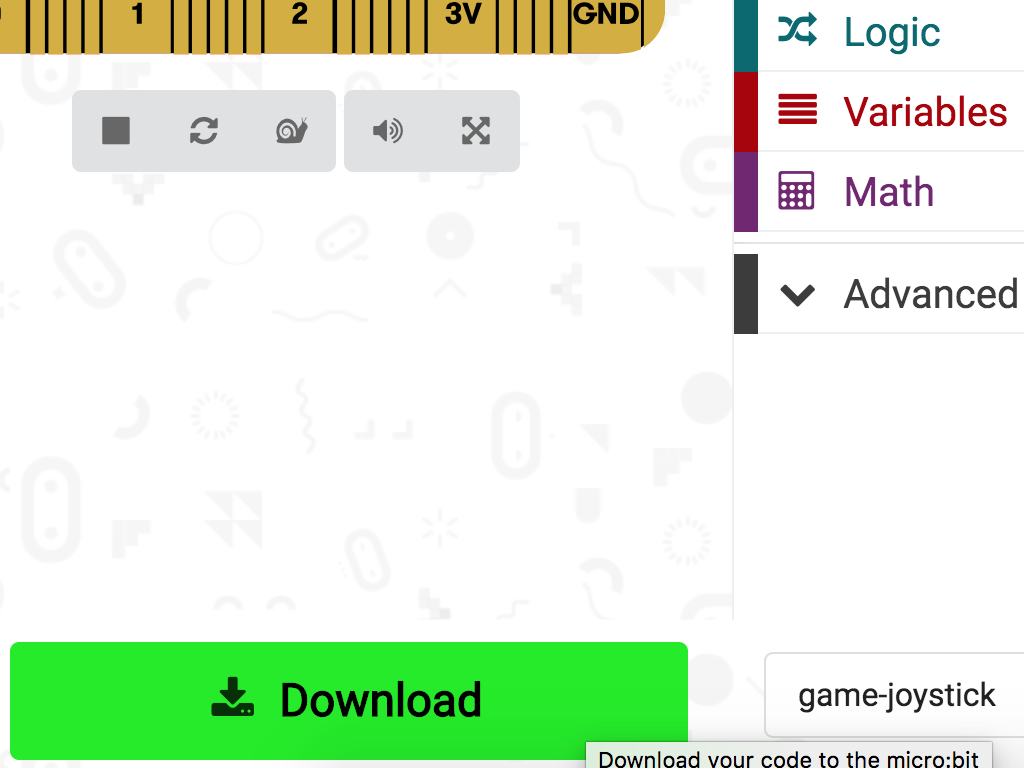
In the MakeCode editor, click on the 'Download' button
The downloaded code should be in your 'Downloads' folder
Drag and drop this .hex file to the MICROBIT drive
Step 12 — 'for' loop
let state = 0
let globalScore = 0
globalScore = 0
basic.showString("'Start!'")
basic.forever(function () {
    for (let round = 0; round <= 4; round++) {
        basic.clearScreen()
        basic.pause(1000)
        state = Math.randomRange(0, 3)
        if (state == 0) {
            basic.showLeds(`
                . . # . .
                . # . . .
                # # # # #
                . # . . .
                . . # . .
                `)
            basic.pause(500)
        } else if (state == 1) {
            basic.showLeds(`
                . . # . .
                . . . # .
                # # # # #
                . . . # .
                . . # . .
                `)
            basic.pause(500)
        } else if (state == 2) {
            basic.showLeds(`
                . . # . .
                . . # . .
                # . # . #
                . # # # .
                . . # . .
                `)
            basic.pause(500)
        } else if (state == 3) {
            basic.showLeds(`
                . . # . .
                . # # # .
                # . # . #
                . . # . .
                . . # . .
                `)
            basic.pause(500)
        }
    }
    basic.showNumber(globalScore)
})
Copy and paste this code into the Javascript interface.
This game will last a total of 5 rounds, so we will use a 'for ... ' loop.
To display a random arrow, use this line of code:
state = Math.randomRange(0, 3)
state = Math.randomRange(0, 3)
'basic.showLeds' will update the micro:bit's LED display under these conditions :
If state = 0, show a left arrow.
If state = 1, show a right arrow.
If state = 2, show a down arrow.
If state = 3, show an up arrow.
If state = 0, show a left arrow.
If state = 1, show a right arrow.
If state = 2, show a down arrow.
If state = 3, show an up arrow.
Finally, to show the score at the end of the 5 rounds, use: basic.showNumber(globalScore)
Parts List
Required Parts (1)
Project Summary
1 part total
Required parts
$79.35
Total (required)
$79.35
Unavailable items will be skipped
