DC Motor with micro:bit
Learn to use a DC motor with the micro:bit
Written By: Cherie Tan
Difficulty
Easy
Steps
14
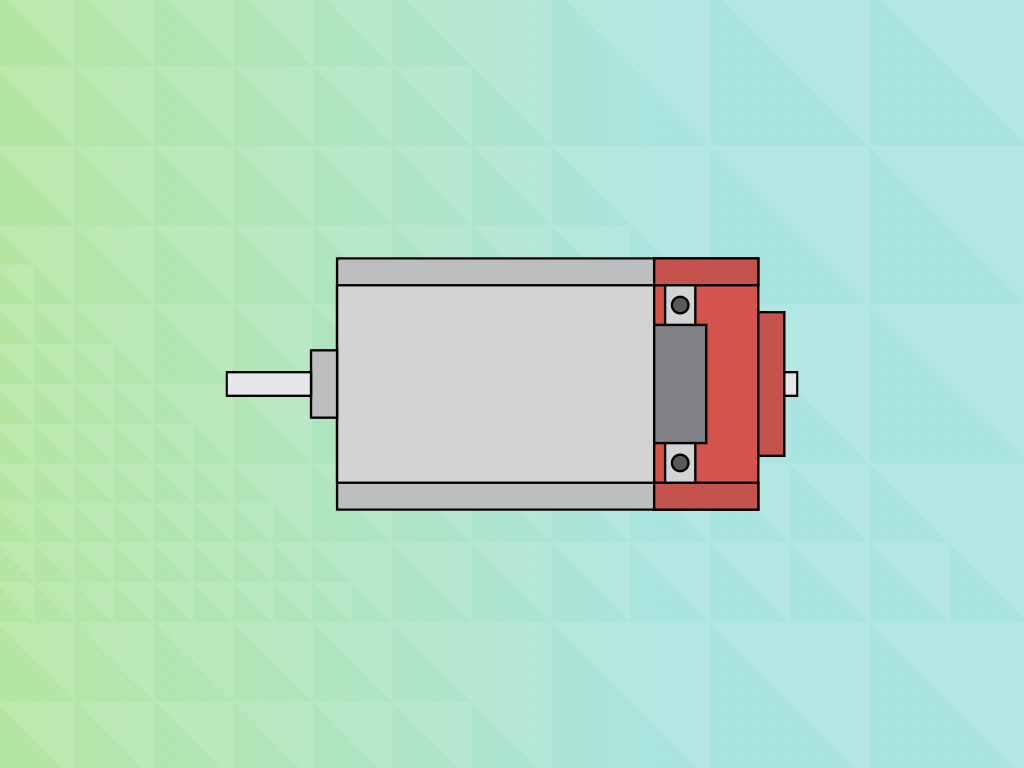
A DC motor is a simple two-lead, electrically controlled device that converts direct current electrical energy into mechanical energy. It comes with a rotary shaft on which wheels, gears, and propellers, etc can be mounted on.
In this guide, learn to connect a DC motor to a micro:bit with a relay module and build a mini fan, then program it in MakeCode.
Complete this guide to learn how to use a DC motor with the micro:bit.
A DC motor is a simple two-lead, electrically controlled device that converts direct current electrical energy into mechanical energy. It comes with a rotary shaft on which wheels, gears, and propellers, etc can be mounted on.
It can be made to rotate clockwise or anticlockwise by reversing the polarity applied to the leads.
At low speeds, DC motors are impractical for position-control applications as there would be little torque and minimal position control. For that, we recommend using a servo motor with the micro:bit.
Similar to the servo motor, however, a controller such as the micro:bit can be used to govern the DC motor's operation through PWM.
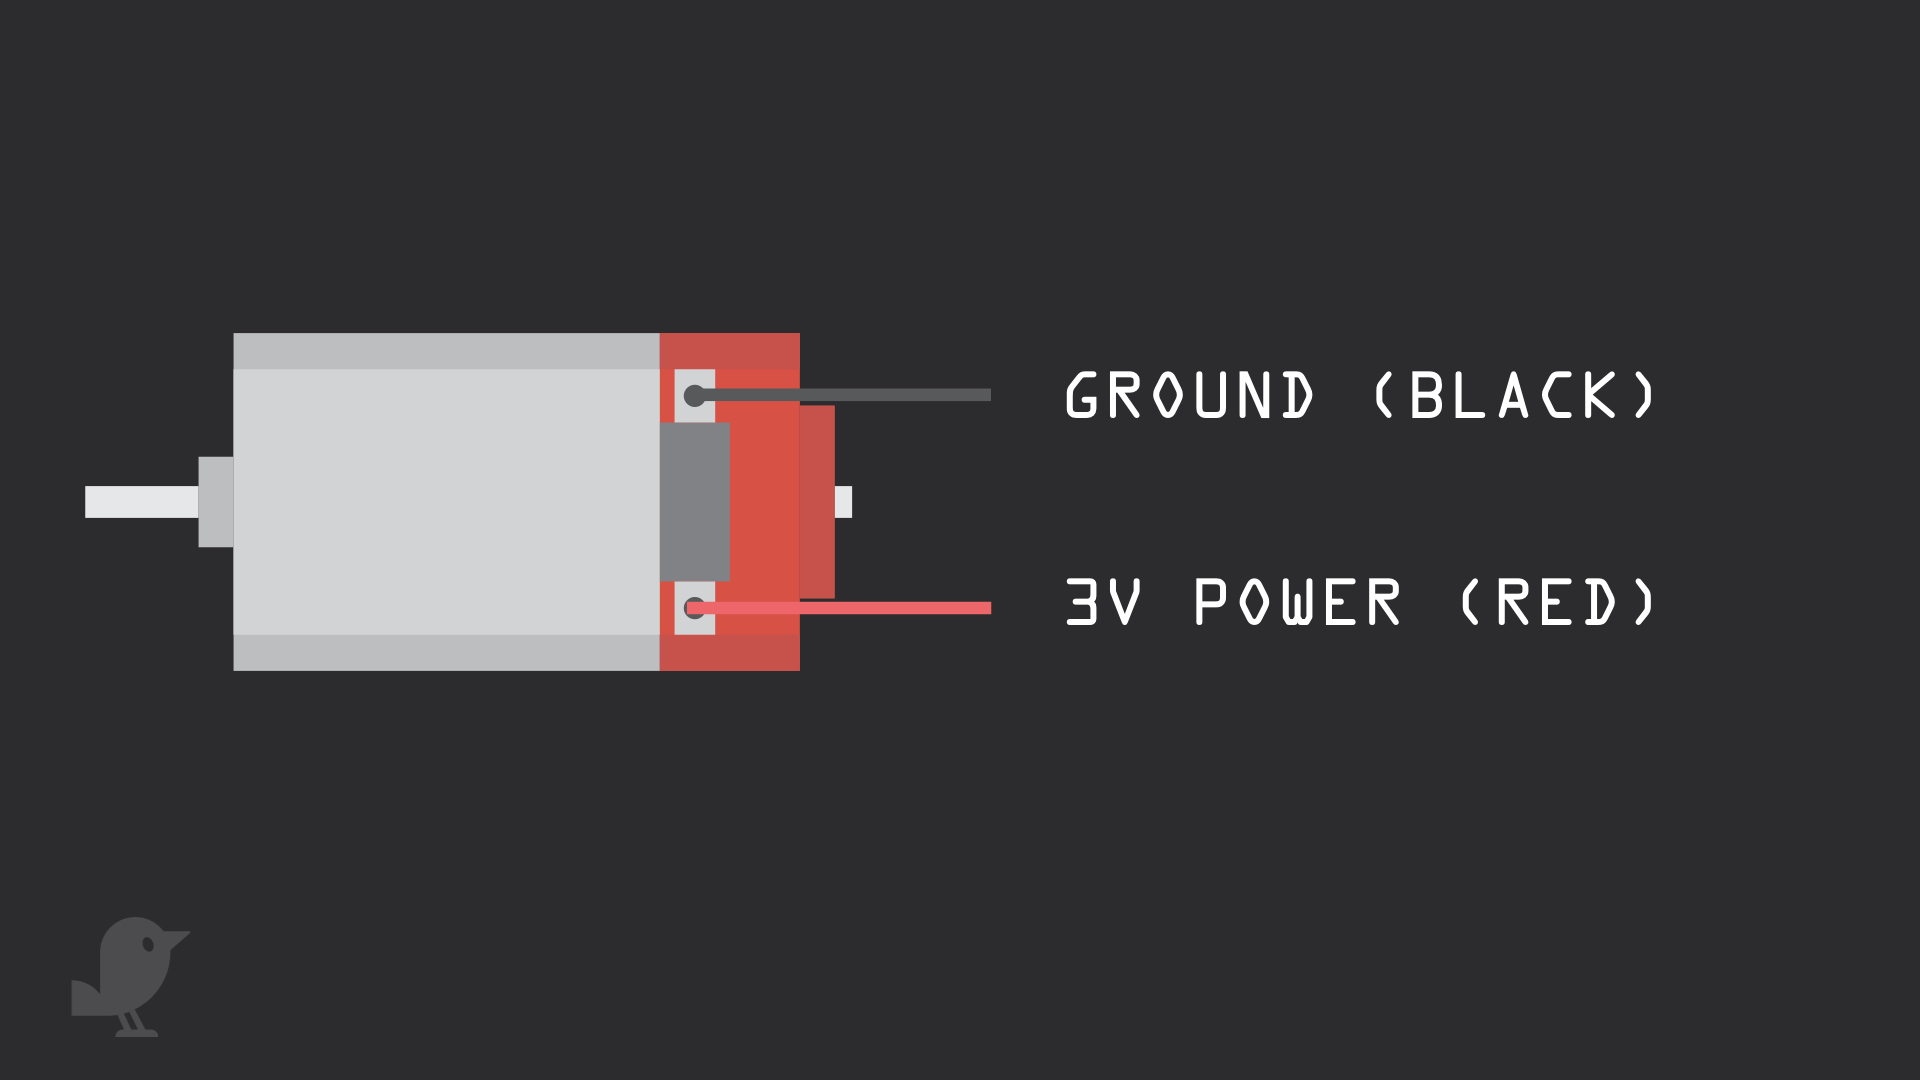
It has two wires:
Ground (Black)
3V Power (Red)
Ground (Black)
3V Power (Red)
In the following steps, you will learn to control a DC motor with a mini fan propeller and the micro:bit.
While you could change the speed of a DC motor by varying its supplied voltage, there are limitations to this:
1. Dropping a supplied voltage to 50% of the specified recommended voltage will cause the motor to cease to rotate
2. Applying a voltage that exceeds 30% of the recommended operating voltage may cause overheating and damage to the motor
1. Dropping a supplied voltage to 50% of the specified recommended voltage will cause the motor to cease to rotate
2. Applying a voltage that exceeds 30% of the recommended operating voltage may cause overheating and damage to the motor
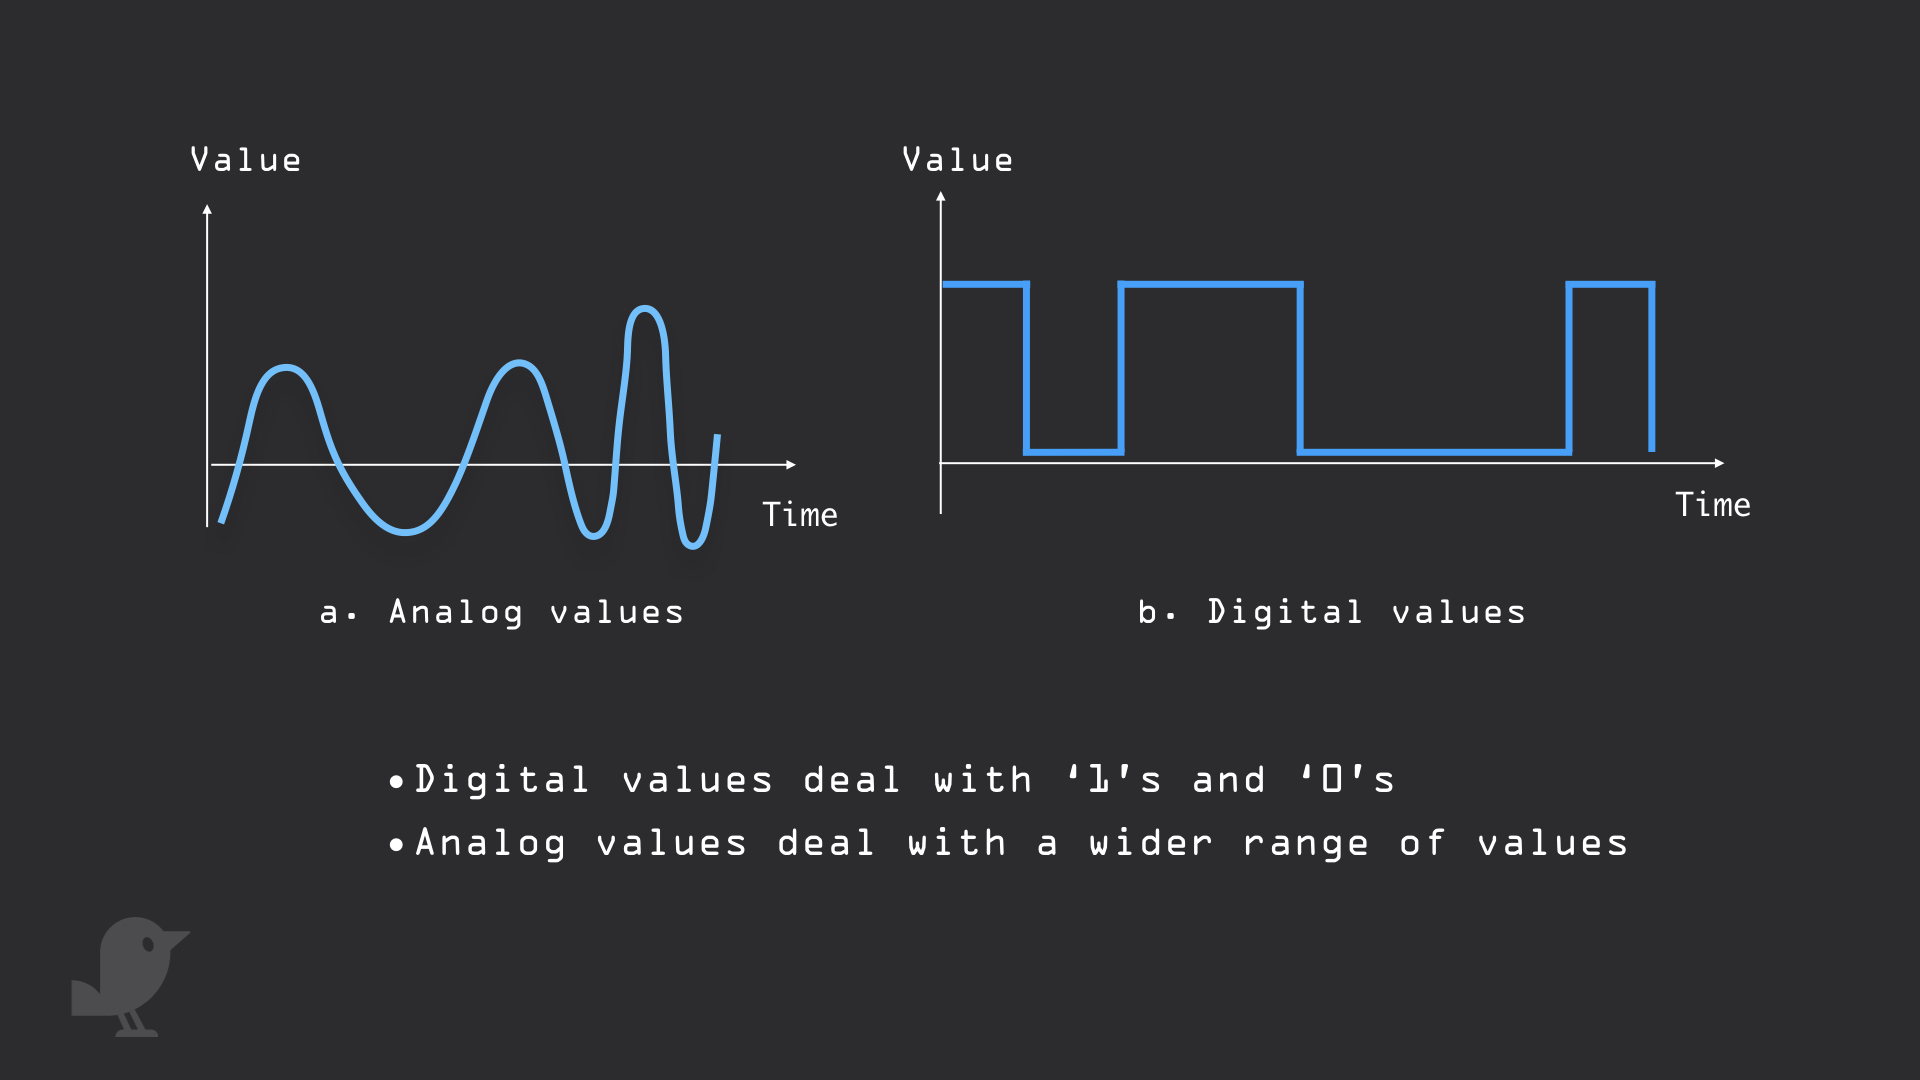
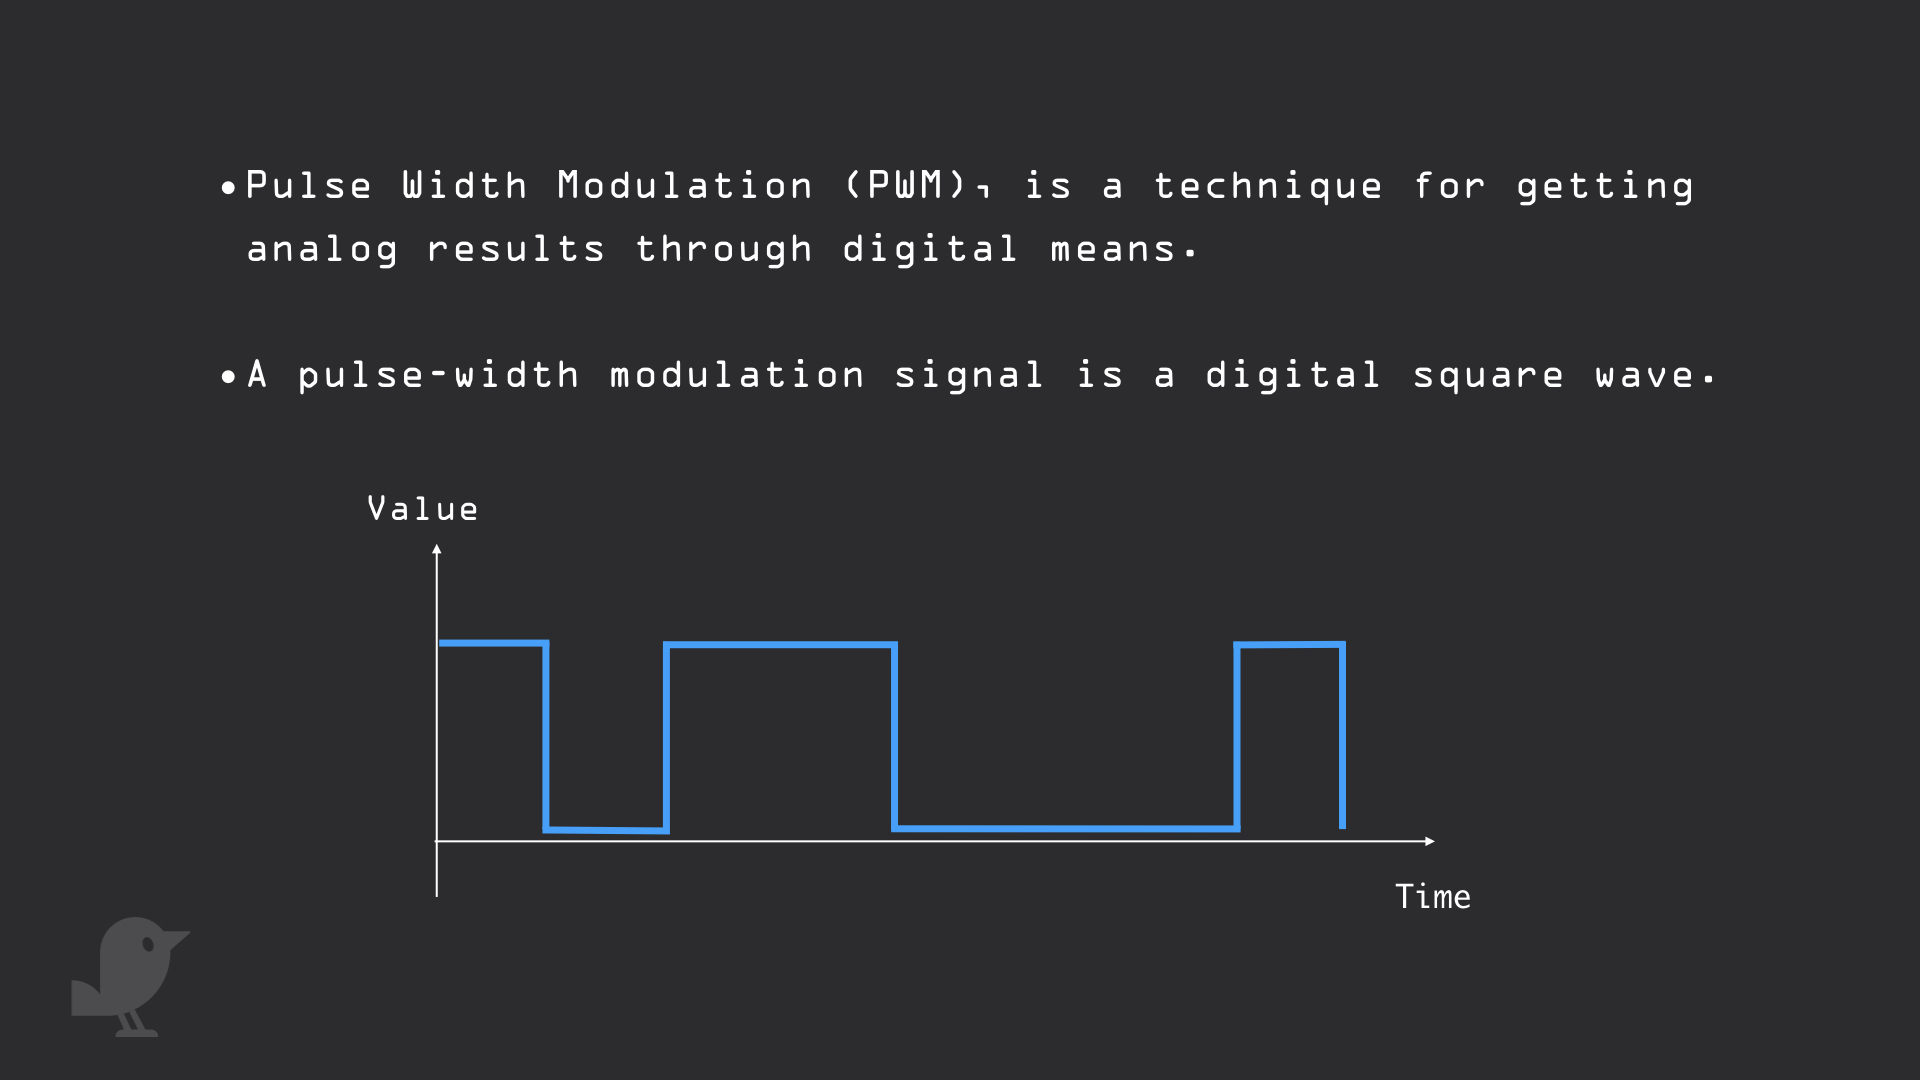
The best way to efficiently control the speed of a DC motor is through PWM.
What PWM does is it turns the motor rapidly ON and OFF
The width of the pulse and period between pulses controls the speed of the motor.

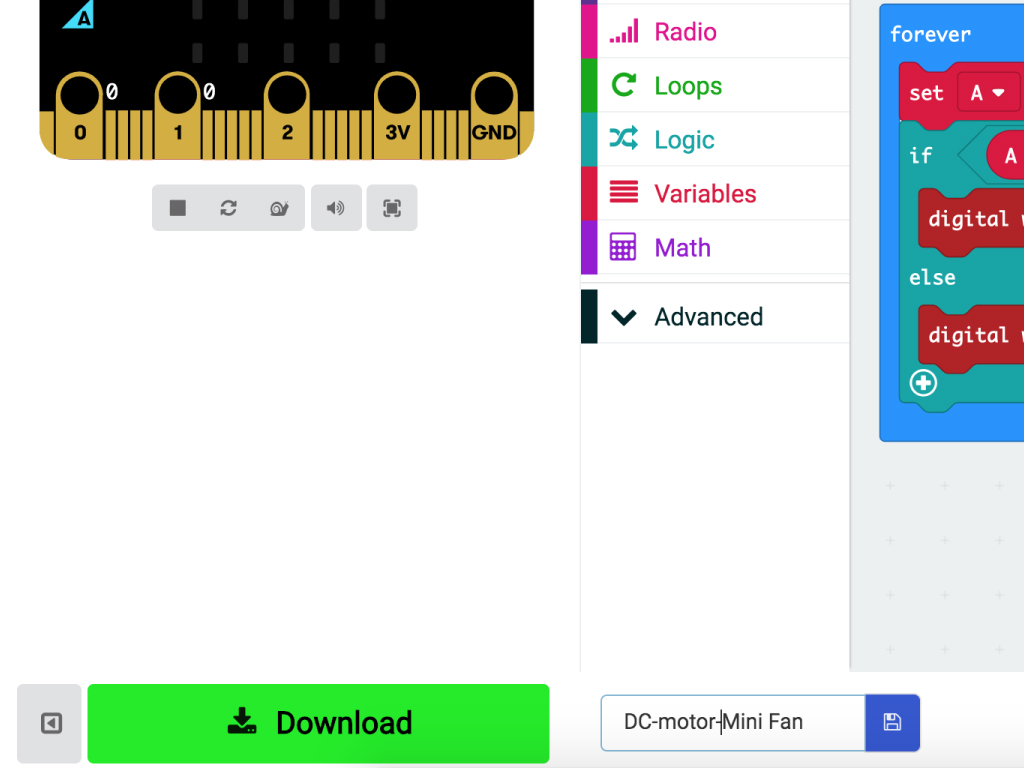
pins.digitalWritePin(DigitalPin.P1, 0)
pins.setPull(DigitalPin.P0, PinPullMode.PullUp)
basic.forever(function () {
    if (pins.digitalReadPin(DigitalPin.P0) == 0) {
        pins.digitalWritePin(DigitalPin.P1, 1)
    } else {
        pins.digitalWritePin(DigitalPin.P1, 0)
    }
})
It's time to program the micro:bit. Head to Makecode.
Click on 'New project'
Copy and paste the following code to the Javascript interface.

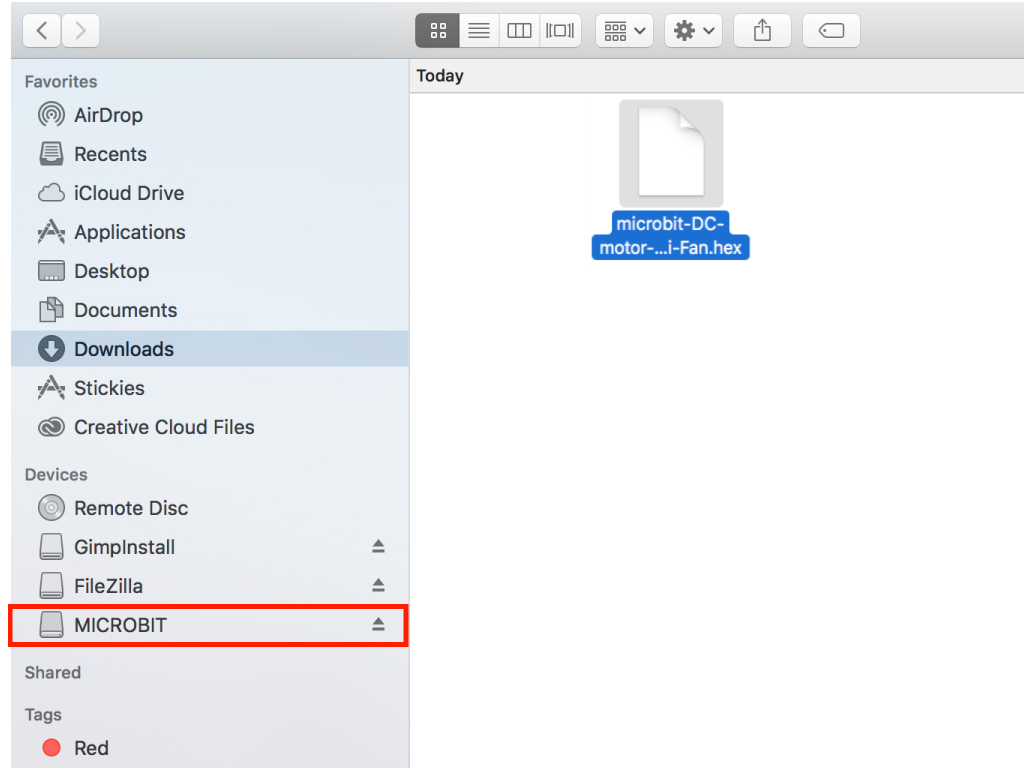
Finally, to upload the code to the micro:bit, first connect the micro:bit to your computer using a microUSB cable
Click on the 'Download' button on the bottom left corner in MakeCode editor
Once downloaded, you can find the hex file in your 'Downloads' folder.
Drag and drop it to the MICROBIT drive