
Beginner
Servo with micro:bit
Learn to use a servo with the micro:bit
By Cherie Tan
One of the most entertaining things to do with electronics is to make a mechanical device move. A popular device used to make things move is a servomotor or servo for short.
In this guide, learn to connect a servo to the micro:bit and program it in MakeCode.
Complete this guide to learn the basics in controlling a servo.
While there are many different types of motors, a servo is ideal for pointer-like position-control applications. They are commonly used in robotics, for steering model cars, boats, airplanes and for many other sensor-positioning purposes. Here are some key points on servos:
It receives control signals from a controller, in this case the micro:bit
It receives control signals from a controller, in this case the micro:bit
Its position can be controlled more precisely than a standard DC motor
There are two kinds of servos in the kit, the micro servo 9g and the continuous servo. For the micro servo, its rotation angle can be set (limited to 180 degrees). The continuous servo can rotate 360 degrees.
For the micro servo, it may move a little beyond 180 degrees, if so, use this servo calibrator program
They are rated in kg/cm (kilogram per centimeter) which tells you how much weight your servo motor can lift at a particular distance.
For example, the TowerPro Analog SG90 servo used in this guide is rated 1.8kg/cm at an operating voltage of 4.8V.
So it should be able to lift 1.8kg if the load is suspended 1 cm away from the motor shaft.
The greater the distance, the lesser the weight carrying capacity.
For example, the TowerPro Analog SG90 servo used in this guide is rated 1.8kg/cm at an operating voltage of 4.8V.
So it should be able to lift 1.8kg if the load is suspended 1 cm away from the motor shaft.
The greater the distance, the lesser the weight carrying capacity.
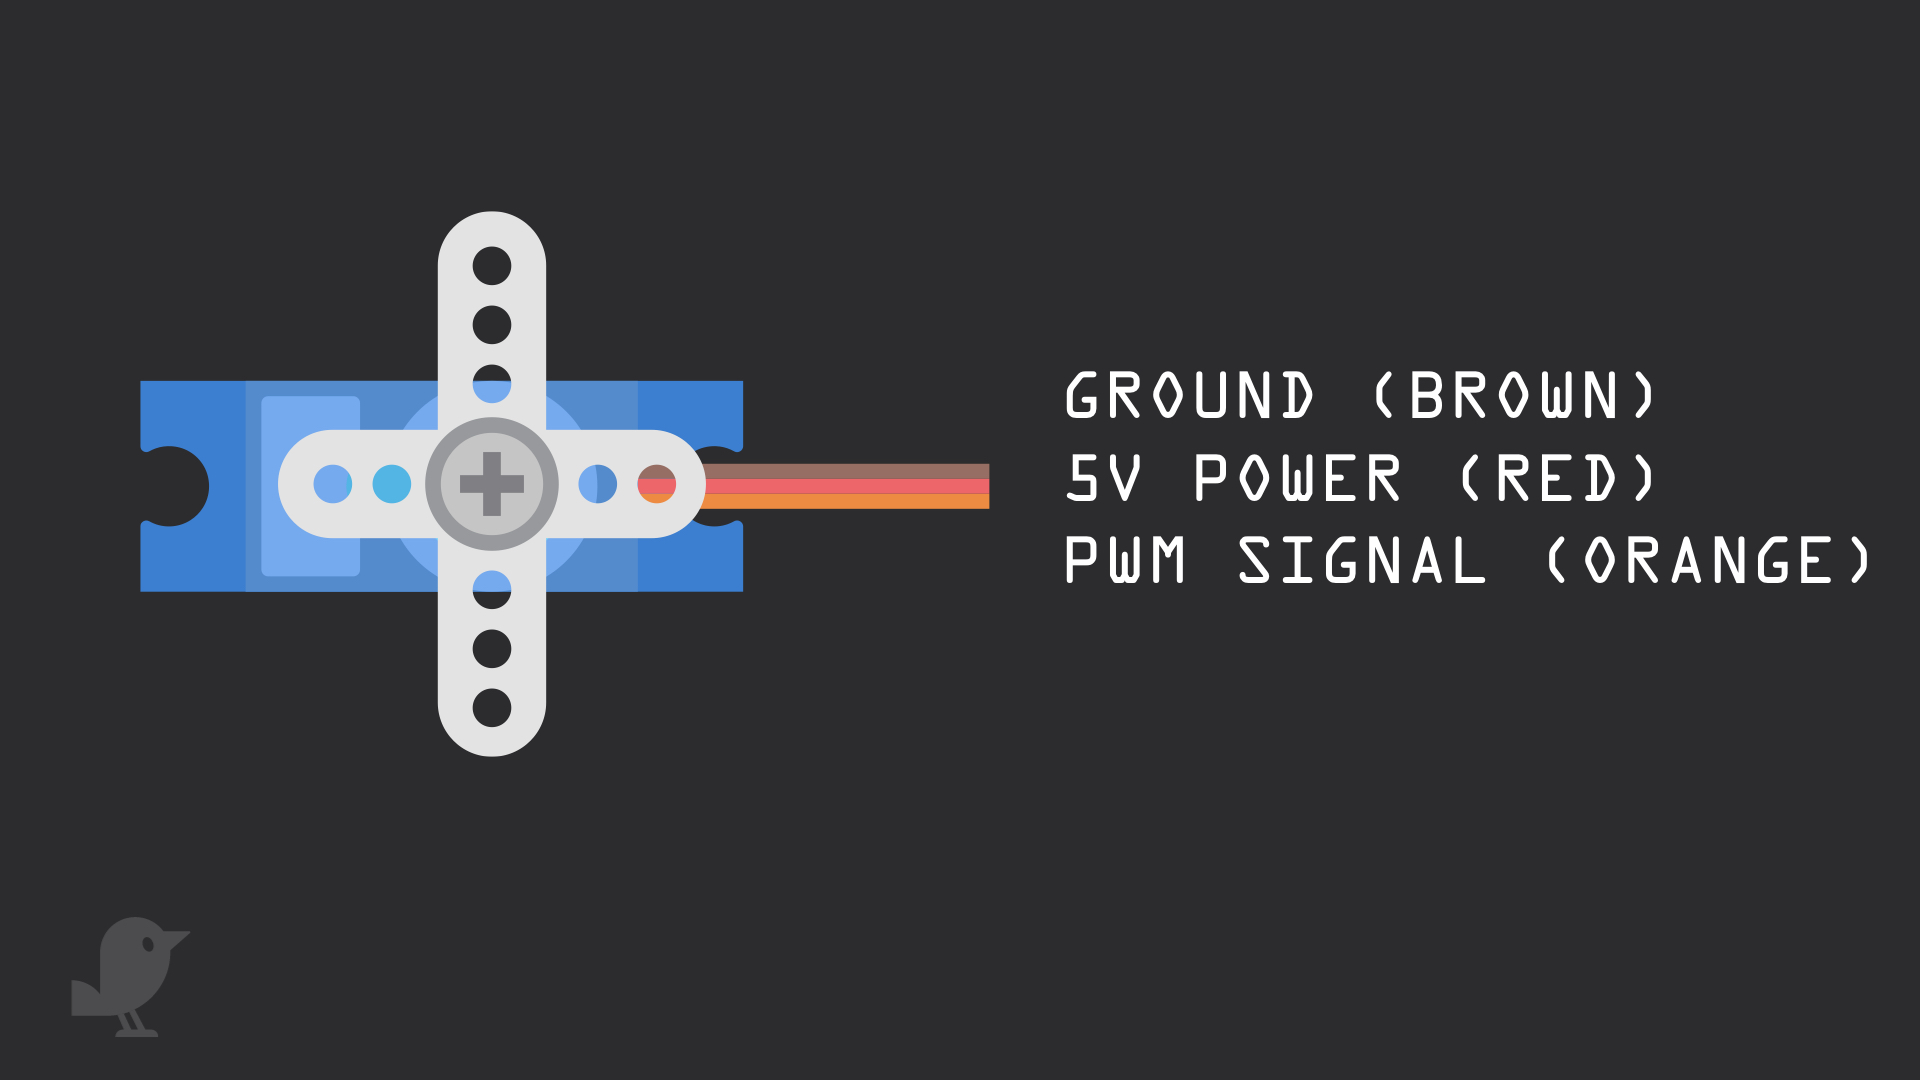
It has three wires:
Ground (Brown)
5V Power (Red)
PWM Signal (Orange)
Ground (Brown)
5V Power (Red)
PWM Signal (Orange)
In the following steps, you will learn to control a servo with the micro:bit.
Step 1 — Servo
While there are many different types of motors, a servo is ideal for pointer-like position-control applications. They are commonly used in robotics, for steering model cars, boats, airplanes and for many other sensor-positioning purposes. Here are some key points on servos:
It receives control signals from a controller, in this case the micro:bit
It receives control signals from a controller, in this case the micro:bit
Its position can be controlled more precisely than a standard DC motor
There are two kinds of servos in the kit, the micro servo 9g and the continuous servo. For the micro servo, its rotation angle can be set (limited to 180 degrees). The continuous servo can rotate 360 degrees.
For the micro servo, it may move a little beyond 180 degrees, if so, use this servo calibrator program
They are rated in kg/cm (kilogram per centimeter) which tells you how much weight your servo motor can lift at a particular distance.
For example, the TowerPro Analog SG90 servo used in this guide is rated 1.8kg/cm at an operating voltage of 4.8V.
So it should be able to lift 1.8kg if the load is suspended 1 cm away from the motor shaft.
The greater the distance, the lesser the weight carrying capacity.
For example, the TowerPro Analog SG90 servo used in this guide is rated 1.8kg/cm at an operating voltage of 4.8V.
So it should be able to lift 1.8kg if the load is suspended 1 cm away from the motor shaft.
The greater the distance, the lesser the weight carrying capacity.
It has three wires:
Ground (Brown)
5V Power (Red)
PWM Signal (Orange)
Ground (Brown)
5V Power (Red)
PWM Signal (Orange)
In the following steps, you will learn to control a servo with the micro:bit.
Step 2 — Pulse Width Modulation (PWM)
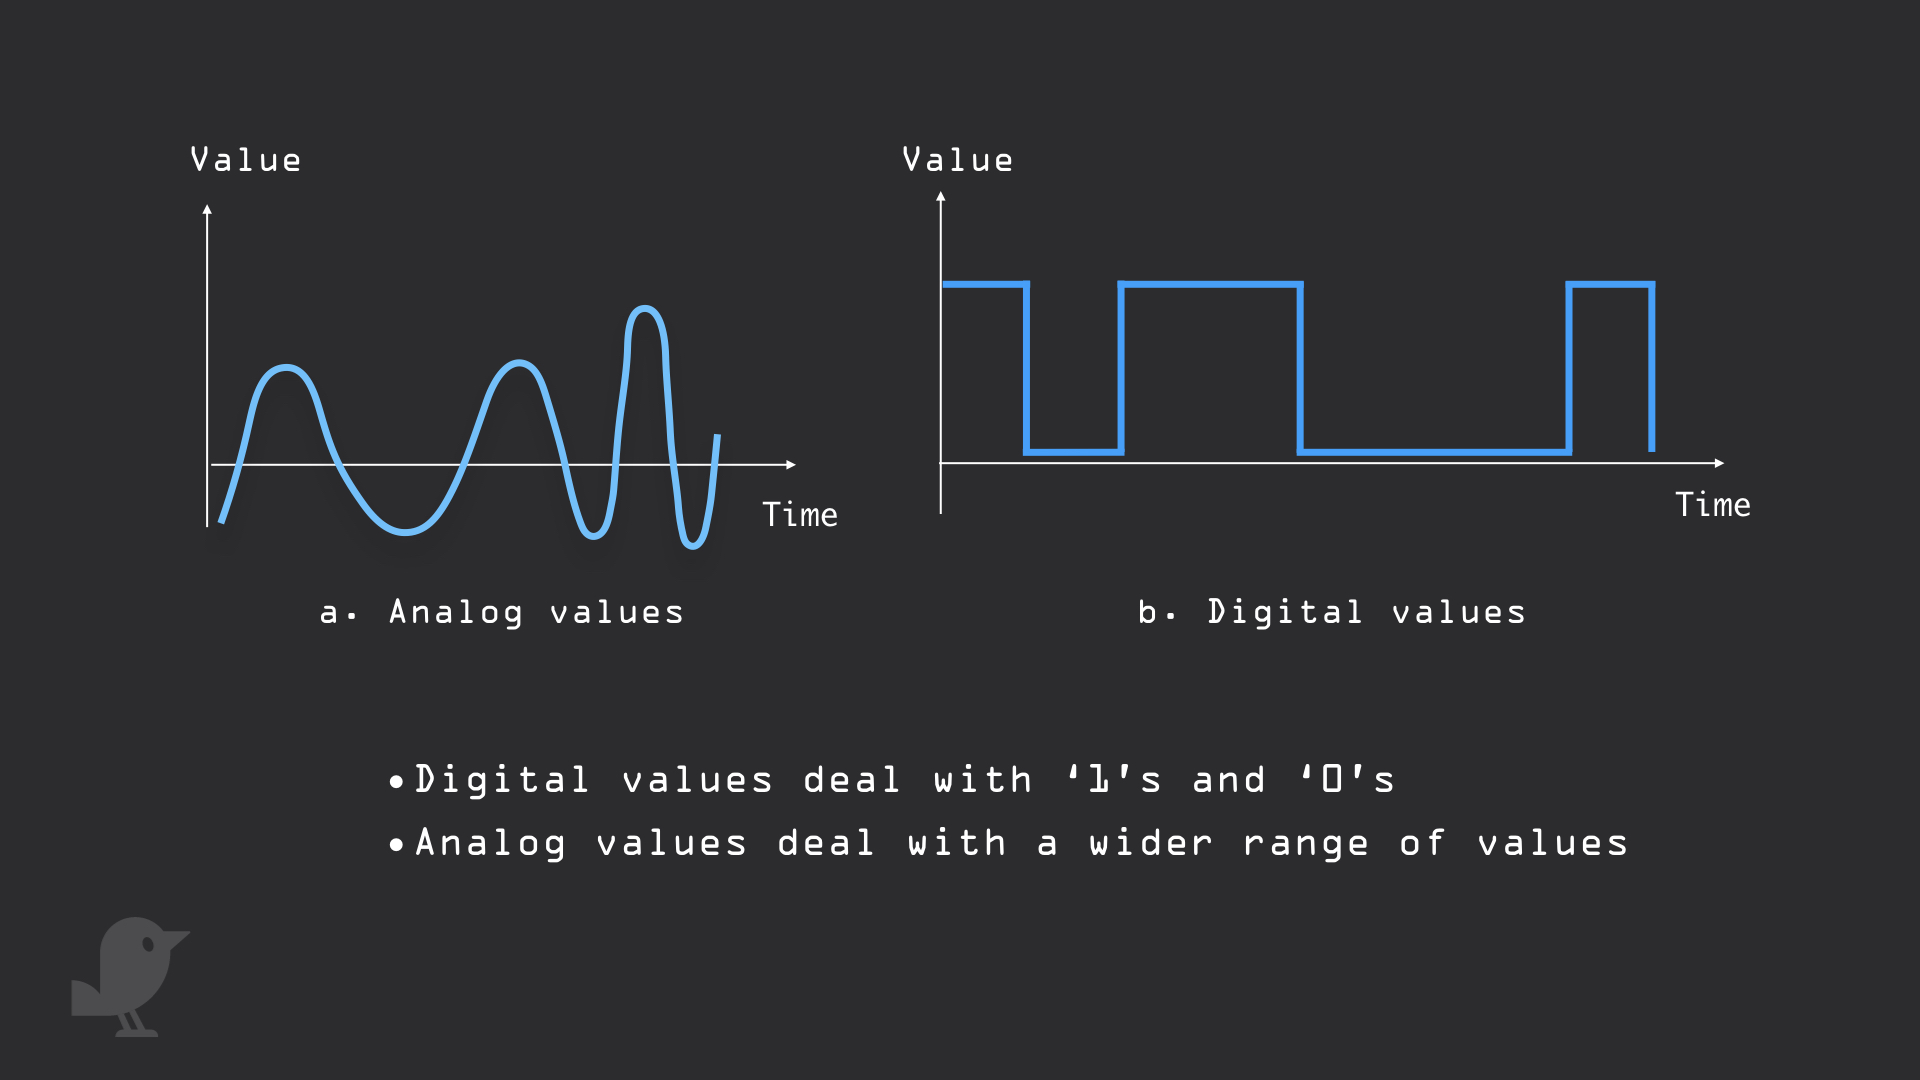
The micro:bit by itself is not able to send varying degrees of voltage out through its GPIO pins. So, what if you needed to produce analog effects such as when using a servo? To simulate analog effects, this can be done through pulse width modulation (PWM).
What PWM does is it turns a digital pin ON and OFF very quickly, which simulates various voltage levels.
By turning a pin ON and OFF very quickly, this varies the duty cycle of the pin (how much time it is spent in the 'ON' state)
Yup, the more time the pin is spent 'ON' over the course of a second, the longer the duty cycle, and higher the simulated voltage.
The MakeCode editor has servo-specific blocks that will allow the control of a servo through PWM. The PWM signal is mapped to specific angles from 0 to 180 degrees
Step 3 — Power
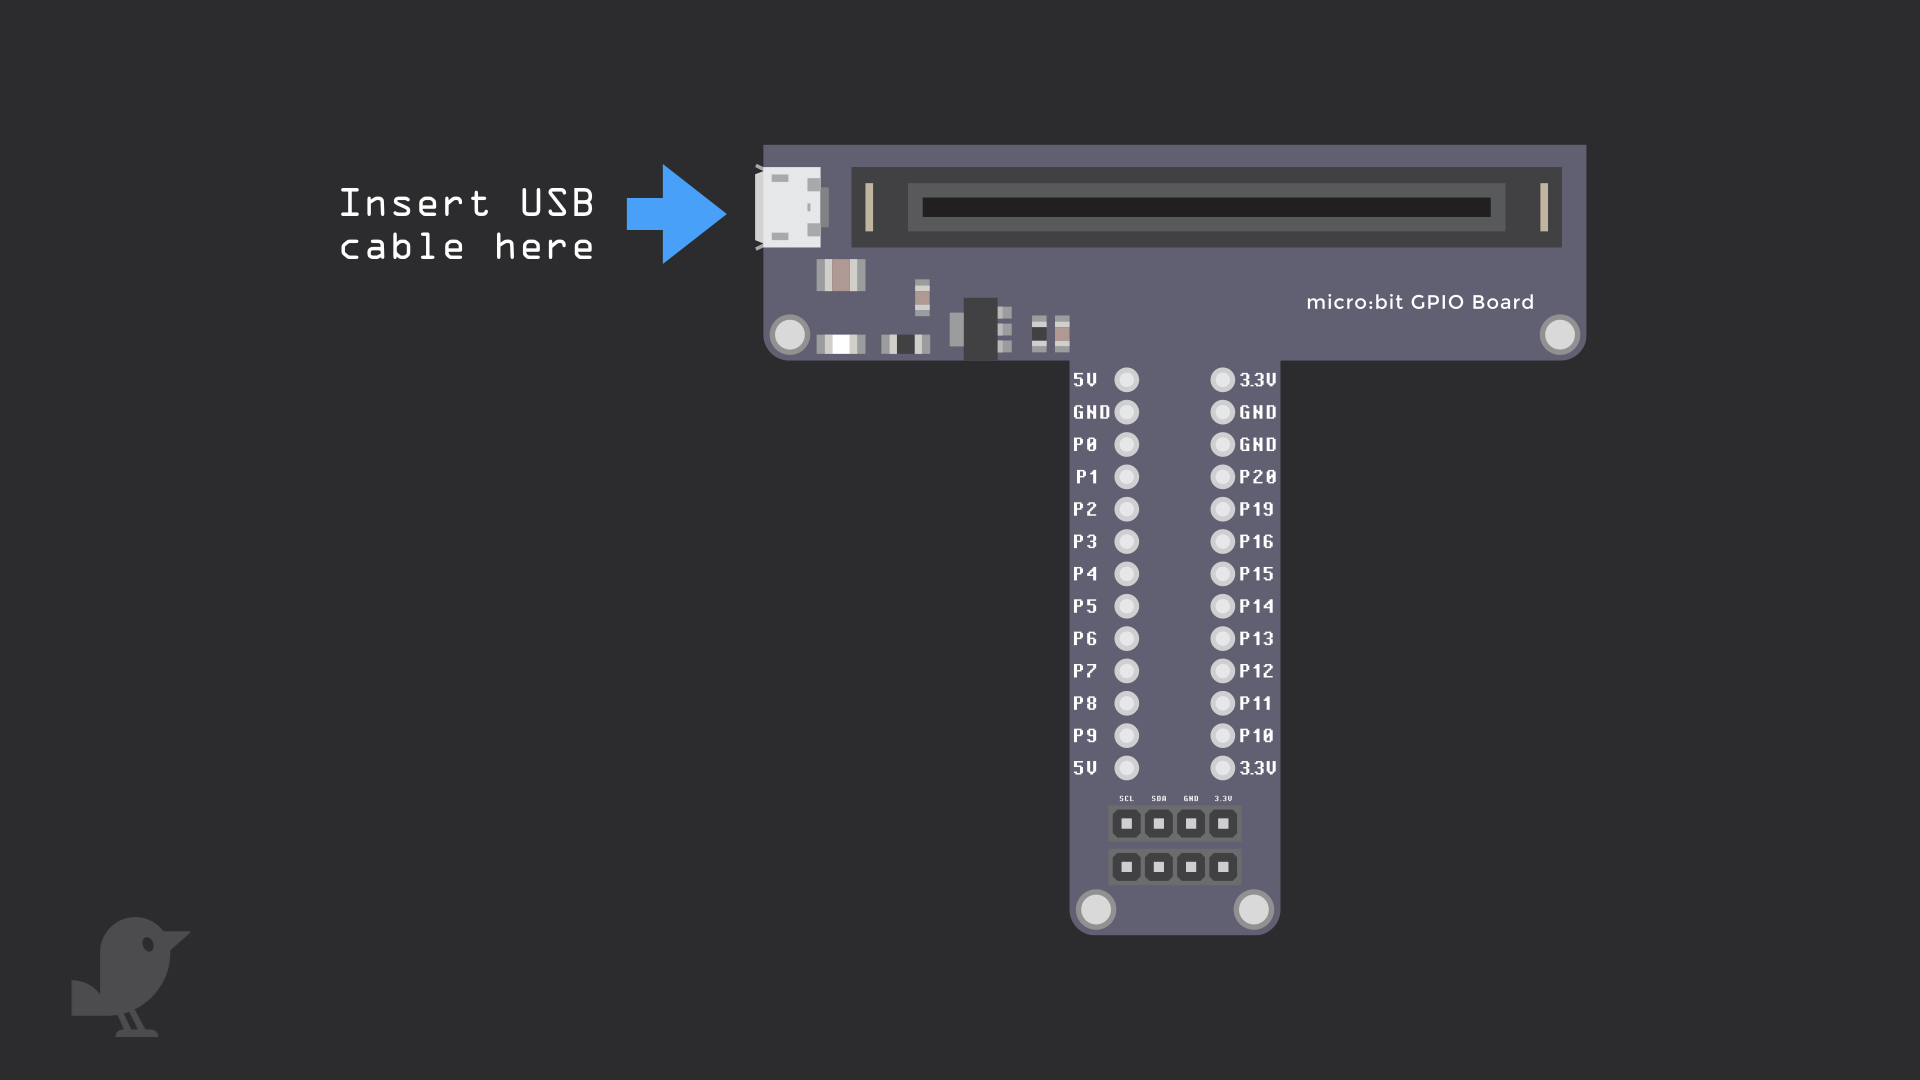
There are two ways to power the micro:bit, by using an external battery pack or with a USB cable
However, there is a maximum amount of current that the micro:bit can handle.
Using the micro:bit to power the servo via USB will get you very close to the limit.
To power the servo and make sure you are getting the full amount of torque from the servo, a battery pack is the ideal choice. For greater accuracy, we recommend powering the servo with an operating voltage of 4.8V to 6V.
While you could power the micro:bit via 3 volts, and get basic movement going from one position to another, it may not give you a highly accurate angle of rotation. Also, in a real application, it can cause issues with the micro:bit if the servo draws too much current when a load is placed on it.
Step 4 — Pin Overview
There are three pins on the servo. They are : SIG, 5V, and GND.
Step 5 — P0 to SIG
Connect SIG from the servo to P0 on the micro:bit
Step 6 — 5V
Connect 5V on the servo to B1 on the breadboard. Note: Whilst these servos can work with the micro:bit, the specified operating voltage for most servo motors is around +5V. According to the micro:bit foundation, the micro:bit can only supply a small amount of power to connected circuits (3V and 90mA for the V1 and 190mA for the V2 at a maximum). Trying to draw more power than the micro:bit can safely supply, could lead to damaging the device. You can connect it to 3.3V on the micro:bit to be safe.
Step 7 — GND to GND
Connect the GND pin to GND on the micro:bit
Step 8 — MakeCode Example 1
input.onButtonPressed(Button.A, function () {
    pins.servoWritePin(AnalogPin.P0, 180)
    basic.pause(1000)
})
input.onButtonPressed(Button.B, function () {
    pins.servoWritePin(AnalogPin.P0, 0)
    basic.pause(1000)
})
The MakeCode editor comes with support for using the servo. We'll program it so that by pressing button A on the micro:bit, the servo will turn a 180 degrees, and so spinning around one way
We'll also program it so that by pressing button B, it will return to its starting position.
We'll also program it so that by pressing button B, it will return to its starting position.
Open up the MakeCode editor
Click on 'New Project'
Copy and paste this code to the Javascript interface
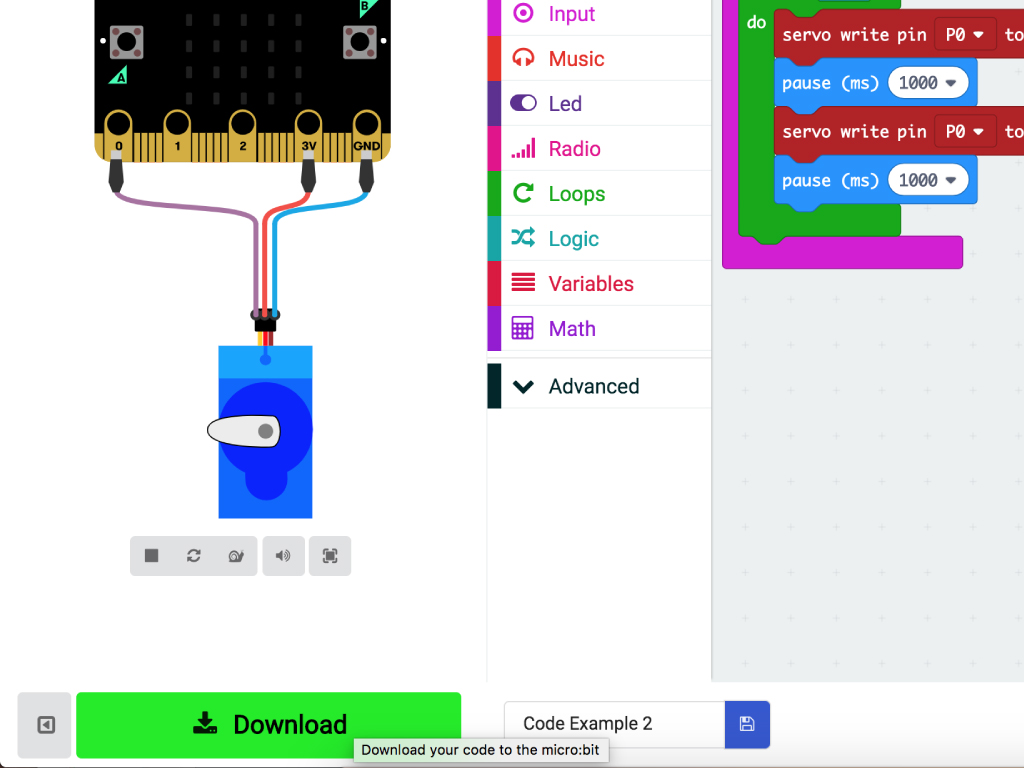
Step 9 — MakeCode Example 2
input.onButtonPressed(Button.A, function () {
    while (true) {
        pins.servoWritePin(AnalogPin.P0, 180)
        basic.pause(1000)
        pins.servoWritePin(AnalogPin.P0, 0)
        basic.pause(1000)
    }
})
In this second example:
After pressing button A, the micro:bit will start to turn one way followed by a pause of 1 second or 1000 ms, before going back to its starting position. Then there is another pause of 1 second. This process continues, where the servo moves one way and then the other until the micro:bit's power source is disconnected.
After pressing button A, the micro:bit will start to turn one way followed by a pause of 1 second or 1000 ms, before going back to its starting position. Then there is another pause of 1 second. This process continues, where the servo moves one way and then the other until the micro:bit's power source is disconnected.
Replace the existing code with the following code.
Step 10 — MakeCode Example 3 (Continuous servo)
input.onButtonPressed(Button.A, function () {
    while (true) {
        pins.servoWritePin(AnalogPin.P0, 0)
        basic.showNumber(1)
        basic.pause(3000)
        pins.servoWritePin(AnalogPin.P0, 180)
        basic.showNumber(2)
        basic.pause(3000)
        pins.servoWritePin(AnalogPin.P0, 90)
        basic.showNumber(0)
        basic.pause(3000)
    }
})
If you are using a continuous servo, copy and paste the following code into the Javascript editor.
Step 11 — Upload the code to the micro:bit
Finally, to upload the code to the micro:bit and test it out, connect the micro:bit to your computer using a microUSB cable
Step 12 — MakeCode Example 4
input.onButtonPressed(Button.A, function () {
    pins.servoWritePin(AnalogPin.P0, 180)
    basic.pause(1000)
})
input.onButtonPressed(Button.B, function () {
    pins.servoWritePin(AnalogPin.P0, 0)
    basic.pause(1000)
})
pins.servoSetPulse(AnalogPin.P0, 500)
The code in this example are kept exactly the same as MakeCode example 1, with an added 'pins.servosetPulse(AnalogPin.P0, 500)'.
Changing the second parameter changes the pulse width to a specified value. The following code sets the servo pulse to 500 microseconds.
Replace the previous code with this in the Javascript interface.
Parts List
Required Parts (1)
Project Summary
1 part total
Required parts
$79.35
Total (required)
$79.35
Unavailable items will be skipped
