
Beginner
Use an IR Receiver with Arduino
Receive controls from your remote control!
By Cherie Tan
An IR receiver uses infrared communication. Infrared light, unlike visible light, has a slightly longer wavelength and so is undetectable to the human eye. But it is detectable by a TV which listens for IR signals.
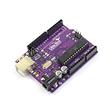
In this guide, you will learn how to capture button presses on a remote with the 100% compatible Arduino development board, the Little Bird Uno R3 and an Arduino compatible IR receiver module. Have a try with a few different remote controls you have around the house!
After completing this guide, you will understand the basics involved and can use an IR receiver in your very own Arduino projects!
Connect Digital Pin 11 to the Signal Pin of the IR Receiver.
Step 1 — Connect Digital Pin 11 to the IR Receiver
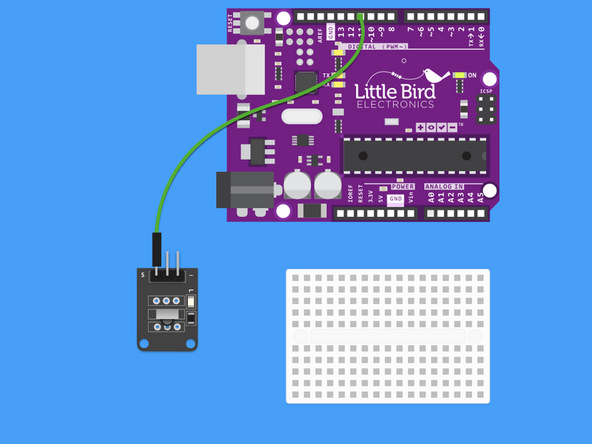
Connect Digital Pin 11 to the Signal Pin of the IR Receiver.
Step 2 — Connect 5V to the 5V Pin of the IR Receiver
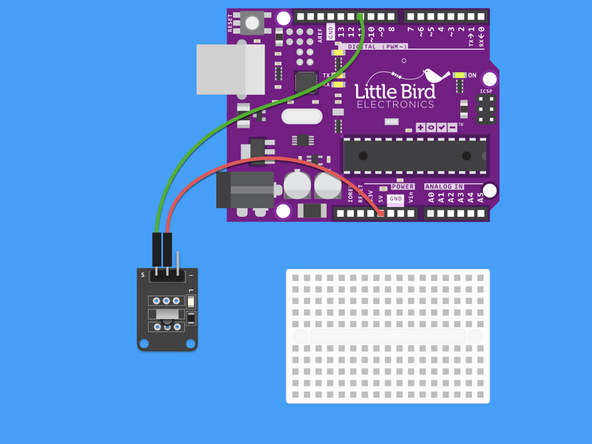
Connect 5V to the 5V (middle) Pin of the IR Receiver.
Step 3 — Connect Ground to the Ground Pin of the IR Receiver

Connect Ground to the Ground Pin of the IR Receiver.
Step 4 — Insert LED into the Breadboard

Insert the LED into the breadboard with the Cathode (shorter leg) on the left hand side.
Step 5 — Insert 220 Ohm Resistor into the Breadboard

Insert a 220 Ohm Resistor into the Breadboard with one leg in line with the LED's anode (longer leg).
Step 6 — Connect LED Cathode to Ground
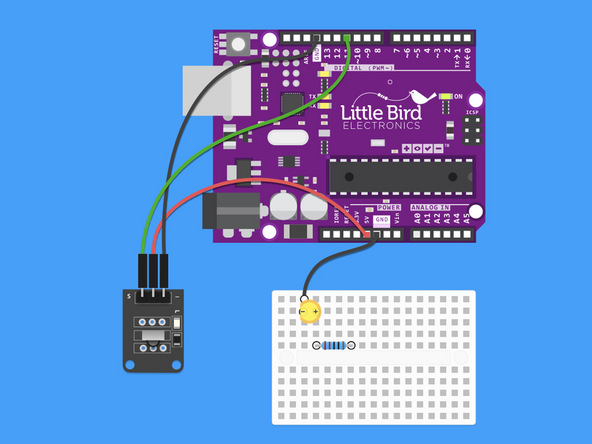
Connect LED's Cathode to a Ground Pin on your Arduino.
Step 7 — Connect Resistor to Digital Pin 13

Connect the 220 Ohm Resistor to Digital Pin 13.
Step 8 — Get the Code
#include <IRremoteInt.h>
#include <IRremote.h>

int RECV_PIN = 11; //define input pin on Arduino
IRrecv irrecv(RECV_PIN);
decode_results results;
void setup() {
  Serial.begin(9600);
  irrecv.enableIRIn(); // Start the receiver
  pinMode(LED_BUILTIN, OUTPUT);

}
void loop() {
  if (irrecv.decode( & results)) {
    String hex = String(results.value, HEX);
    Serial.print("Hexadecimal Code: ");
    Serial.println(hex);

    if(hex == "ff18e7"){
        digitalWrite(LED_BUILTIN, HIGH);   // turn the LED on (HIGH is the voltage level)
    }

    if(hex == "ff4ab5"){
        digitalWrite(LED_BUILTIN, LOW);    // turn the LED off by making the voltage LOW
    }

    irrecv.resume(); // Receive the next value
  }
}
Copy this code and open it in your Arduino IDE.
This code won't work without the IRremote Library (we'll install that next).
Step 9 — Open the Arduino Library Manager
Open the Arduino Library Manager by clicking on Sketch â Include Libraries â Manage Libraries.
Step 10 — Install the IRremote Library
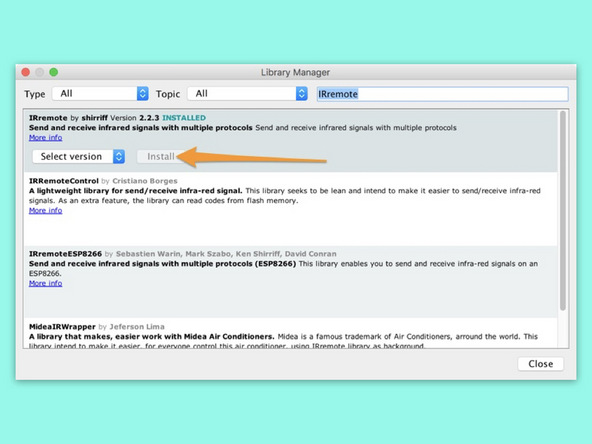
Search for the IRremote Library and install the latest version.
Step 11 — Upload the code and open your Serial Monitor

Upload the code to your Arduino.
Open the Serial Monitor and view the code that is being sent from your remote control.
When you press the up and down arrows the LED should turn on and off.
Try and use another remote control you have at hand!
Parts List
Optional Extras (1)
Project Summary
1 part total
Required parts
$0.00
Optional extras
+$19.55
Total (required)
$0.00
Unavailable items will be skipped
