Use a Two Colour LED Module with micro:bit
Make a Two Colour LED blink using the micro:bit
Written By: Cherie Tan
Difficulty
Easy
Steps
10
Want to make an LED light up and easily change their colours?
In this guide, we will learn to use a handy little LED module and make it blink using the micro:bit!
After completing this guide, you will understand how to use an LED and create a simple program using MakeCode.
If you're using the Micro:bit Advent Calendar, you'll need the contents of the bags labelled 1 and 25.
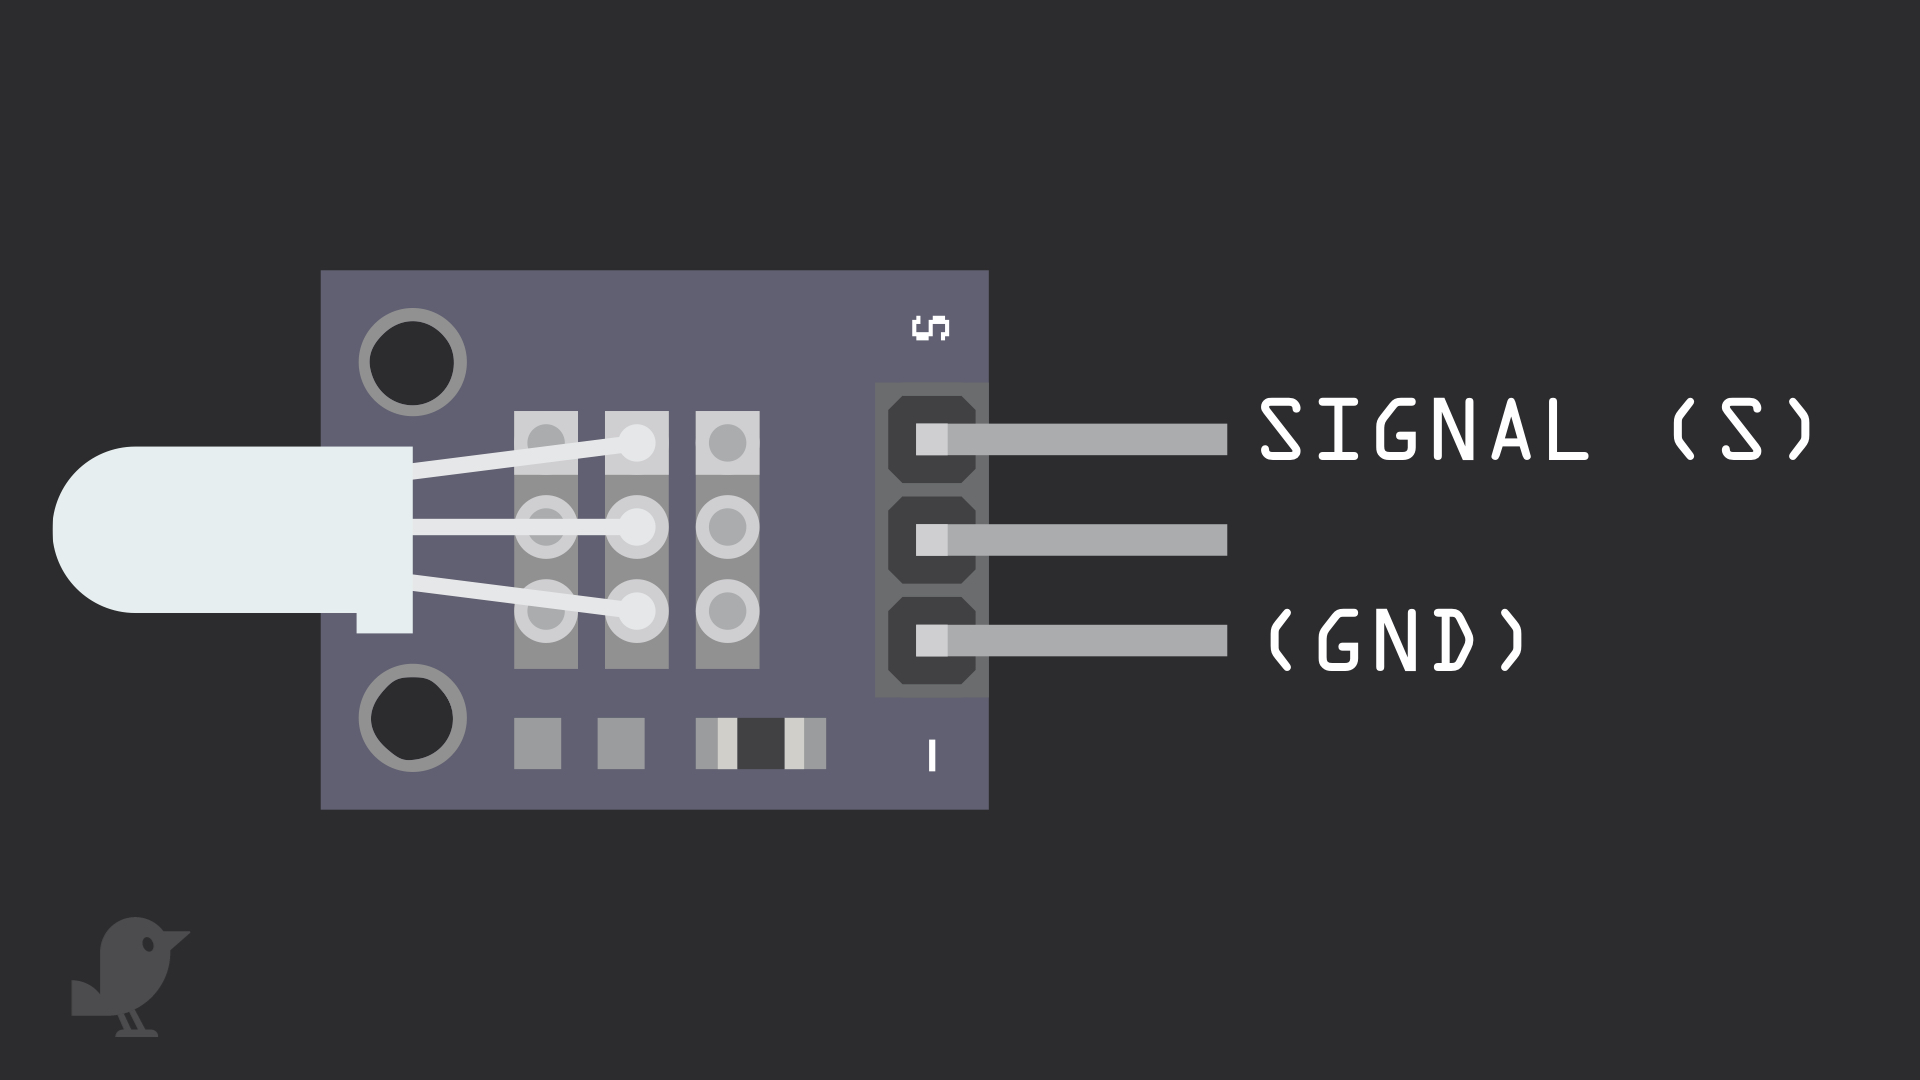
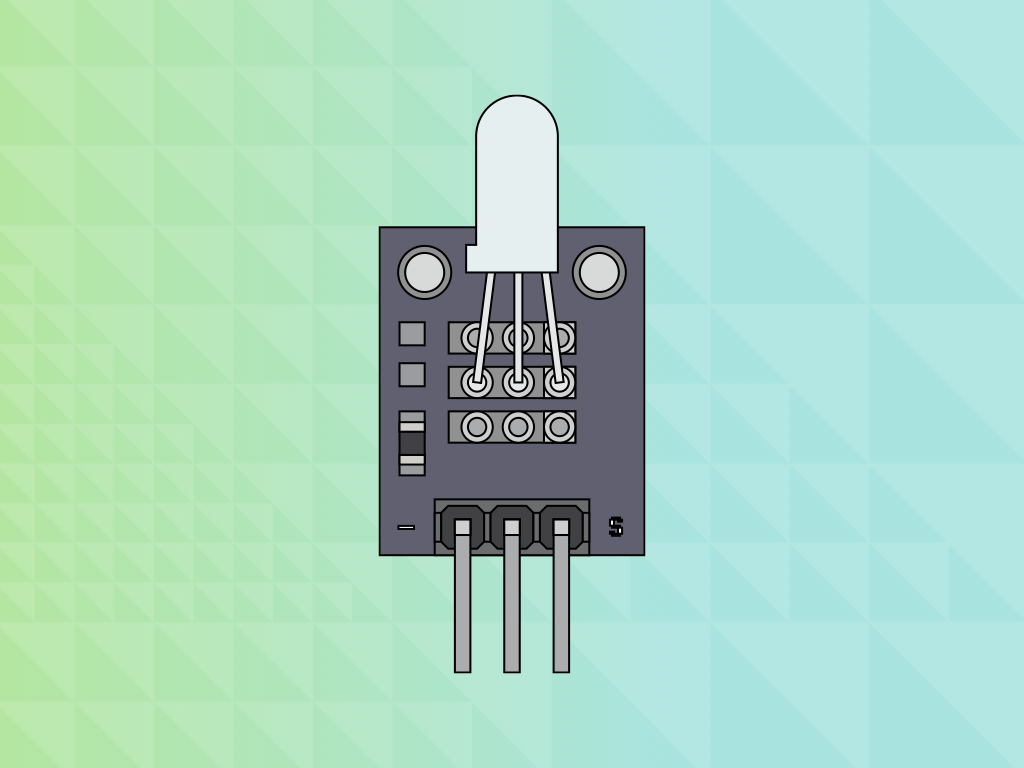
Before we begin, let's take a closer look at the Two Colour LED module! There are three pins:
Signal: This pin is a signal pin, and can be used to emit a green light
Middle Pin : This pin is another signal pin, and can be used to emit a red light
GND: Though it is labelled '-' on the module, this is the ground pin also known as 'GND'. What is 'GND'? In electronics, we define a point in a circuit to be a kind of zero volts or 0V reference point, on which to base all other voltage measurements. This point is called ground or GND.
Voltage is the difference in electric potential between two points. As it is difficult to talk about voltage without a reference point, we need another point to compare it to.
You might have noticed an 'R1' on the module, this stands for 'resistor'. However, the resistor here is actually a 0Ω resistor, so we will need to use external resistors in the circuit!
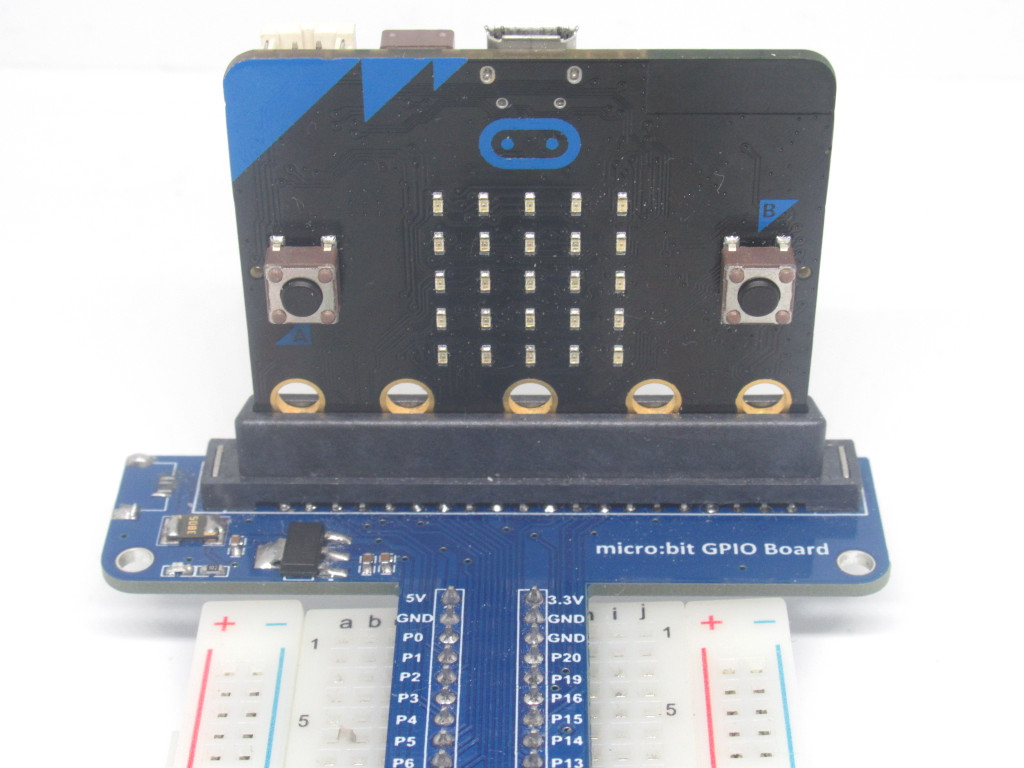
Insert the micro:bit into the breakout board.
Make sure that the micro:bit is inserted in the right orientation, with the buttons facing inward as shown.
basic.forever(function () {
    pins.digitalWritePin(DigitalPin.P0, 1)
    basic.pause(250)
    pins.digitalWritePin(DigitalPin.P0, 0)
    basic.pause(250)
})
The first program we will create will make the LED module flash red. So open up the Makecode Editor.
Click on the Projects button
Create a new document
Copy and paste the Javascript code into the Javascript programming interface.
Click on the 'blocks' interface button and you should now see the MakeCode blocks.
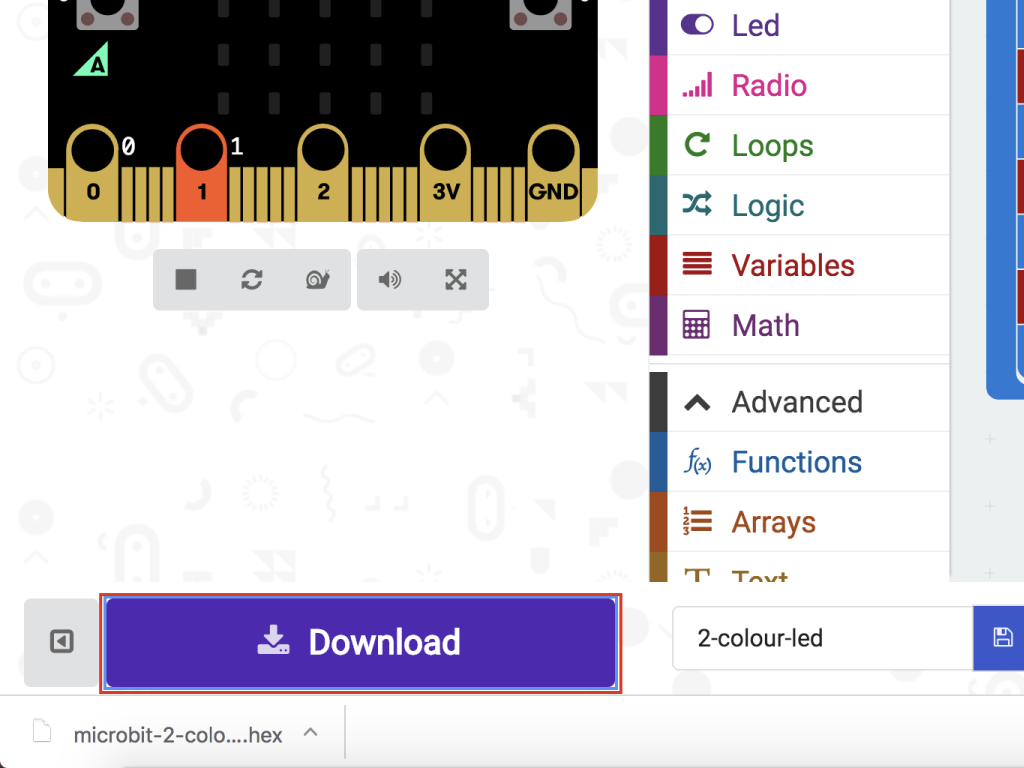
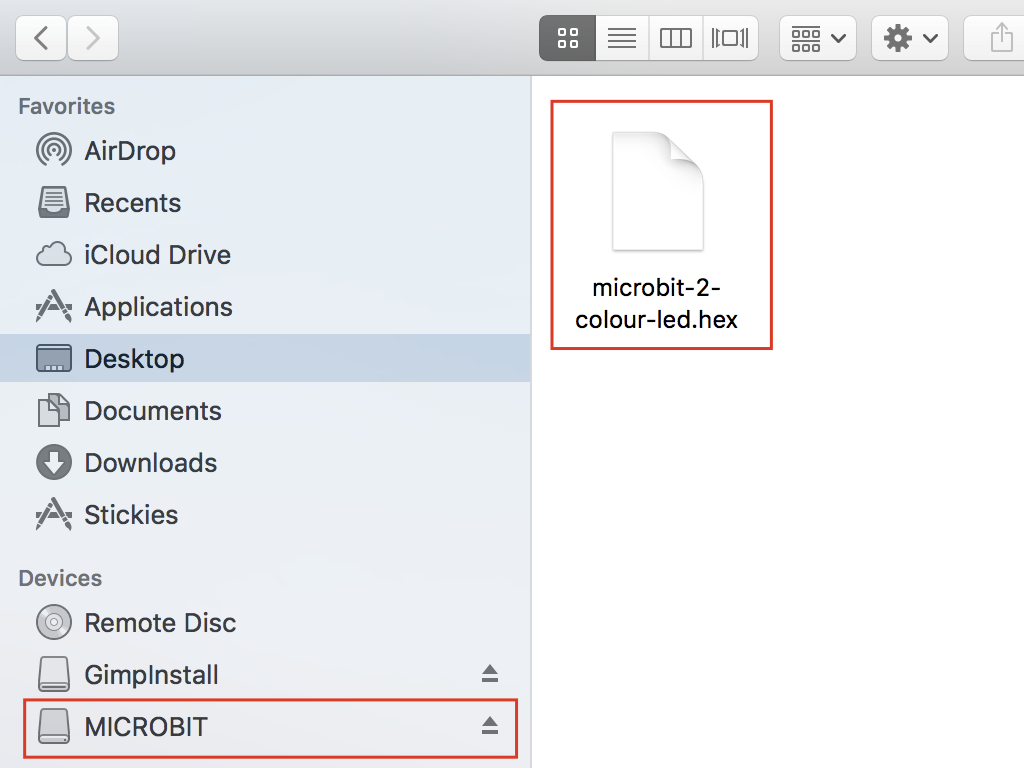
First off, click the download button in the bottom left corner of the screen. This will download a hex file (computer program file) which the micro:bit can read.
Next, plug in your micro:bit, this will reveal a USB on your computer.
Lastly copy across the downloaded file to the micro:bit by dragging and dropping it into the MICRO:BIT drive
The micro:bit will flash as the code is being uploaded. Once done, unplug the micro:bit.