Scrolling Backgrounds with PICO-8
Create the illusion of depth and movement in PICO-8 games
Written By: Cherie Tan
Difficulty
Medium
Steps
13
In this guide, we will add on to our simple PICO-8 game from Sprites and Animation with PICO-8. You will learn to further use the map editor and draw out a level map.
You will learn to create a scrolling background for the game, spawn extra items, and create a game over as well as player congratulatory screen.
Complete this guide to learn how to add depth and movement into your game's background!
You will learn to create a scrolling background for the game, spawn extra items, and create a game over as well as player congratulatory screen.
Complete this guide to learn how to add depth and movement into your game's background!
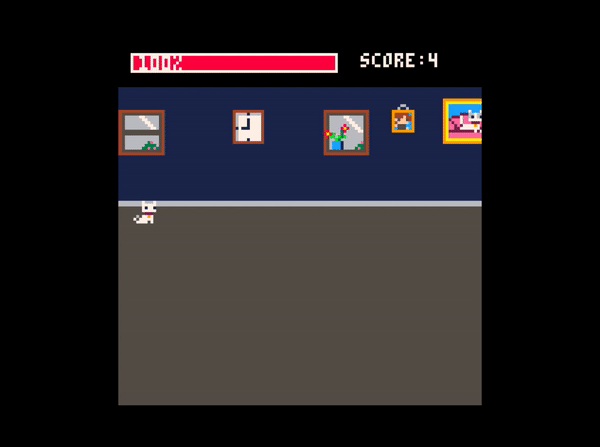
Scrolling backgrounds are a fantastic way to give the illusion of movement and depth. In this guide, we will turn our simple PICO-8 game inspired by the classic space shooter, into a scrolling dodge 'em up!
To go a step further, backgrounds can also be layered and moved at different speeds. This way of adding speed and depth to backgrounds is called parallax scrolling.
To create a background, the map() function will draw the contents of the map editor to the screen. You can view the syntax for the map() function in detail here, but a brief run-down on how it works:
map( mapx, mapy, screenx, screeny, mapwidth, mapheight )
map( mapx, mapy, screenx, screeny, mapwidth, mapheight )
- mapx: The x cell number of the map. This is the location of the top left of the map in the map editor, found by counting the number of tiles or cells from the left edge.
- mapy: The y cell number of the map. This is the location of the top left of the map in the map editor, found by counting the number of tiles or cells from the top edge.
- screenx: The x coordinate on the game screen where the map is to be drawn – this is measured in pixels.
- screeny: The y coordinate of the game screen where the map is to be drawn – this is measured in pixels.
- mapwidth: The number of map cells wide in the region to draw – measured in cells.
- mapheight: The number of map cells tall in the region to draw – measured in cells.
One important difference between mapx or mapy and screenx and screeny is that the former are measured in cells, whereas the latter in pixels.
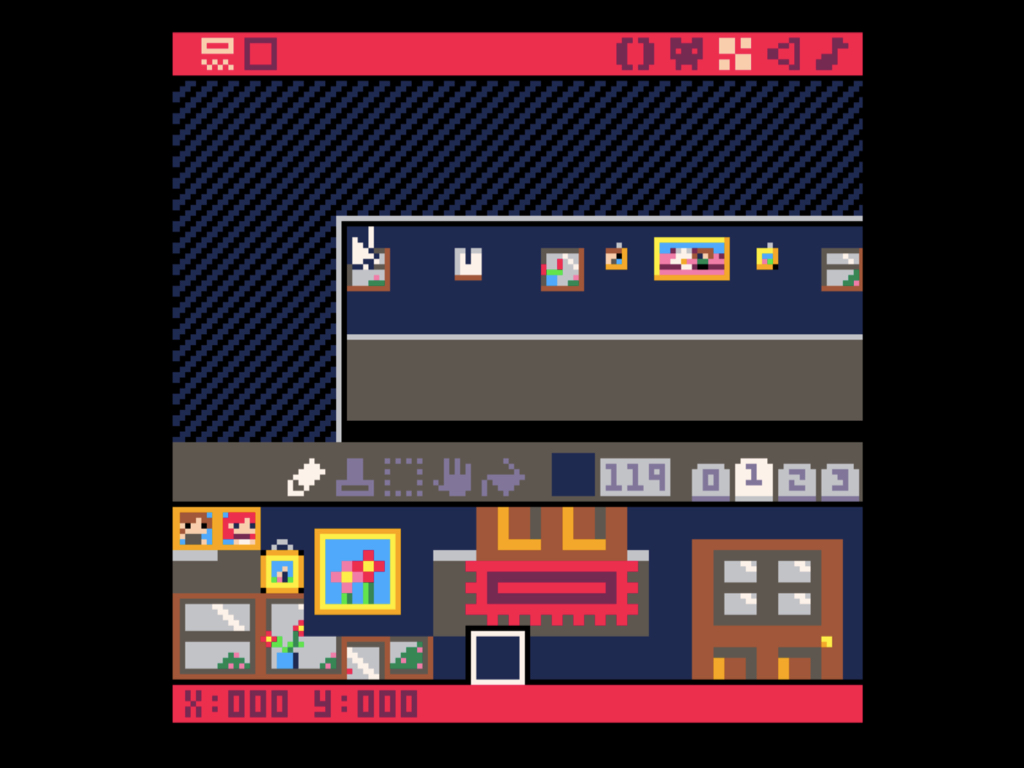
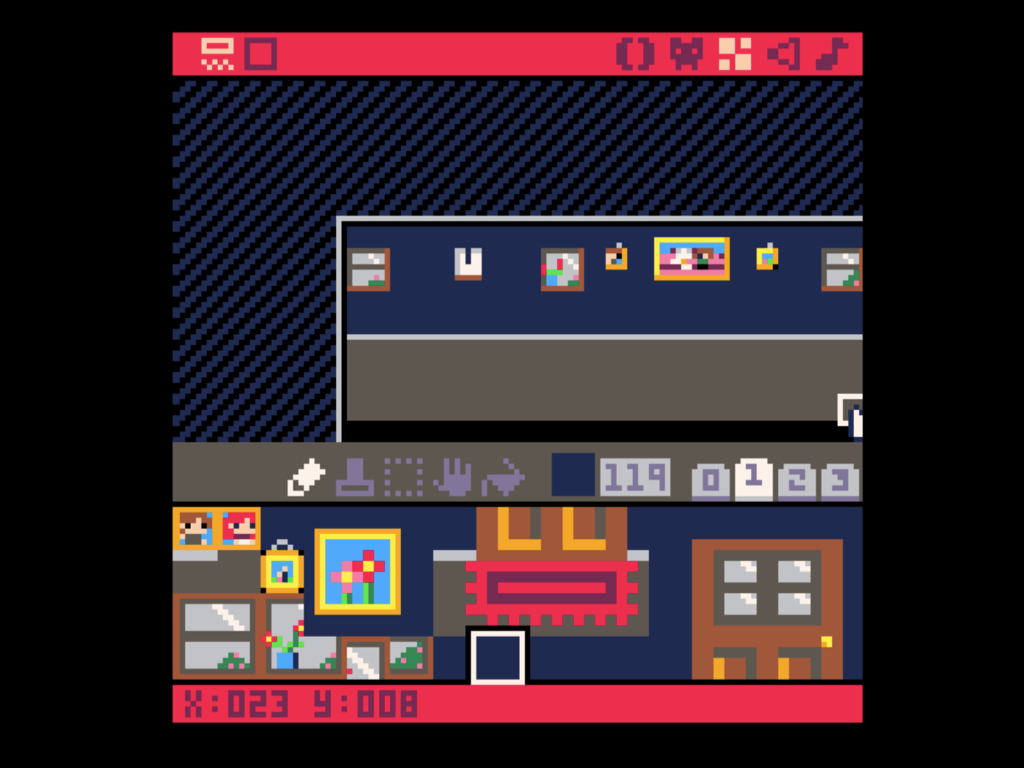
Imagine that we had a map we wanted to draw to the screen, starting at cell x:0 y:0. We want to draw it to the bottom right of the screen where the cursor is placed.
The cells are counted from 0, so these cells are 24 and 9 from top left of the screen.
We will need two copies of the background which will then later be placed next to each other.
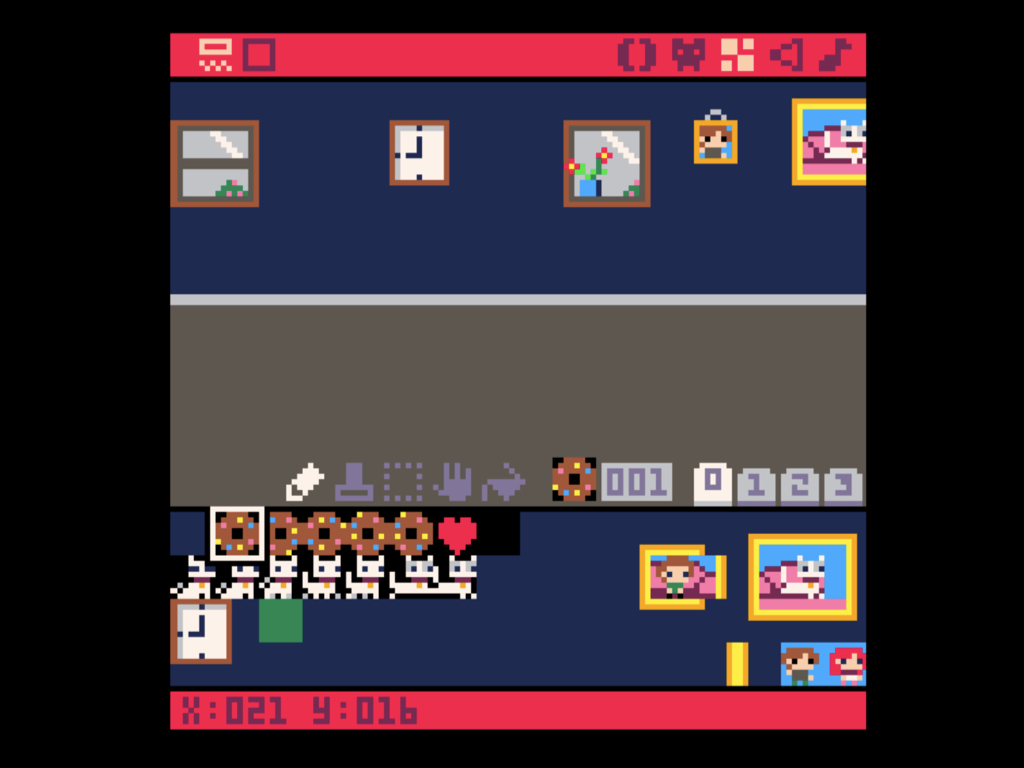
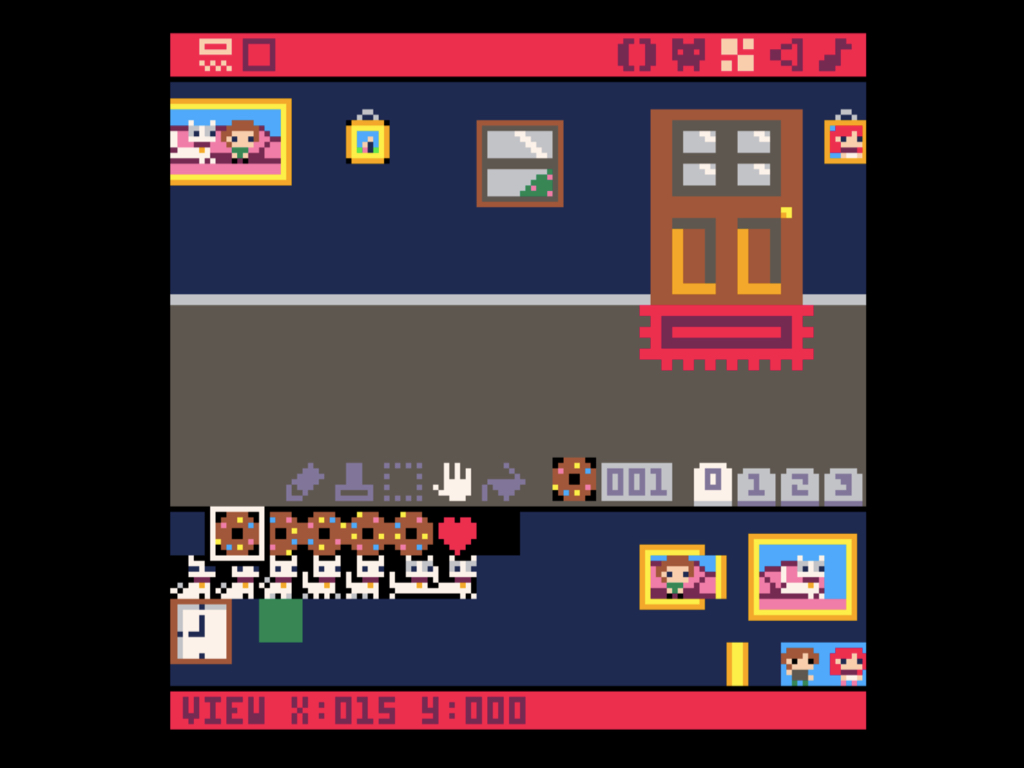
Now that you have an idea of how the background will be drawn to the screen, first, plan out the rest of the background over in the map editor. Here, the background is comprised of an indoor room with paintings, a clock, windows, and a door.
Use the mouse wheel to zoom in or out and add the pixel blocks that will make up the background of your game.
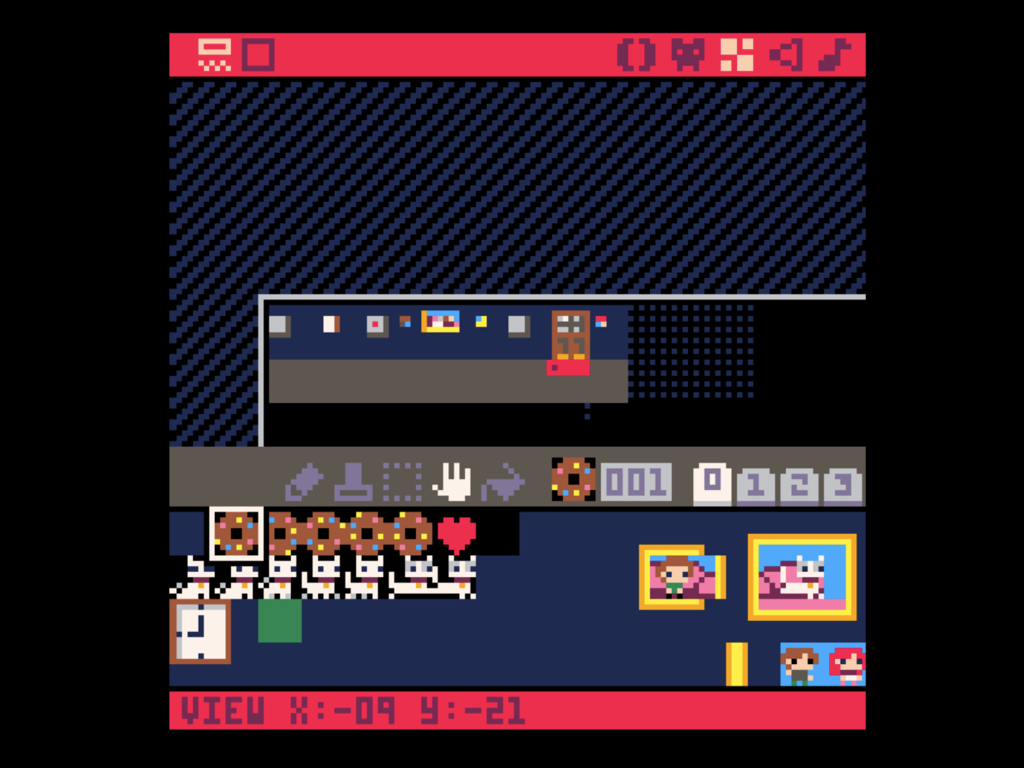
Next, we will need to change the camera offset in the game by using the camera() function.
This function lets you set a camera offset that causes all draw operations to have the offset subtracted from their x and y coordinates. That is to say, the camera sets the origin point for draw functions. By default, it is (0,0)
This function lets you set a camera offset that causes all draw operations to have the offset subtracted from their x and y coordinates. That is to say, the camera sets the origin point for draw functions. By default, it is (0,0)
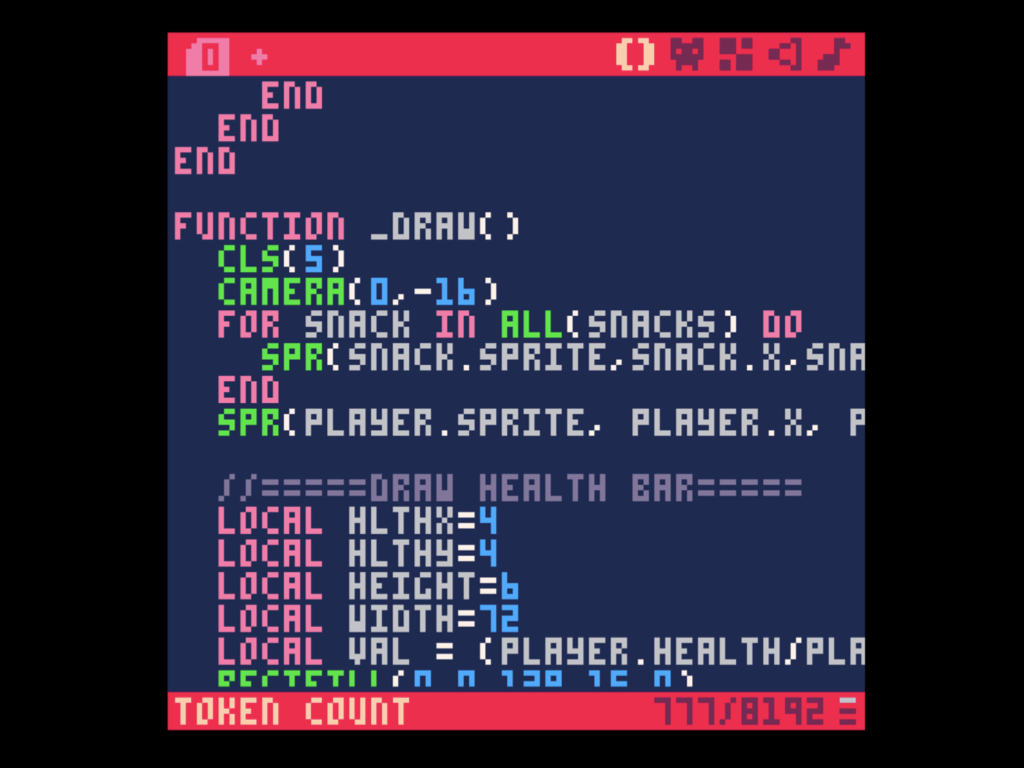
Go ahead and add camera(0,-16) into the _draw() function
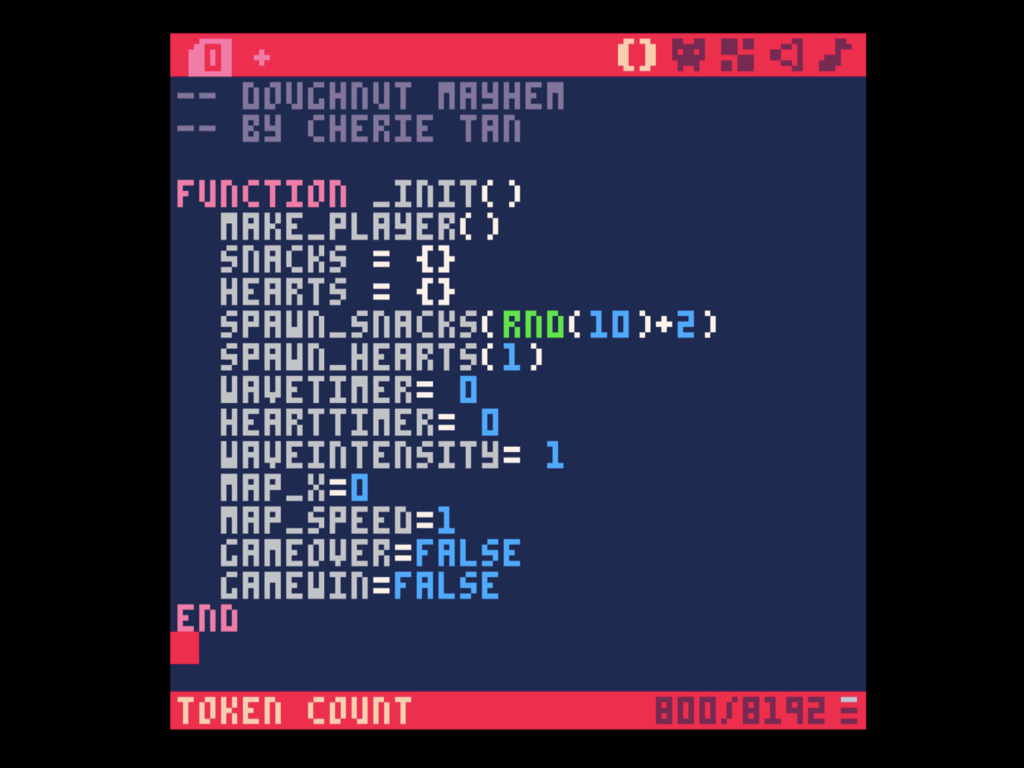
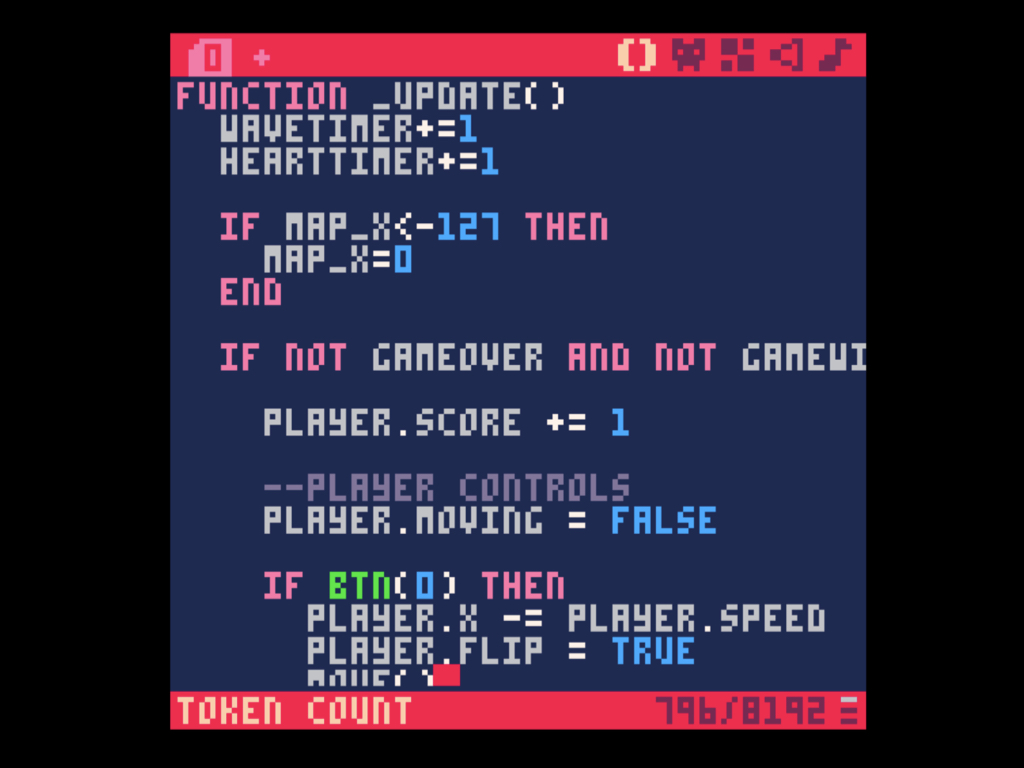
By controlling the location on the game screen with a variable for its position and a variable to control its speed, we can slowly move the background to the left of the game. Go ahead and declare a new variable in _init() called map_x with a value of 0. This is the variable for the position of the background.
Then declare another variable called map_speed with a value of 1
While we are at it, declare another two more variables: gameover and gamewin. Let both have a starting value of false. These will later be used for our game over and player congratulatory screens.
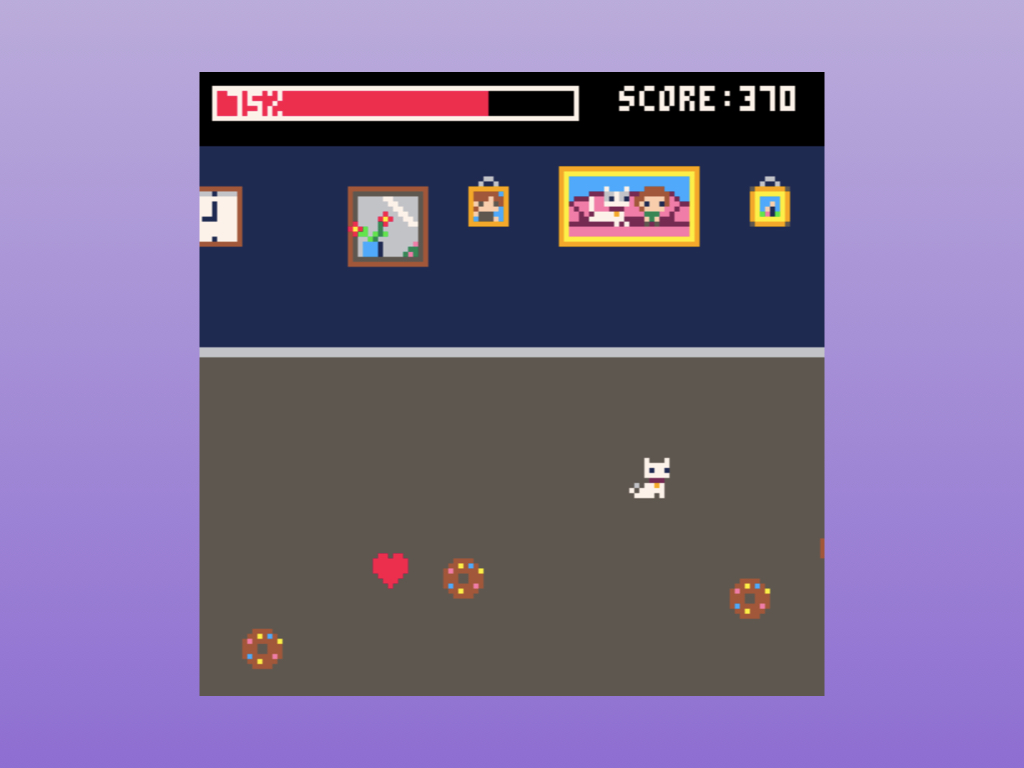
We will also add player lives as an item in this game, and they will be created similar to how the snacks were created. So go ahead and make a new empty table called hearts.
Next, create a new function called spawn_hearts and call it within _init().
Finally, create another variable, hearttimer.
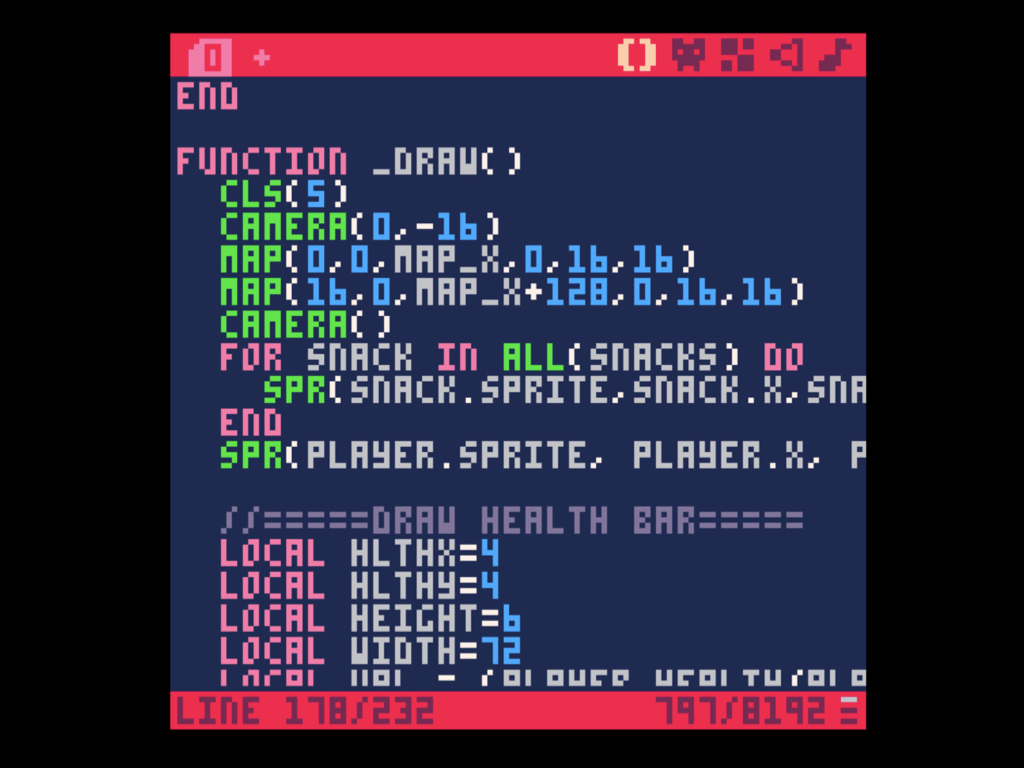
Here, the map is drawn at the value of map_x from the left and 0 pixels from the top. The second map is drawn map_x+128 from the let, and 0 from the top.
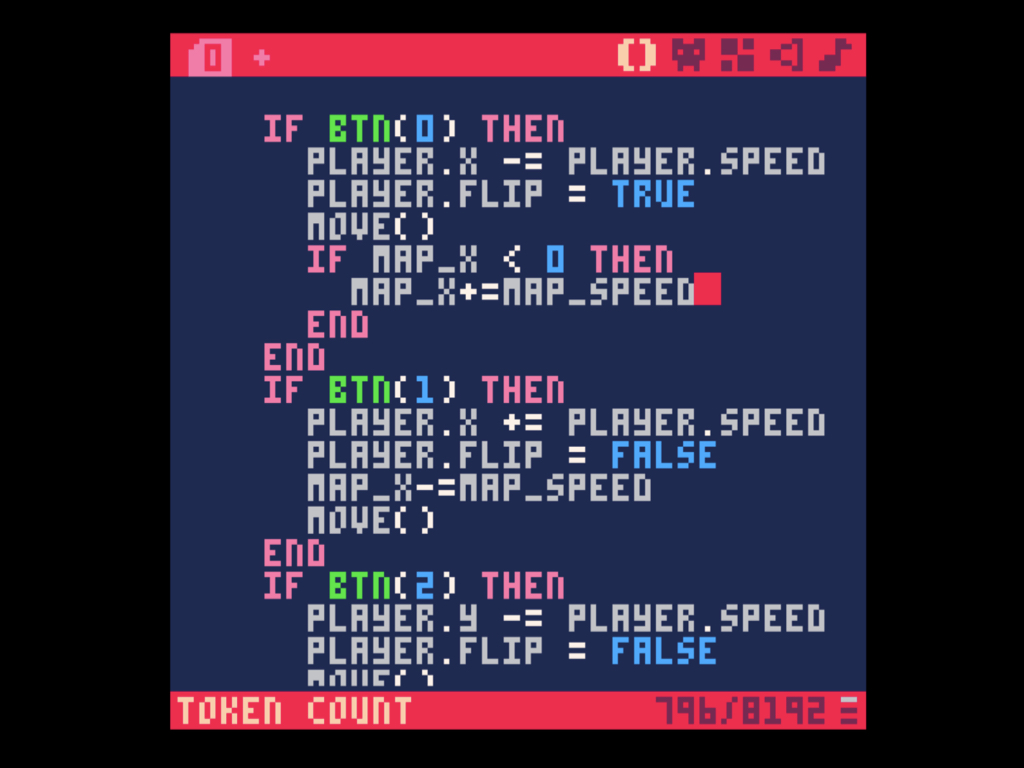
In _update(), the value of map_x changes until it gets all the way to the left of the screen. When it is at a value of -127, it is reset to 0.
For the background to scroll according to player movement, add the conditions as shown in if btn(0) then and if btn(1) then.
To get the background scrolling, we'll need to use the map() function. Two copies are drawn, first of map_x, and the second with map_x shifted at 128 pixels -- the width of the screen
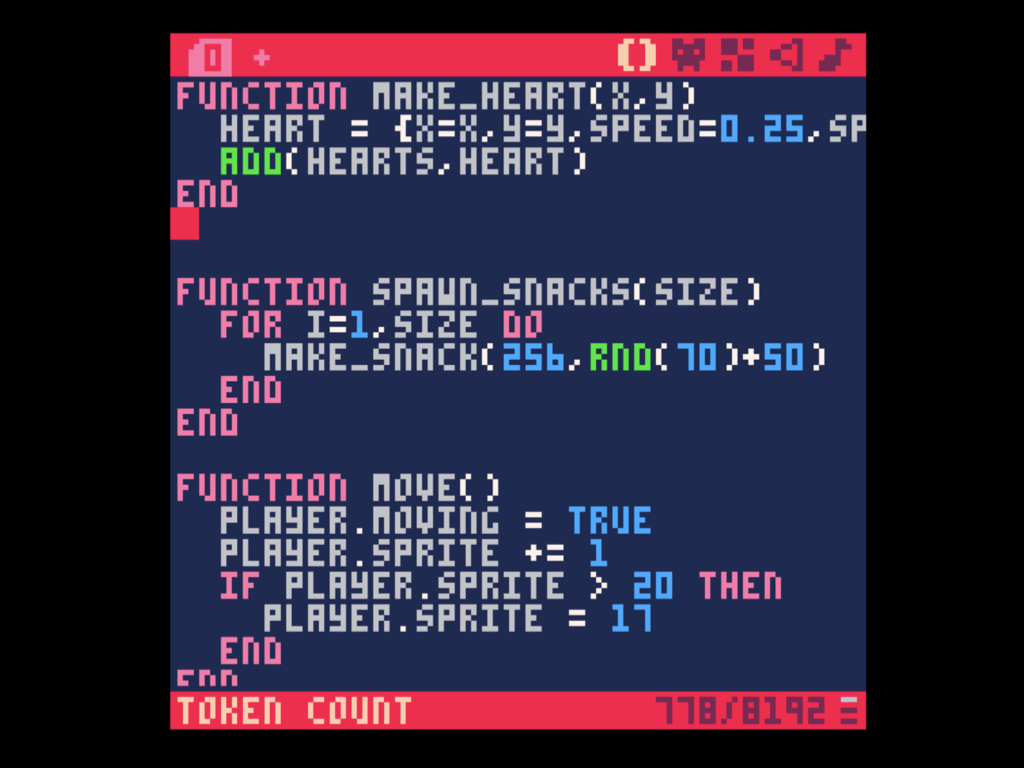
Next, we will need to create a function that will make heart sprites and add them to the empty hearts table.
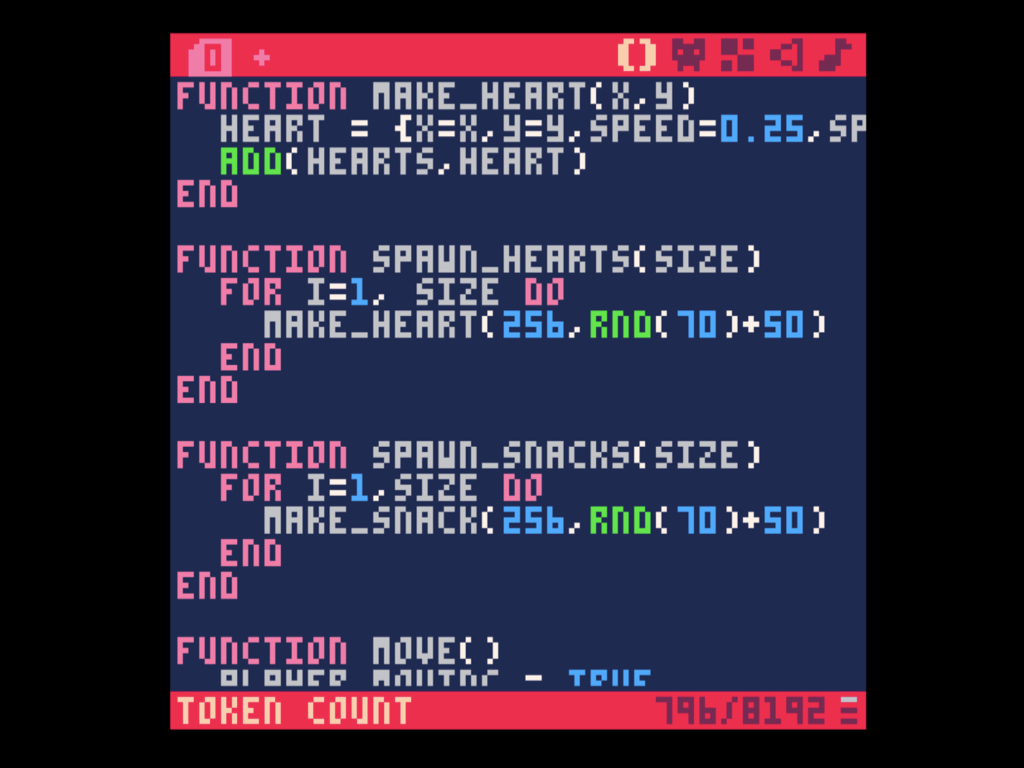
Making the player lives or heart items is the first step, next we'll also need to create another function to spawn the items into the game. So go ahead and create a new function called spawn_hearts which accepts one parameter, size.
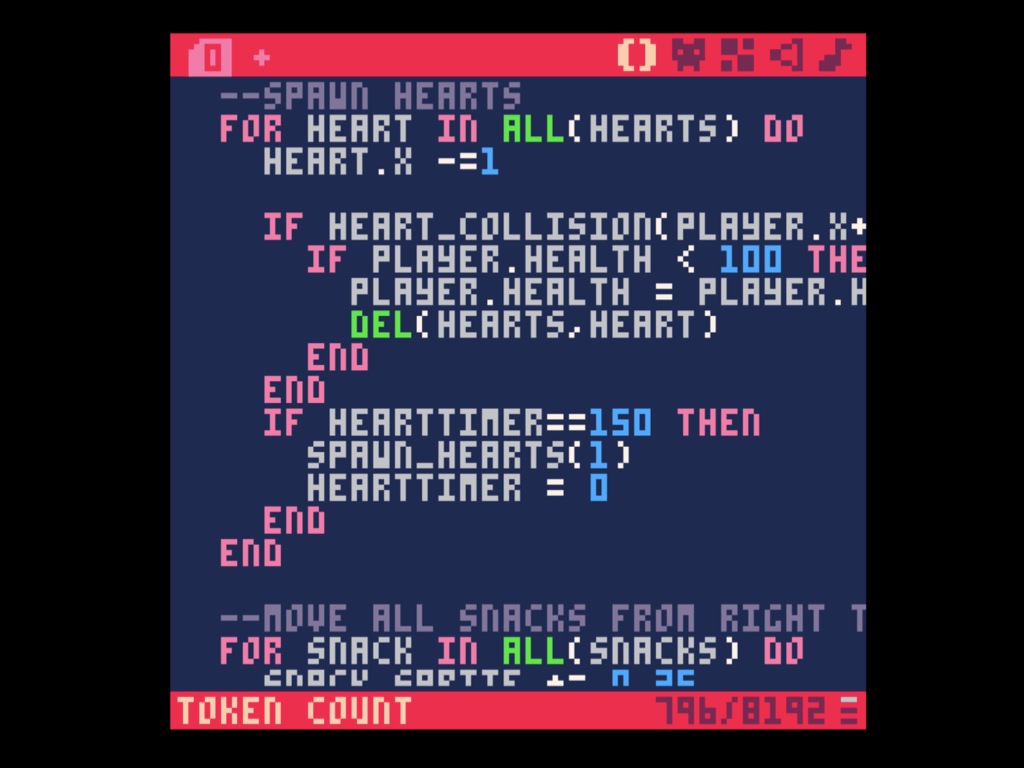
Next, using the heart_collision function, if there is a collision between the heart sprite and player sprite, and if the player's health is less than 100, increase the player's health by 25. Then, delete that heart sprite from the hearts table.
To keep on spawning the hearts in the game, we will use a timer. Every time the value of hearttimer is 150, spawn a heart sprite and then re-set the timer to 0.
So we've created two new functions. Now it's time to call these other functions within the _update() function.
To move each heart sprite from right to left of the screen, use a for loop with heart.x -=1 to continually decrement the value of the heart sprite's x coordinate.
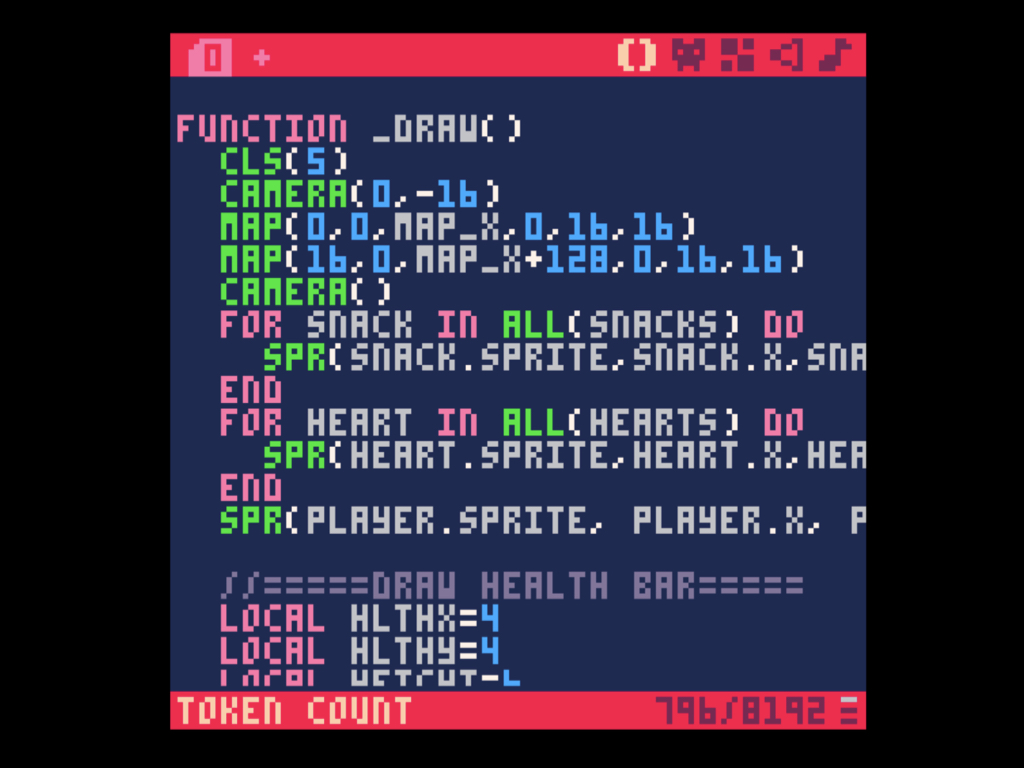
As we did for each snack sprite in the snacks table, we will draw each heart sprite in the hearts table using for heart in all(hearts) do and then by using spr(heart.sprite, heart.x,heart.y) within that for loop.
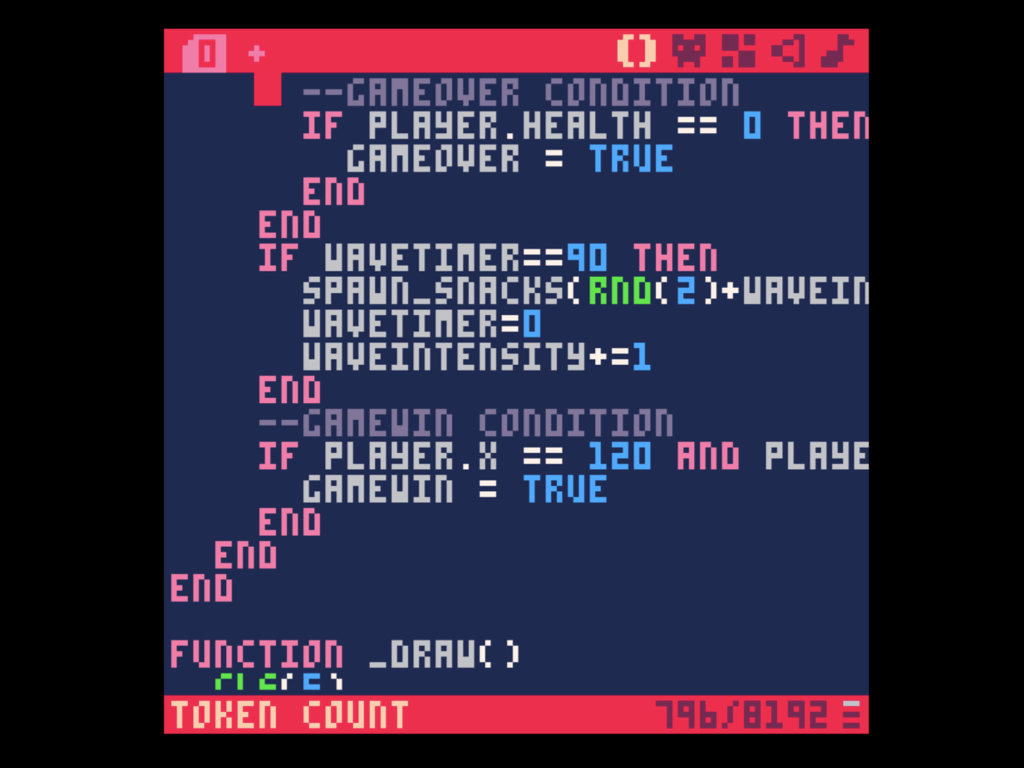
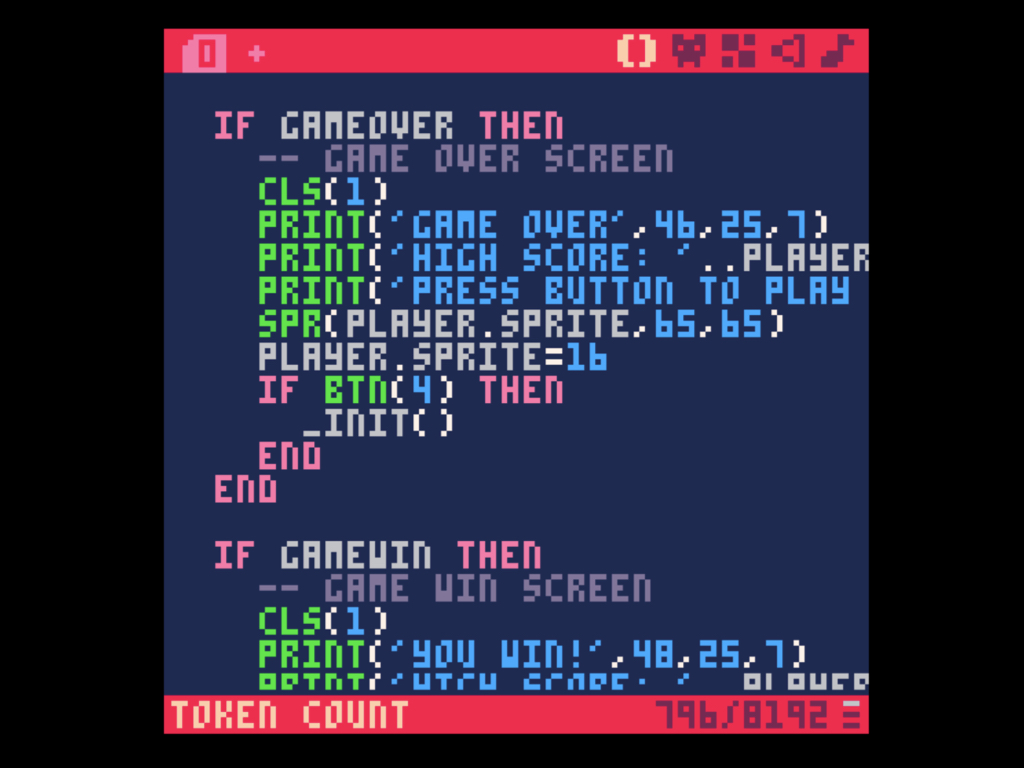
Next, add a game over condition. When the player's health reaches zero, set gameover to true.
Then in _draw(), if gameover is true then draw the game over screen.
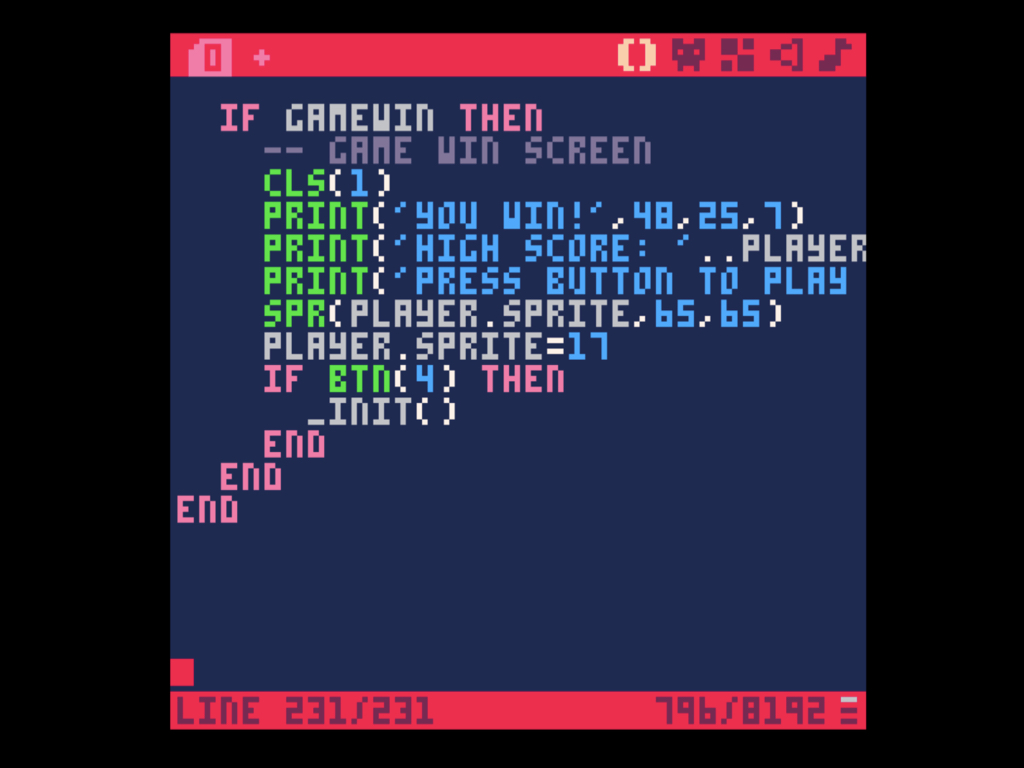
So you've made it to the end of the level, what now? One way is to add a congratulatory message to the player
In _draw() function, set a condition to display the game win screen if gamewin is true.
In _draw() function, set a condition to display the game win screen if gamewin is true.
To reset the game on button press, add the following condition within the if gamewin then condition:
if btn(4) then
_init()
end
if btn(4) then
_init()
end
We're done! Check out the guides over at https://www.littlebird.com.au/a/how-to/#raspberrypi to learn even more. Happy coding!