Bluetooth Controller with Bird Bot
Control the Bird Bot with another micro:bit!
Written By: Cherie Tan
Difficulty
Medium
Steps
12
Previously, we showed you how to get the Bird Bot moving in First Steps with Bird Bot.
In this guide, learn to create a controller for the Bird Bot, with another micro:bit! You will learn to use the built-in accelerometer and bluetooth antennae found on the micro:bit. We will program it in Microsoft MakeCode. Note: You will need a second micro:bit for this guide!
Complete this guide to create your own Bluetooth-controlled Bird Bot in no time.
This guide continues on from our previous guide, First Steps with Bird Bot. You will need the hex file from before. Otherwise, use the import option in the MakeCode editor to upload the hex file here.
The micro:bit uses Bluetooth Low Energy, a power friendly version of Bluetooth, allowing wireless connection between computers, smartphones, tablets, and other micro:bits. In this guide, we will show you how to create a Bluetooth controller for the Bird Bot with another micro:bit.
For a crash course on using Bluetooth with the micro:bit, check out our starter guide on Bluetooth with micro:bit.
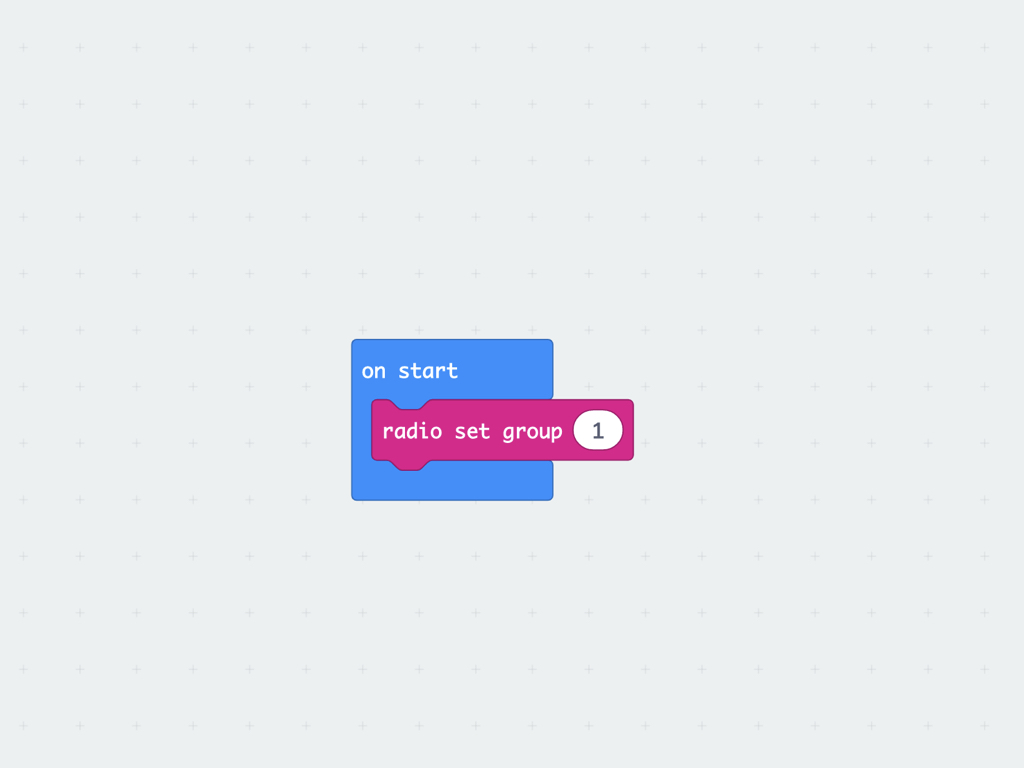
For two of the micro:bits to communicate, the first thing to do is to set the radio group for both micro:bits. To do so, first, click on the Radio category, then click and drag the radio set group over, and place it inside an on start block.
What does the radio set group block do? It allows you to connect a micro:bit to a virtual group, so that it can communicate with other micro:bits of the virtual group. This is exactly what we need to create a controller for the Bird Bot -- by using another micro:bit! Also, by using a different radio set group number, this will allow multiple micro:bit radio projects to run without interfering with each other. However, the micro:bit can only ever be a member of one group at a time, and any packets sent will only be received by other micro:bits in the same group. Feel free to assign the micro:bit to a group number from 0 to 255. By default, the group number is 0.
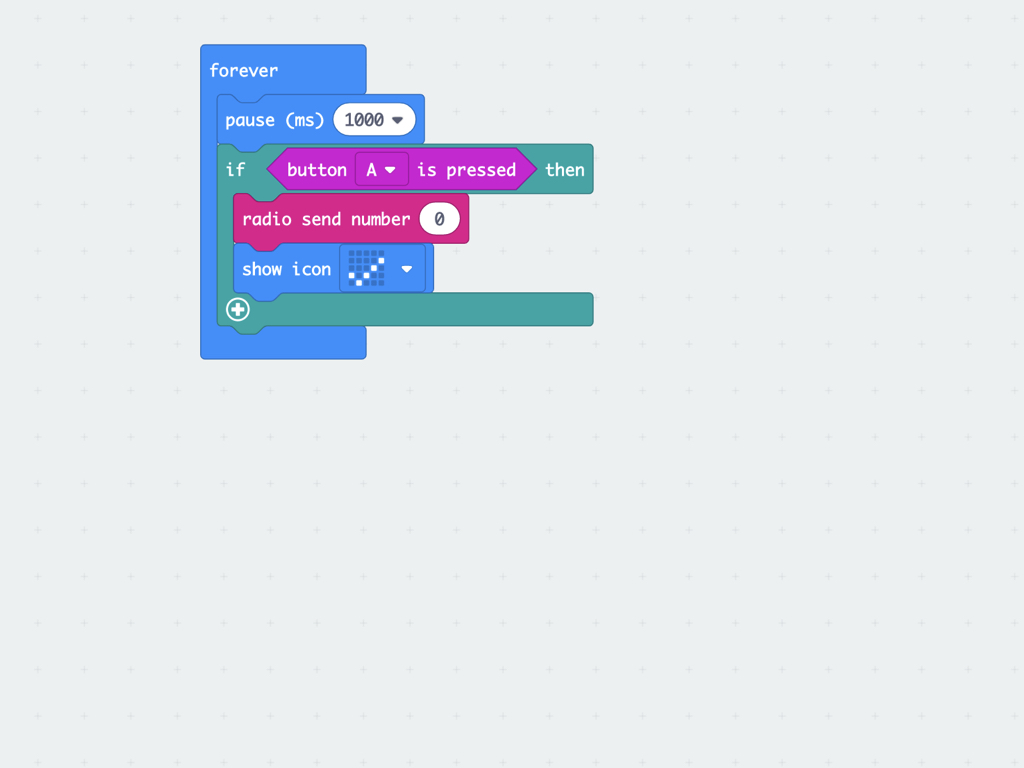
Next, over in the Basic category, click and drag out a forever block.
Also within the Basic category, click and drag out a pause (ms) block, then set its value to 1000.
Next, from the Logic category, click and drag out a if ... then block
From Input category, click and drag out a button A is pressed block and place it within the if ... then block
What we will do here is create a condition so that if button A is pressed, send out a radio signal. In this example, we will use a radio send number block for one micro:bit to send the number 0 to another micro:bit.
Then drag out a show icon block and place it right after radio send number 0. Set its icon to show a tick icon. This will display on the LED matrix of the micro:bit acting as a controller, as confirmation that the radio signal has been sent successfully.
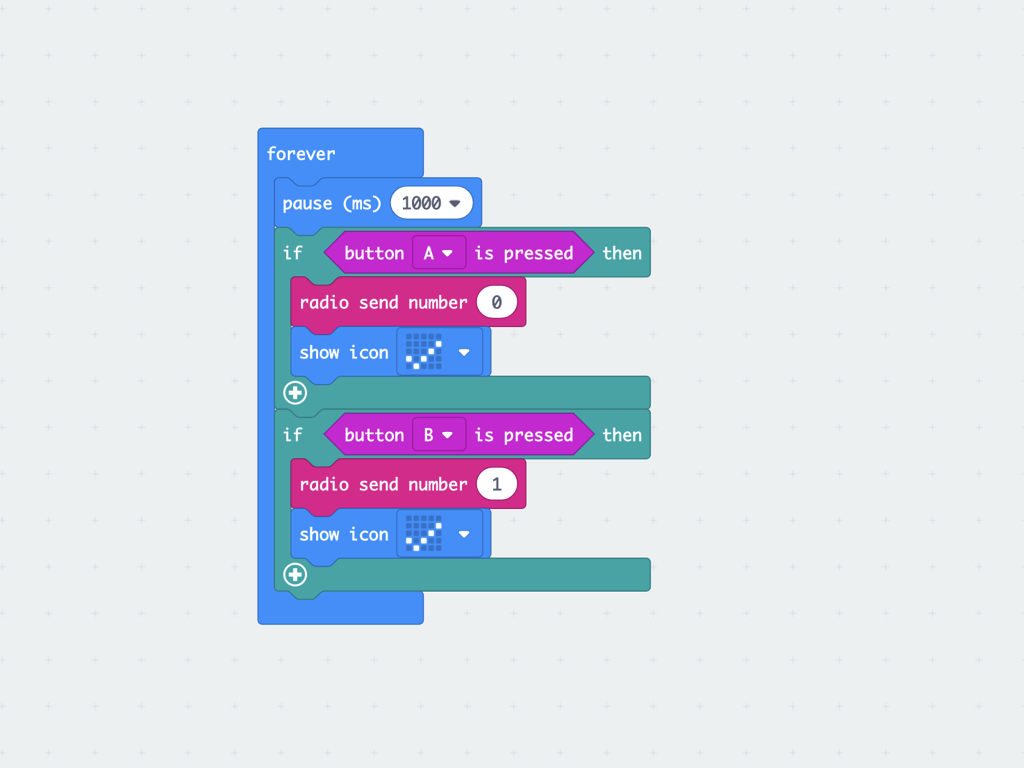
Create another condition that will check to see if button B is pressed. If it is pressed, send out the message, a number 1 to one or more micro:bits.
Likewise, display a tick icon right after radio send number with a show icon block.
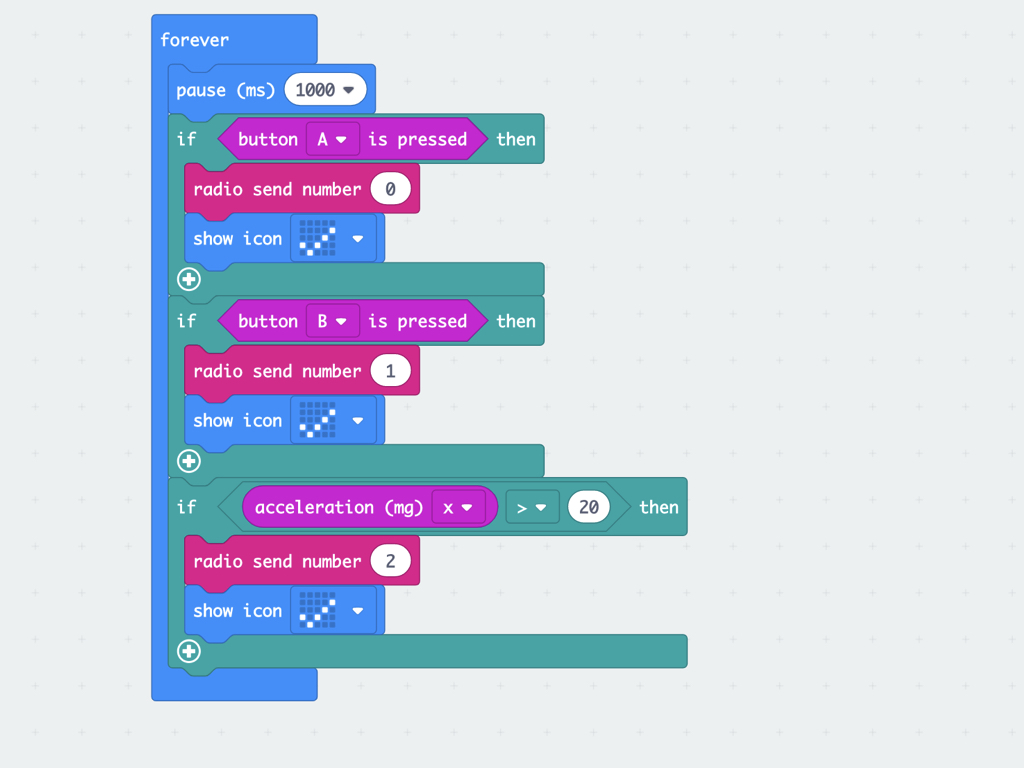
Next, to add controls for the Bird Bot to turn right, add the following code blocks.
The acceleration (mg) x block can be found under the Input category
The micro:bit has an on-board three-axis accelerometer chip that can be used to measure the movement along the x, y, and z axes. It measures acceleration values in mG or milliG, and the micro:bit's accelerometer is capable of measuring accelerations between +2g and -2g.
In this guide, we will use the acceleration measurements along the x-axis of the micro:bit to control the Bird Bot. Before moving on, try this out: place the micro:bit on a table with the LED matrix display pointing upward. Then display the accelerometer values, and you should see the values x=0, y=0, and z=-1023. Then tilt the micro:bit board from the left to right. Next, try tilting it from right to left. What you should see is a value ranging from -1023 to 1023.
In this guide, we will use the acceleration measurements along the x-axis of the micro:bit to control the Bird Bot. Before moving on, try this out: place the micro:bit on a table with the LED matrix display pointing upward. Then display the accelerometer values, and you should see the values x=0, y=0, and z=-1023. Then tilt the micro:bit board from the left to right. Next, try tilting it from right to left. What you should see is a value ranging from -1023 to 1023.
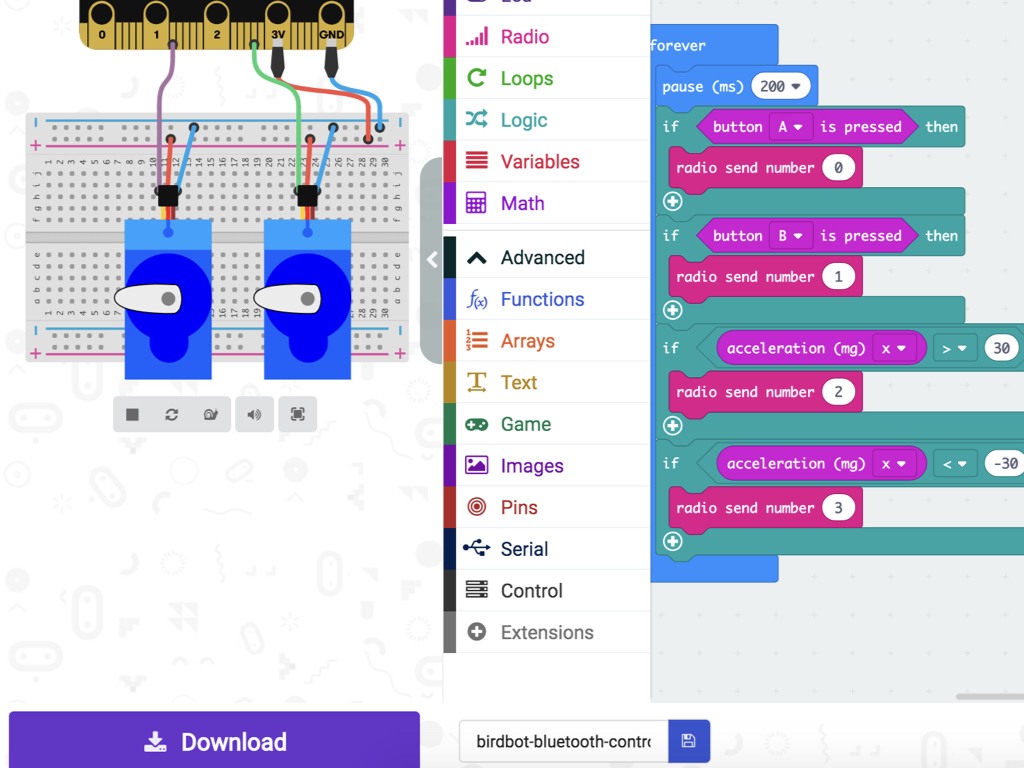
Here, we have created a condition so that with a slight tilt of the micro:bit toward the right, the controller (micro:bit) will send out a message to nearby micro:bits in its radio group. It will send out a number 2, this will later be used to program the Bird Bot to turn right! Instead of acceleration (mg) x > 20, what condition would you construct so that the Bird Bot will only turn when there is a great enough tilting motion?
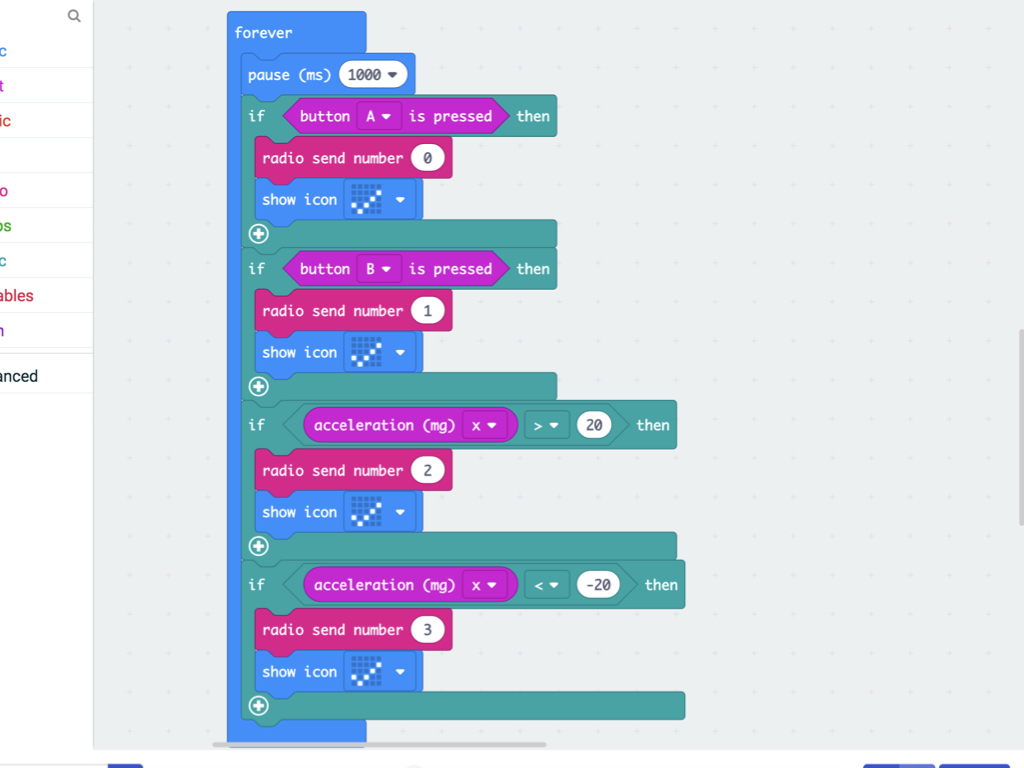
Now it is time to program the controller to get the Bird Bot to turn left. Using a similar condition but this time, acceleration (mg) x < -20, the micro:bit acting as the controller will send out a message, a number 3 to nearby micro:bits in the same radio group as it. This will later be used to get the Bird Bot to turn right.
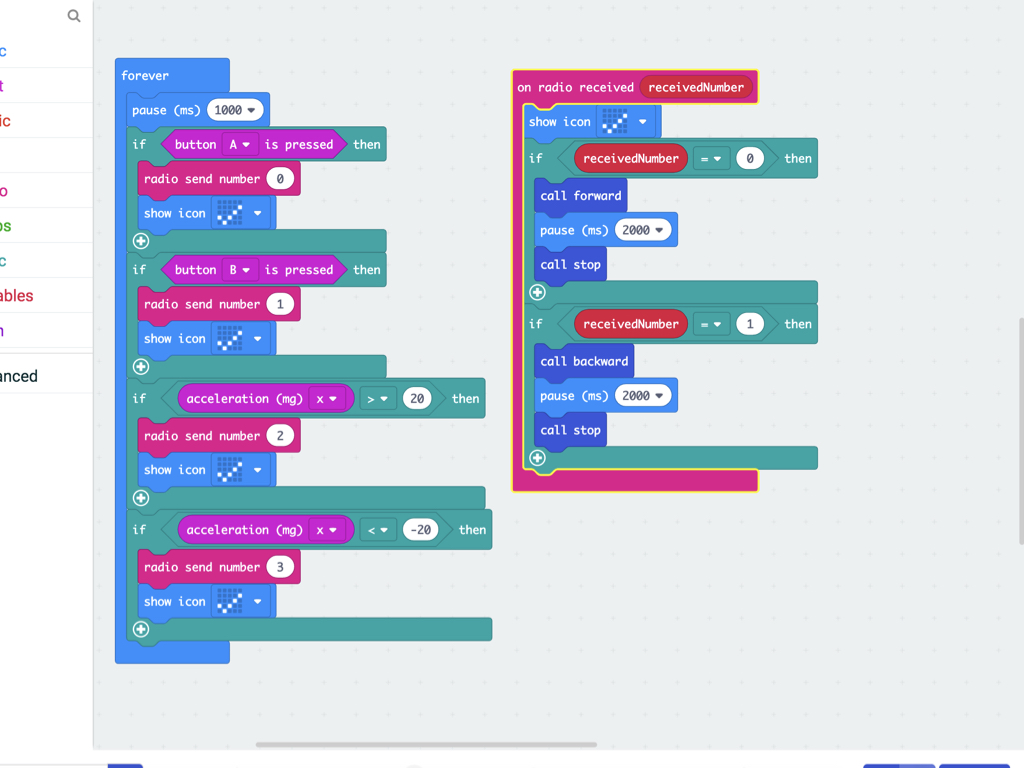
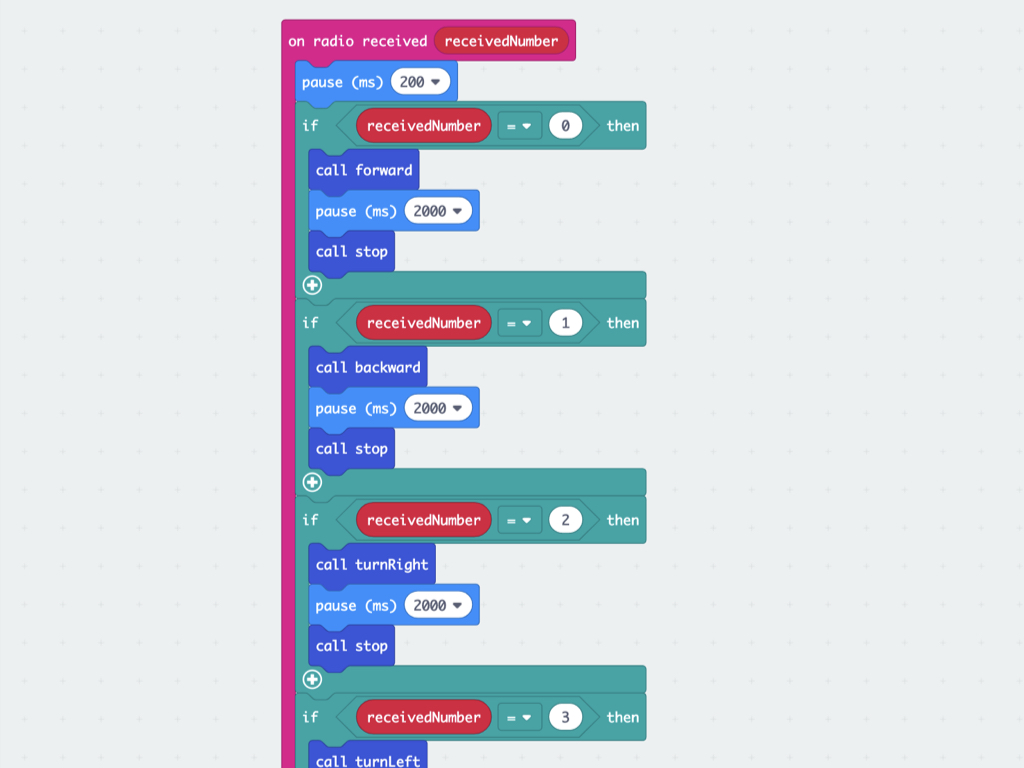
Now get out a show icon block so that it displays a tick icon immediately upon receiving a message.
Next, create a condition as we did before, using if ... then block, so that if receivedNumber = 0 then call the forward function.
Add a pause 2000 (ms) block right after it
Then call the stop function
Likewise, create another condition to check if the receivedNumber is 1, if so then call the backward function.
Add a pause (ms) 2000 block then call the stop function
In the next part of this guide, we will now put together the code that will get the Bird Bot to move according to the messages sent by the controller. First, click on the Radio category, then click and drag out a on radio received receivedNumber block.
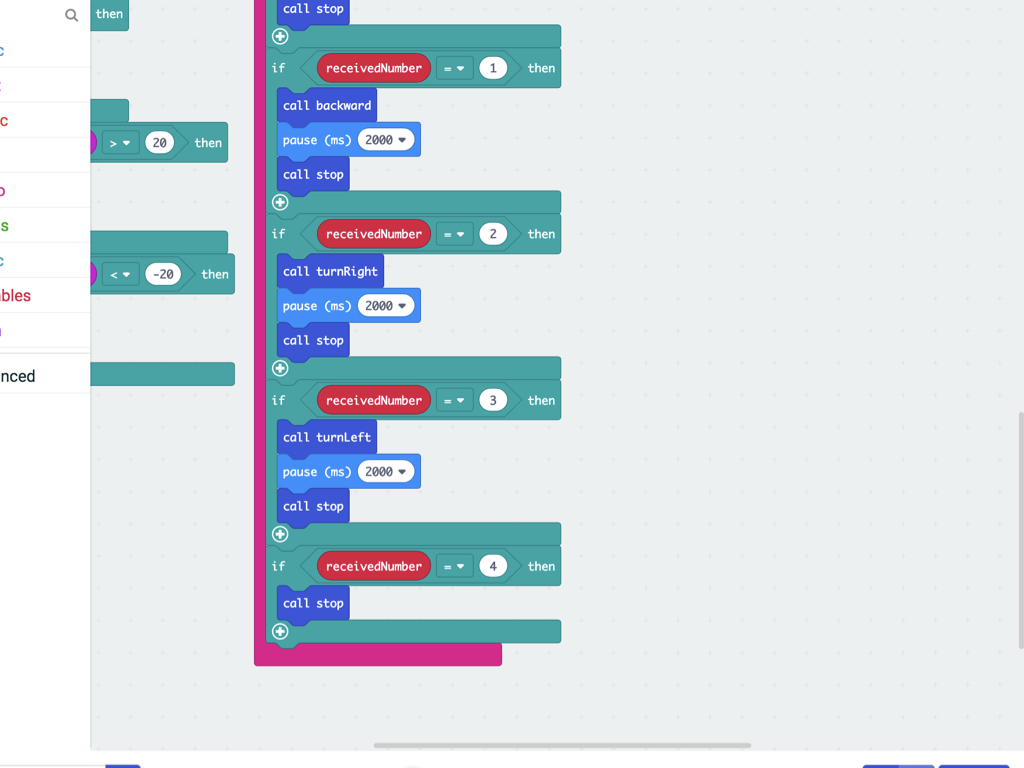
Next, add the following code blocks so that the turnRight function is called when the receivedNumber is 2.
Then add the code blocks as shown so that the turnLeft function is called when the receivedNumber is 3.
Finally, if the receivedNumber is 4, call the stop function.
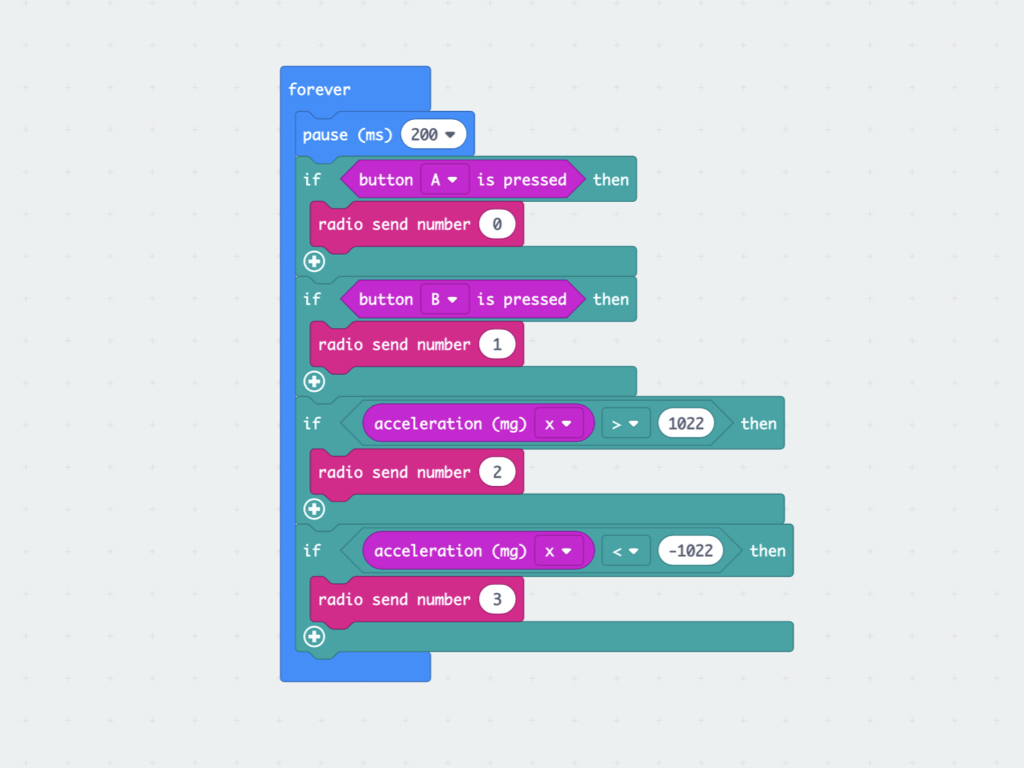
If we were to upload this code to the micro:bits right now, with a slight tilt of the micro:bit controller, the Bird Bot will turn right or left. It will not prove to be very reliable, so let's go ahead and optimise our code. First, change the pause (ms) block to a value of 200.
Next, change the pause (ms) block over in on radio received receivedNumber is 200 as well.
Then, in the forever block, change the value of if acceleration (mg) x > 20 then to if acceleration (mg) x > 1022
Finally, also within the forever block, change the condition if acceleration (mg) x < -20 to if acceleration (mg) x < -1022
Now with the updated code, the Bird Bot will only turn when the micro:bit has been greatly tilted either to the right or left. There is also enough time to press button A or B, moving it forward or backward.
function forward () {
    basic.showArrow(ArrowNames.North);
    pins.digitalWritePin(DigitalPin.P8, 1);
    pins.servoWritePin(AnalogPin.P8, 180);
    pins.digitalWritePin(DigitalPin.P16, 1);
    pins.servoWritePin(AnalogPin.P16, 0);
    basic.clearScreen();
}
function backward () {
    basic.showArrow(ArrowNames.South);
    pins.digitalWritePin(DigitalPin.P8, 1);
    pins.servoWritePin(AnalogPin.P8, 0);
    pins.digitalWritePin(DigitalPin.P16, 1);
    pins.servoWritePin(AnalogPin.P16, 180);
    basic.clearScreen();
}
function turnLeft () {
    basic.showArrow(ArrowNames.West);
    pins.digitalWritePin(DigitalPin.P8, 1);
    pins.servoWritePin(AnalogPin.P8, 180);
    basic.pause(100);
    basic.clearScreen();
}
function turnRight () {
    basic.showArrow(ArrowNames.East);
    pins.digitalWritePin(DigitalPin.P16, 1);
    pins.servoWritePin(AnalogPin.P16, 0);
    basic.pause(100);
    basic.clearScreen();
}
function stop () {
    pins.digitalWritePin(DigitalPin.P16, 0);
    pins.digitalWritePin(DigitalPin.P8, 0);
}
radio.onReceivedNumber(function (receivedNumber) {
    basic.pause(200);
    if (receivedNumber == 0) {
        forward();
        basic.pause(2000);
        stop();
    }
    if (receivedNumber == 1) {
        backward();
        basic.pause(2000);
        stop();
    }
    if (receivedNumber == 2) {
        turnRight();
        basic.pause(2000);
        stop();
    }
    if (receivedNumber == 3) {
        turnLeft();
        basic.pause(2000);
        stop();
    }
    if (receivedNumber == 4) {
        stop();
    }
})
radio.setGroup(1)
basic.forever(function () {
    basic.pause(200);
    if (input.buttonIsPressed(Button.A)) {
        radio.sendNumber(0);
    }
    if (input.buttonIsPressed(Button.B)) {
        radio.sendNumber(1);
    }
    if (input.acceleration(Dimension.X) > 1022) {
        radio.sendNumber(2);
    }
    if (input.acceleration(Dimension.X) < -1022) {
        radio.sendNumber(3);
    }
})
Want the complete code or to check on your own code? Copy the code here.
Paste the copied code into the Javascript interface.
Click on the Blocks button to view the code in Blocks.
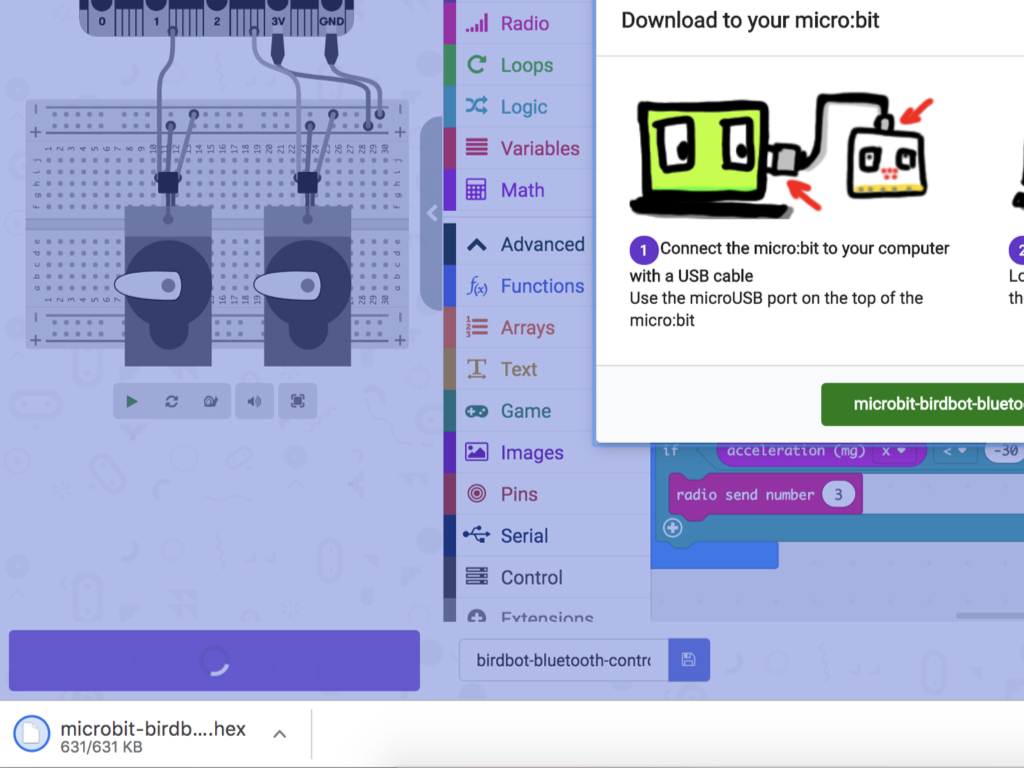
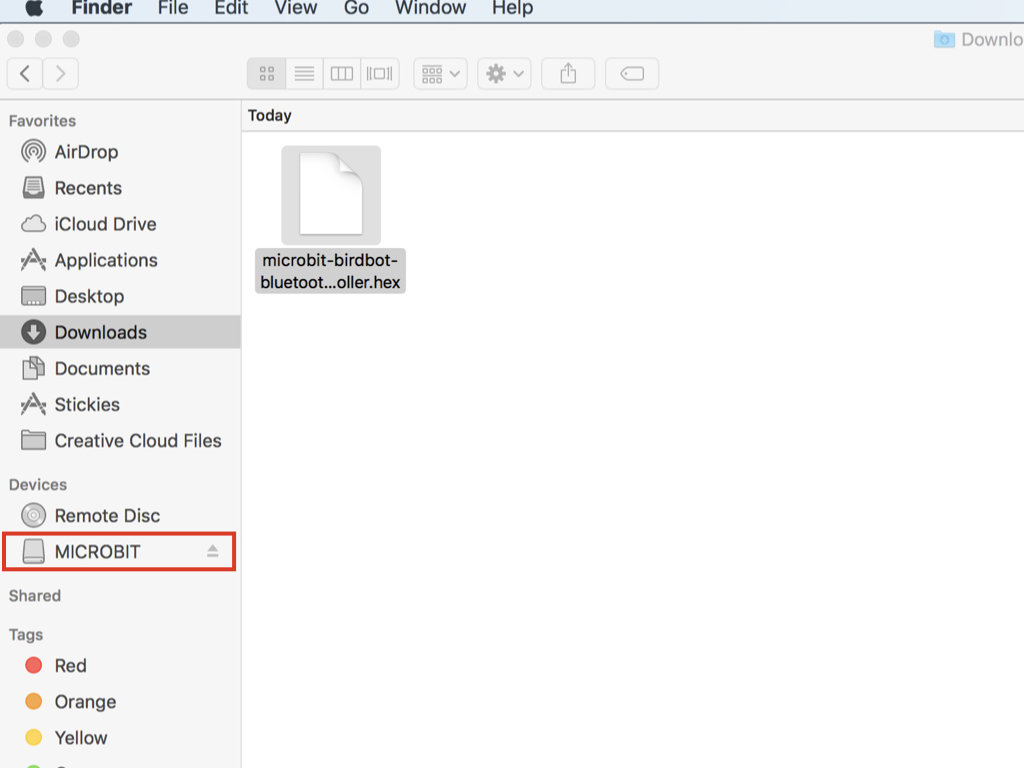
Click on the Download button
After connecting the micro:bit via micro USB cable to the computer, drag and drop the birdbot-bluetooth-controller.hex file into the MICROBIT drive
Repeat the same for the second micro:bit that acts as the controller.
Feel free to download a copy of the complete program or hex file here.

Power up the Bird Bot with 3 x AAA batteries, and the other micro:bit via a USB cable connected to the computer.
Please make sure to use brand new or charged AAA batteries!
We're done with the bluetooth-controlled Bird Bot! In the next guide, we will delve into the world of obstacle avoidance with the Bird Bot. Check out the guides over at https://www.littlebird.com.au/a/how-to/#micro-bit to learn even more!