2D Sidescrolling Platformer with MakeCode Arcade
Create a side-scrolling platformer game
Written By: Cherie Tan
Difficulty
Medium
Steps
16
This guide continues on from our previous guide on how to create tile maps in MakeCode Arcade.
In this guide, we will finish up with creating the first level of our side-scrolling game. You'll learn to create multiple enemies and items with arrays, including coins, power-ups, and lives.
Complete this guide to make a 2D side-scrolling platformer game in MakeCode Arcade.
In this guide, we will finish up with creating the first level of our side-scrolling game. You'll learn to create multiple enemies and items with arrays, including coins, power-ups, and lives.
Complete this guide to make a 2D side-scrolling platformer game in MakeCode Arcade.
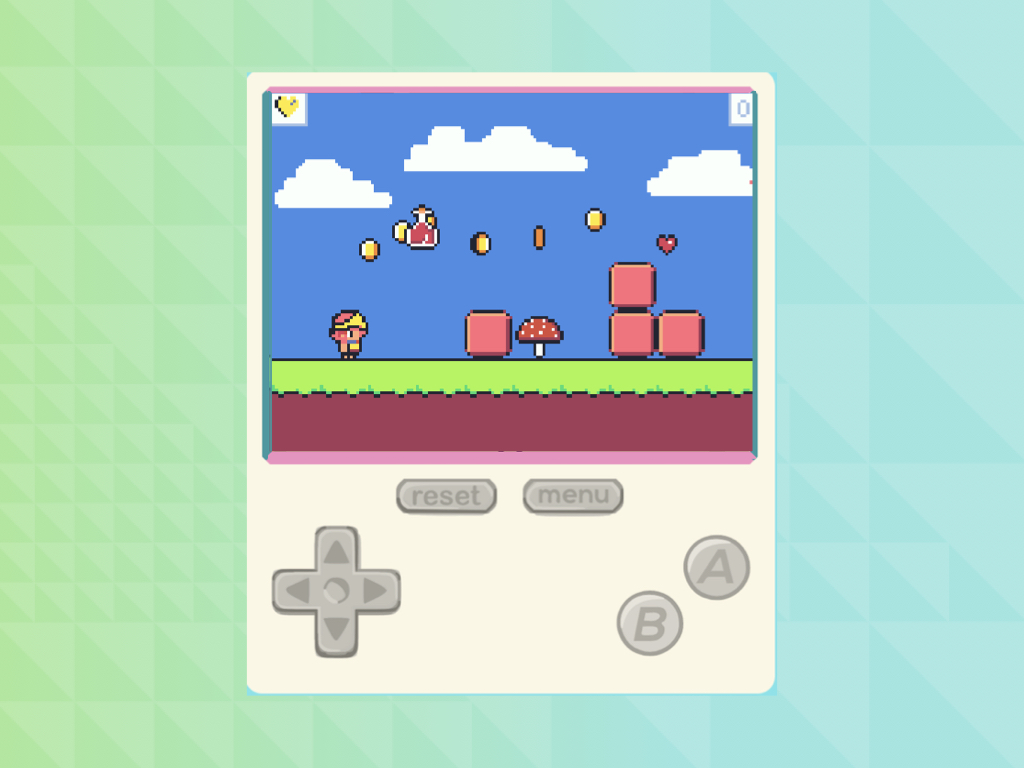
Get your tilemap ready, we're going to complete the first level of our side-scrolling 2D platformer game in MakeCode Arcade
Previously, we learned to create a tile map in MakeCode Arcade for a 2D side-scrolling platformer. Please check out that guide before following along with this one.
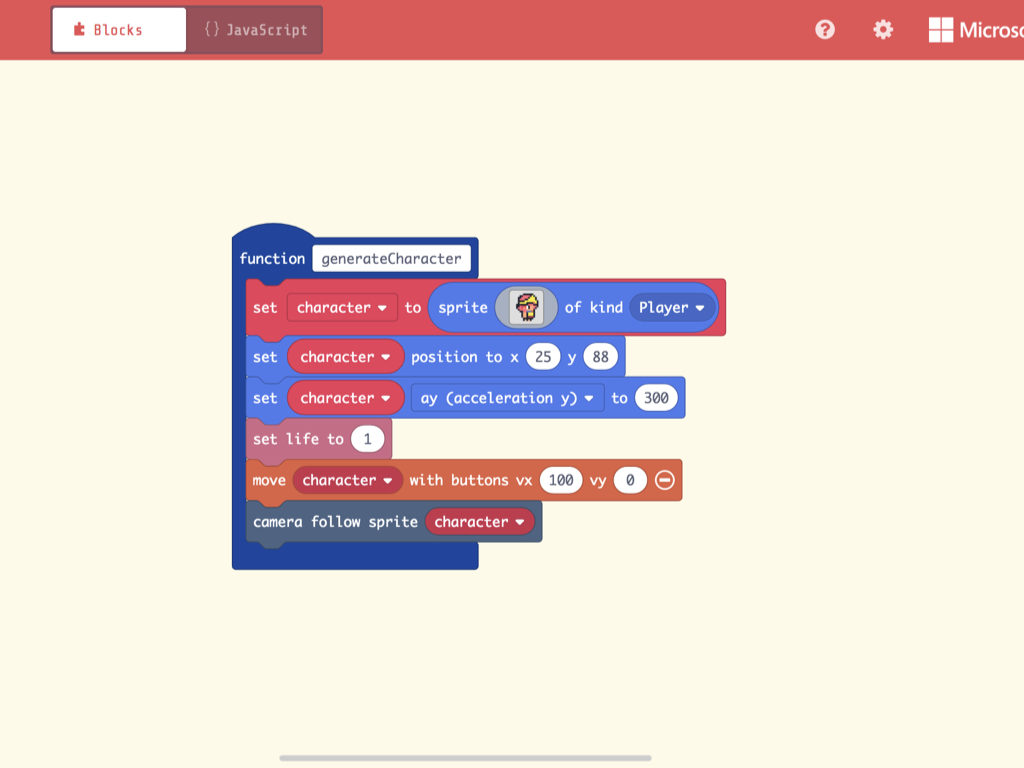
Instead of initialising our player character in the on start block, let's place all the code relevant to generating our player character into a function of its own. Make a new function and name it generateCharacter.
If you've followed along our previous guide on how to Create Tile Maps for MakeCode Arcade, then you'd already have these blocks! Drag them into this new function.
There is one block we have not added previously. Add a set life to 1 block into the generateCharacter function.
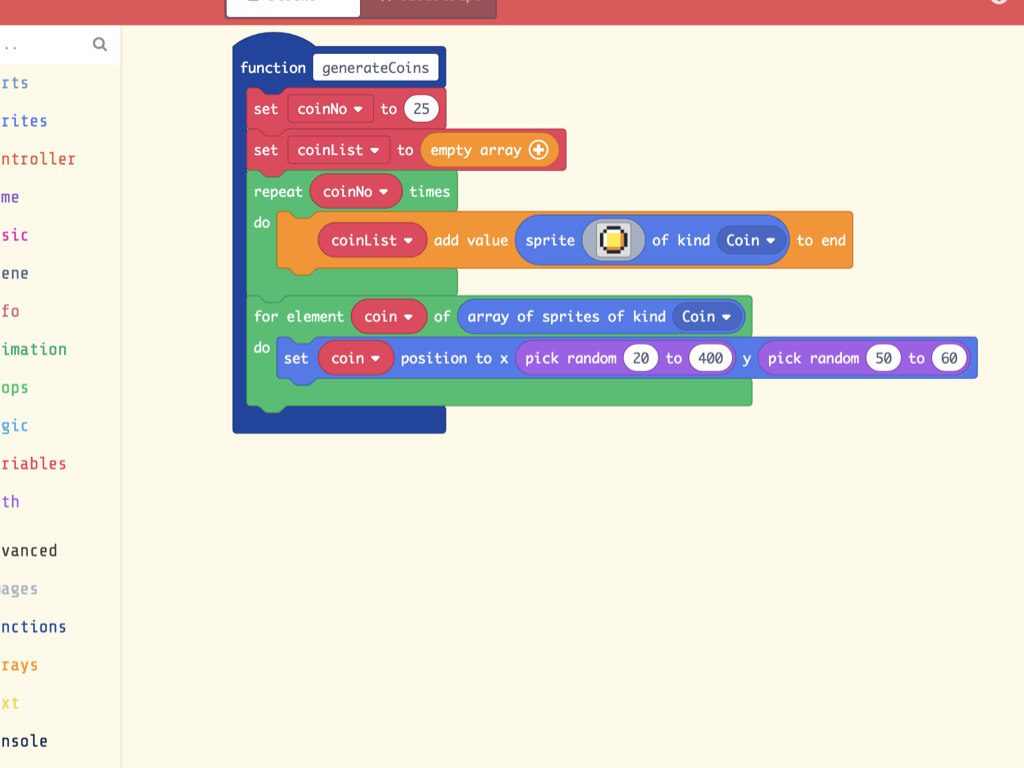
Next, let's generate these coins at certain positions of the tile map. Use a for element coin of array of sprites of kind Coin do block.
Then place a set coin position to x ... y ... block within it.
To randomly position these coins within reach of the player, set the pick random ... to ... blocks as shown.
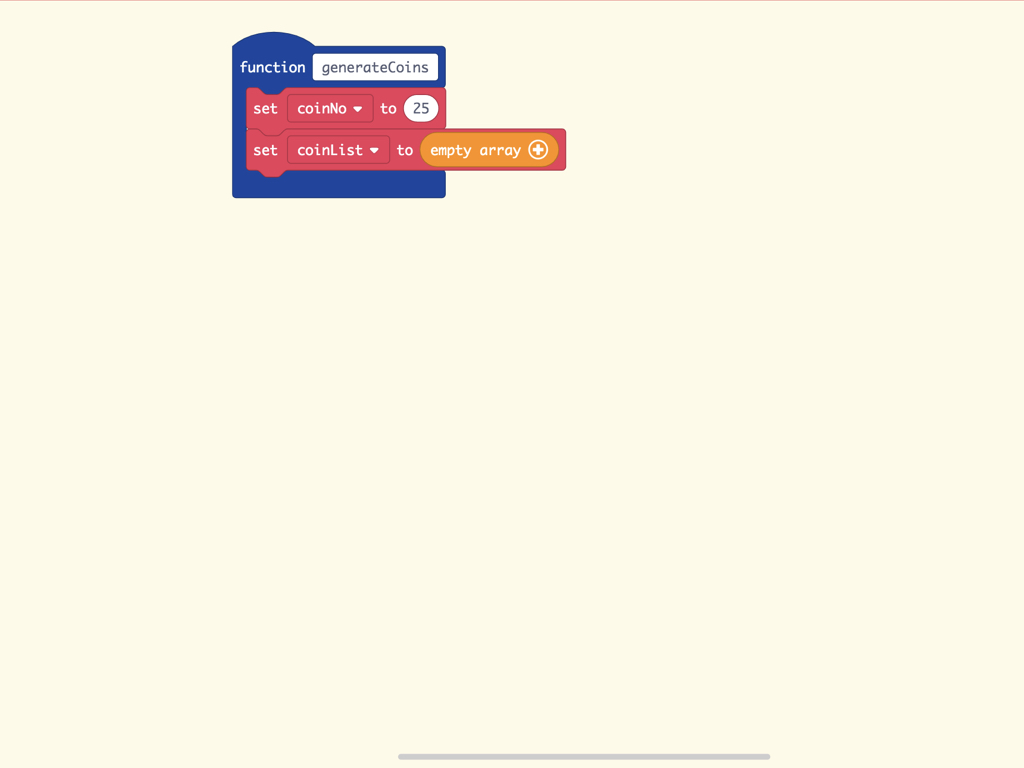
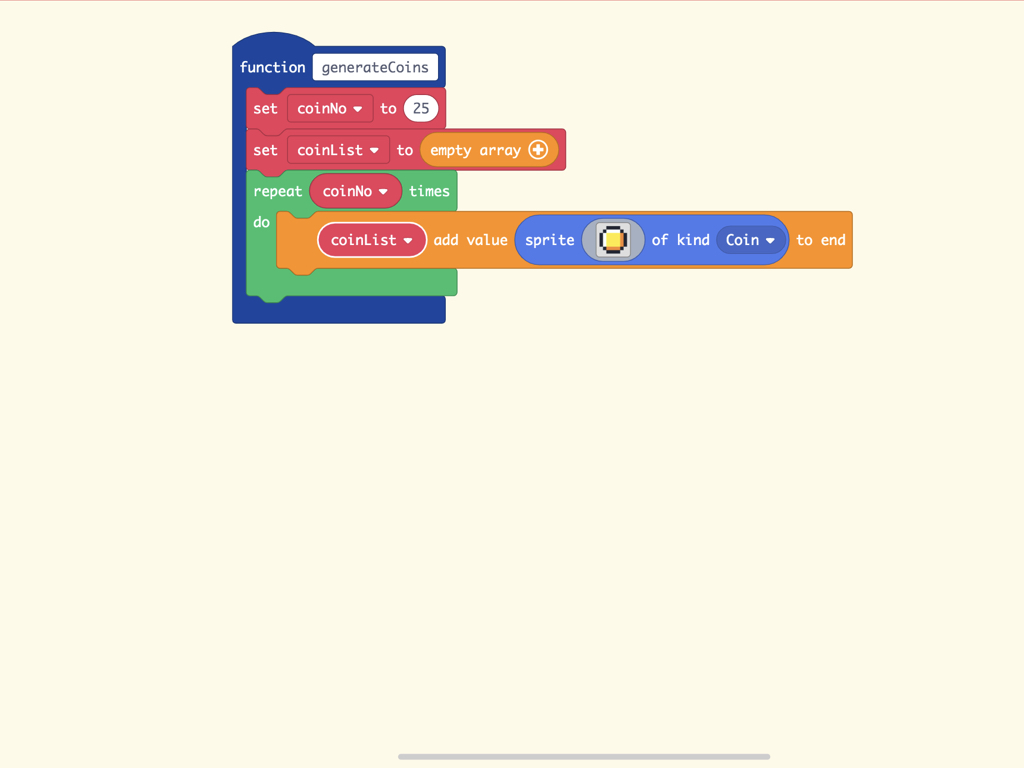
Create a new function called generateCoins.
Then create a new variable called coinNo and set coinNo to 25. This will be used to generate 25 coins in the first level of our game.
Previously, in Spider Invaders we created multiple enemy sprites with an array. Just to recap, arrays were introduced as a way to store multiple related values. This time, we'll create an array called coinList and first set it as an empty array.
To generate the number of coins based on coinNo, use a repeat ... times do block.
Then place a coinList add value sprite ... of kind Coin to end block.
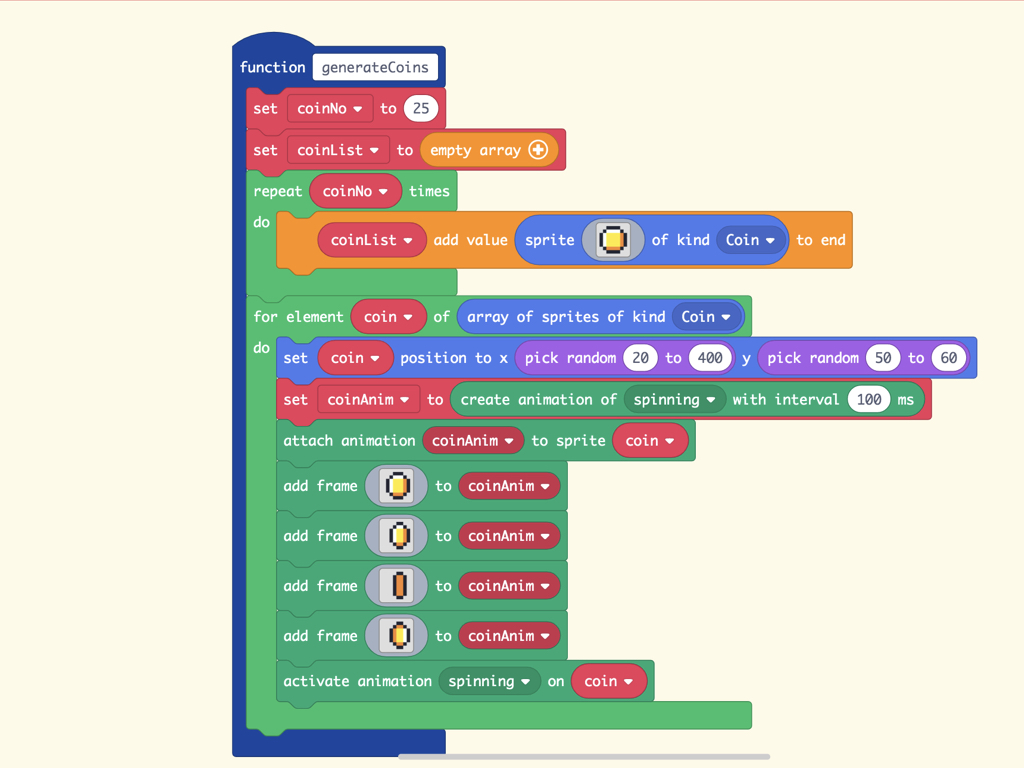
Then add four frames of animation. The coin is spinning in a clock-wise direction, and in the third frame, only one of its side can be seen.
Finally, activate the animation spinning on each coin sprite.
Next, attach the animation coinAnim to each sprite coin with an attach animation coinAnim to sprite coin block.
Let's bring the coins to life with animation. MakeCode Arcade has an extension for adding animation-specific blocks: Go to Advanced > Extensions > Animation
In the for element coin of array sprites of kind Coin block, we will add blocks that will animate each coin sprite. By calling it for each coin that is generated we can have them all animate with just these few blocks!
From Animation tab, get out a set ... to create animation of ... with interval ... ms block. Using set coinAnim to create animation of spinning with an interval of 100 ms will create the animation group that will contain our frames.
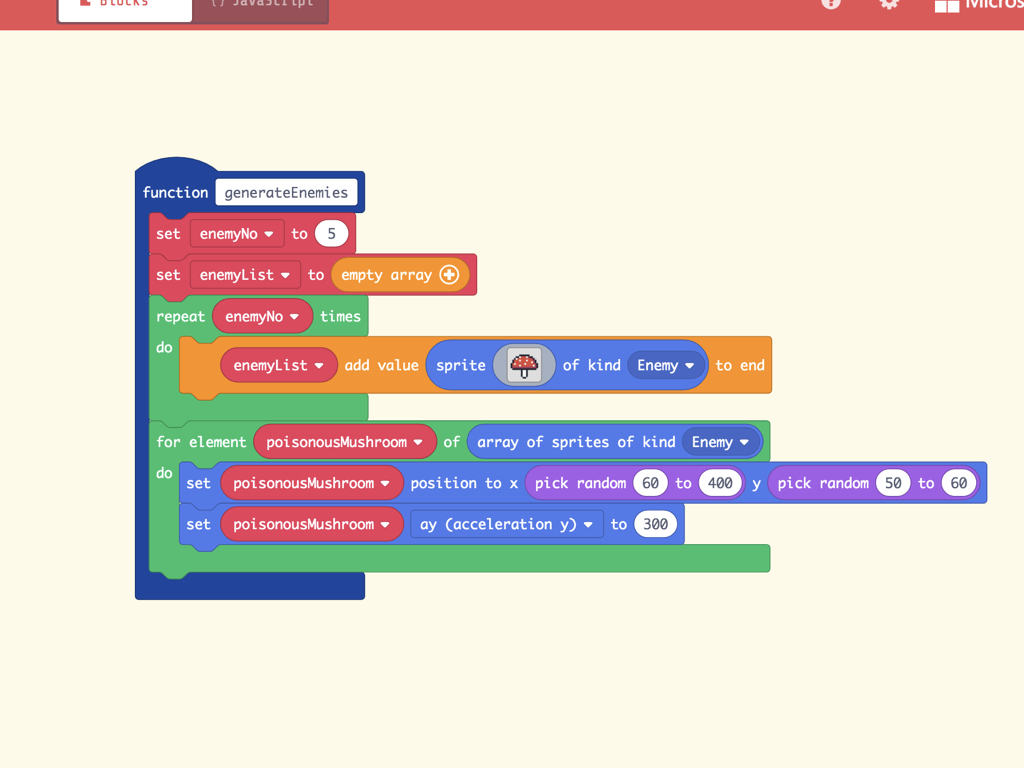
As we've done so before, use a repeat ... times do block to generate the number of enemy sprites.
Use a for element poisonousMushroom of array of sprites of kind Enemy do block to set each poisonous mushroom sprite's x and y positions to be randomly generated within the tile map. We have set x to be pick random 60 to 400 and y to be pick random 50 to 60 so that they are within reasonable reach of the player.
Finally, so that gravity is pulling down on these enemy sprites, use a set poisonousMushroom ay (acceleration y) to 300 block.
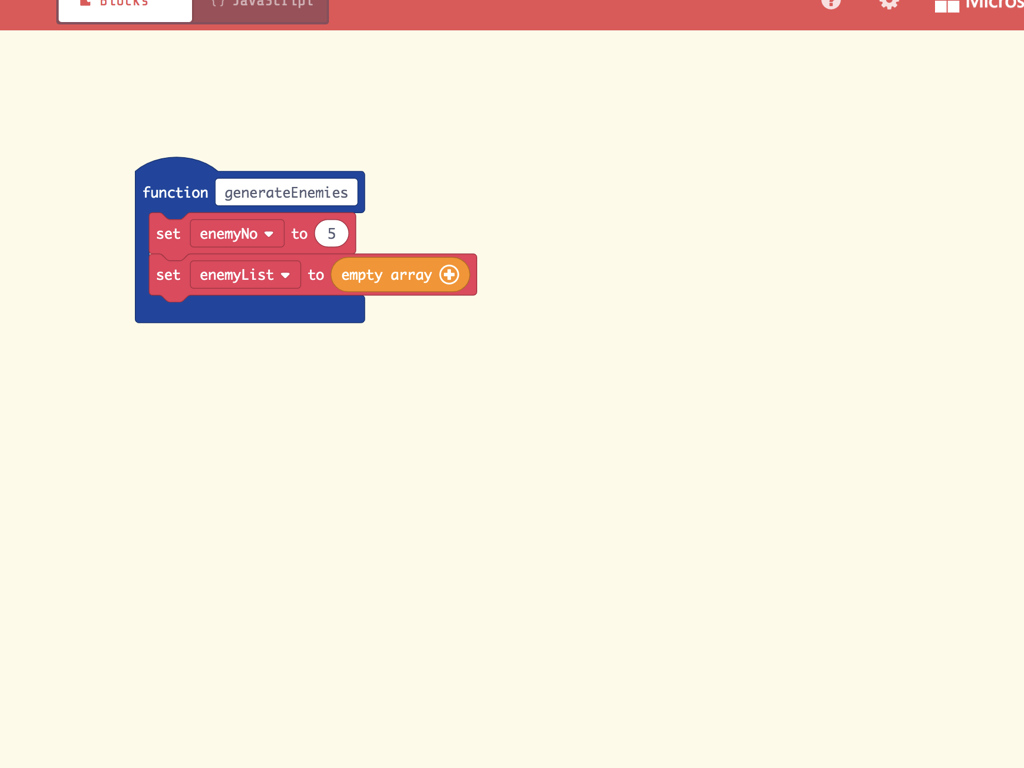
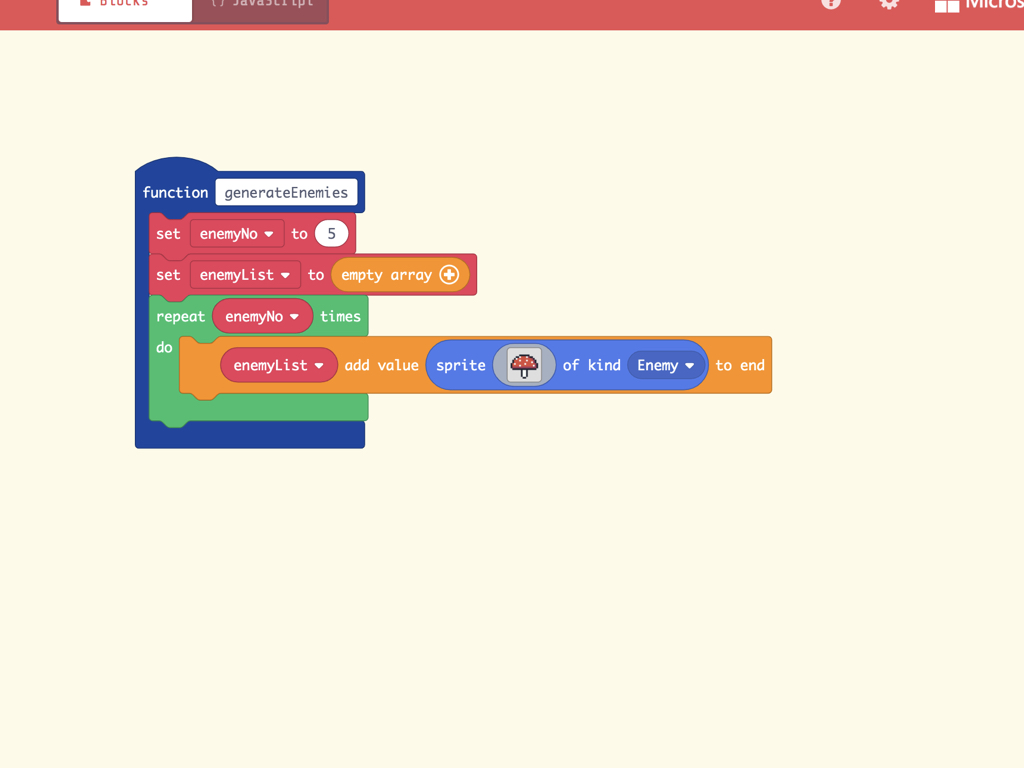
Next, create another function called generateEnemies.
As we've done for generateCoins, here we will use another empty array to store the enemy sprites. So set enemyList to empty array.
Create a new variable and call it enemyNo, this will hold the number of enemies that will be generated. Here, we have set it to be 5.
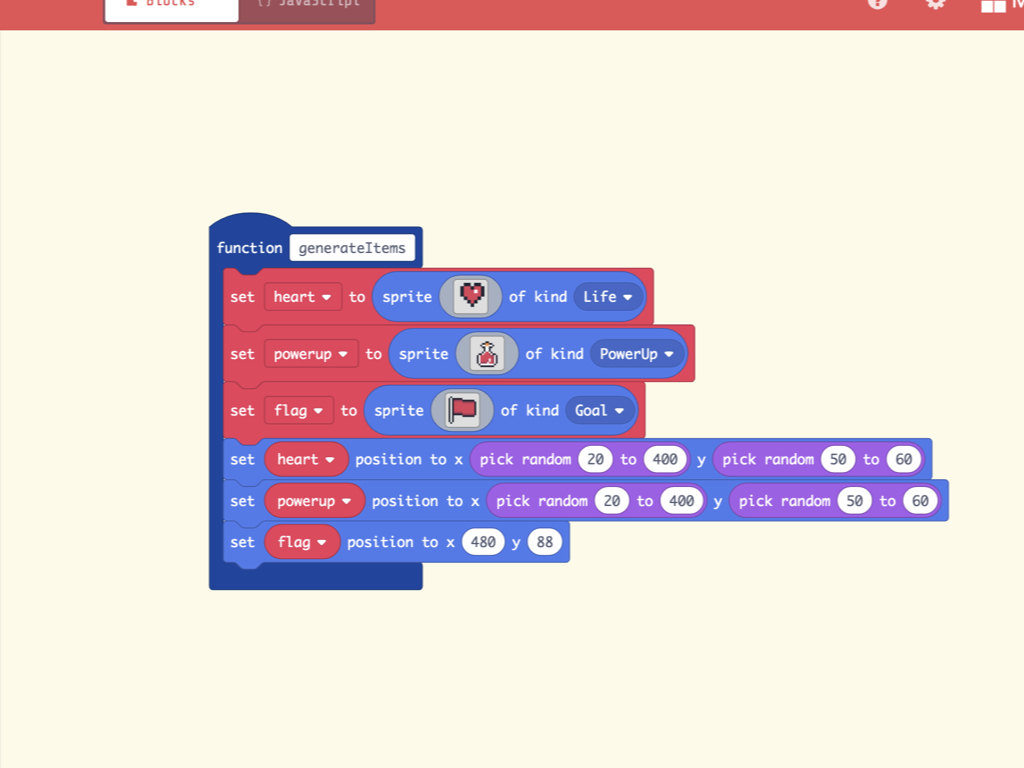
As before, randomly position these sprites (except the flag) with pick random ... to ... blocks.
Set the flag sprite to be positioned at the end of the tile map at x 480 y 88.
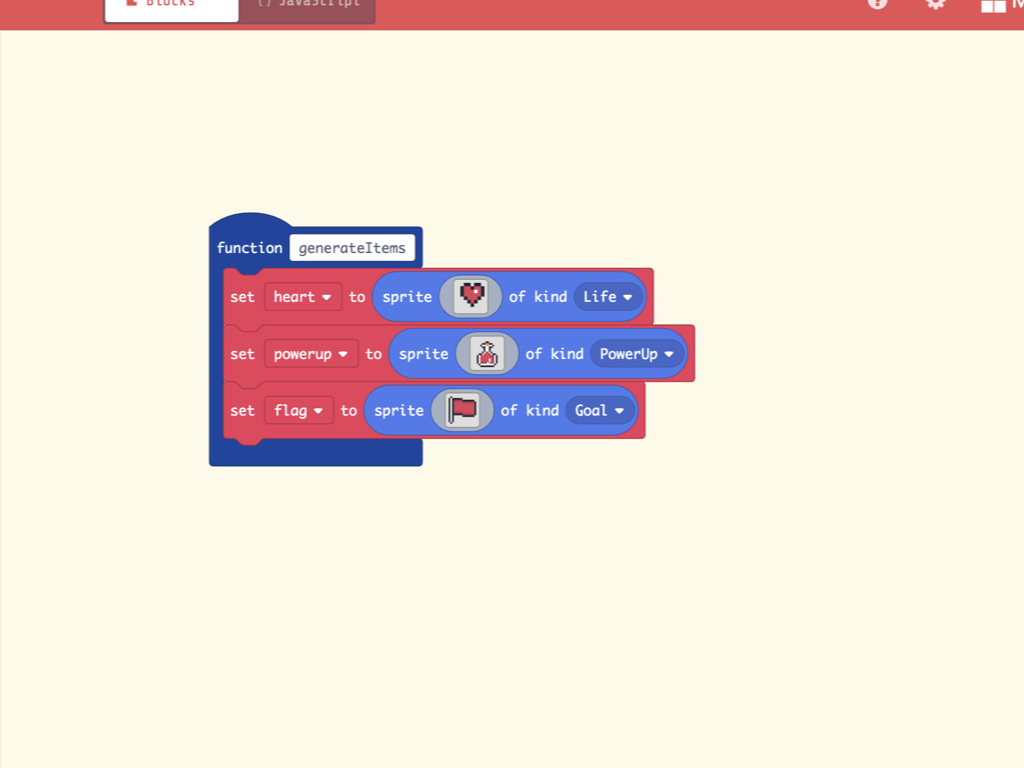
In our variation of Space Invaders, the, enemy sprites doubled in numbers after each level, which may prove to be too tedious! For a game to be engaging, it needs to be fair yet challenging. There are several ways to keep experiences of challenge and success in proper balance. One way is to add power-ups for the player, so let's start with creating a new function called generateItems.
We will create three items for the game, a heart sprite, a powerup sprite, and a flag sprite. The heart sprite will add a player life, while the powerup sprite will upgrade the player's projectile. The flag sprite will advance the player onto the next level, or trigger a win condition.
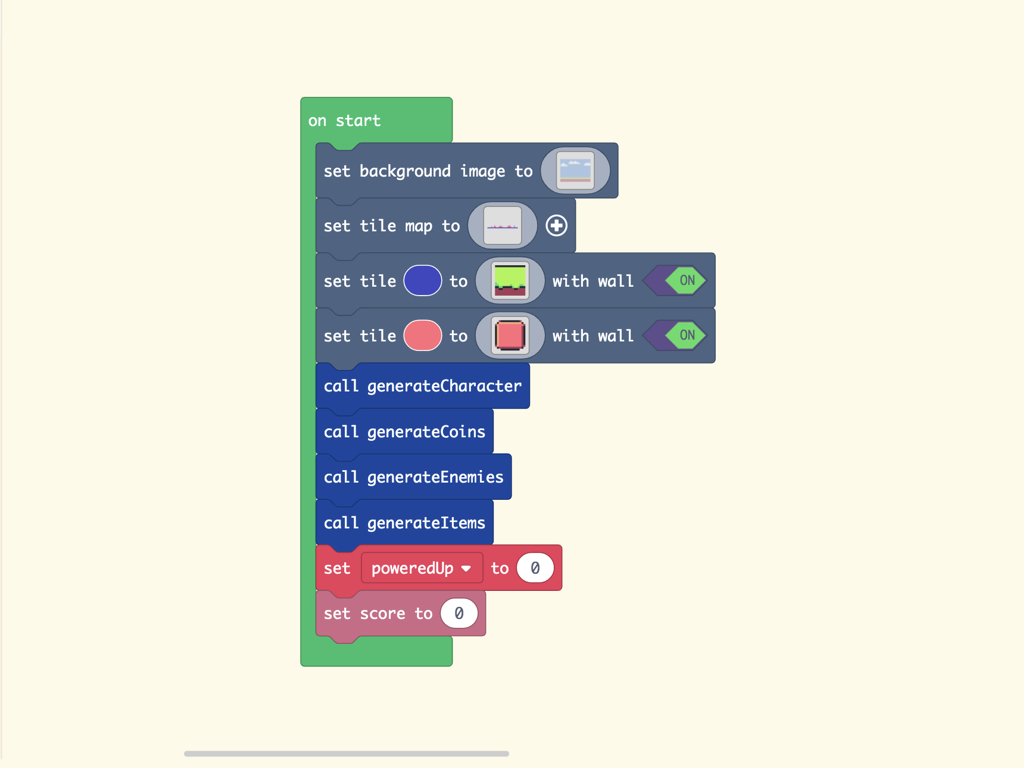
Now that we've created our four custom functions, generateCharacter, generateCoins, generateEnemies, and generateItems, they will need to be called. Call these functions over in on start.
Declare a new variable called poweredUp with an initial value of 0, this will be used to check if a power-up has been picked up by the player later.
Each time the game starts, the score will be zero so add a set score to 0 block.
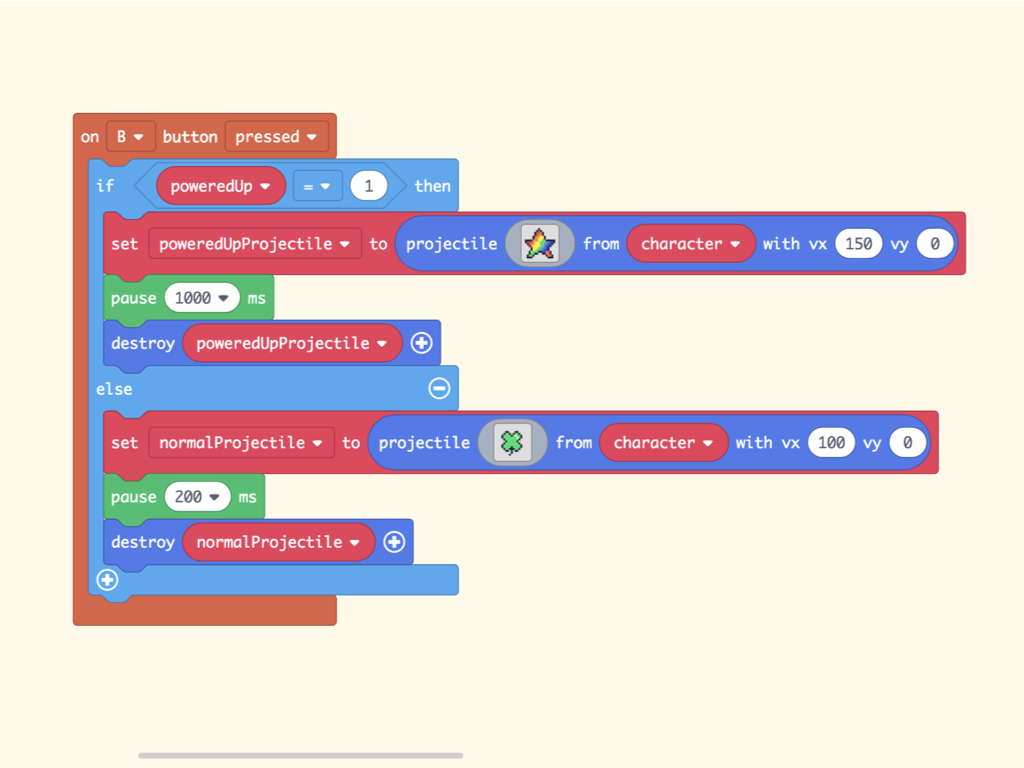
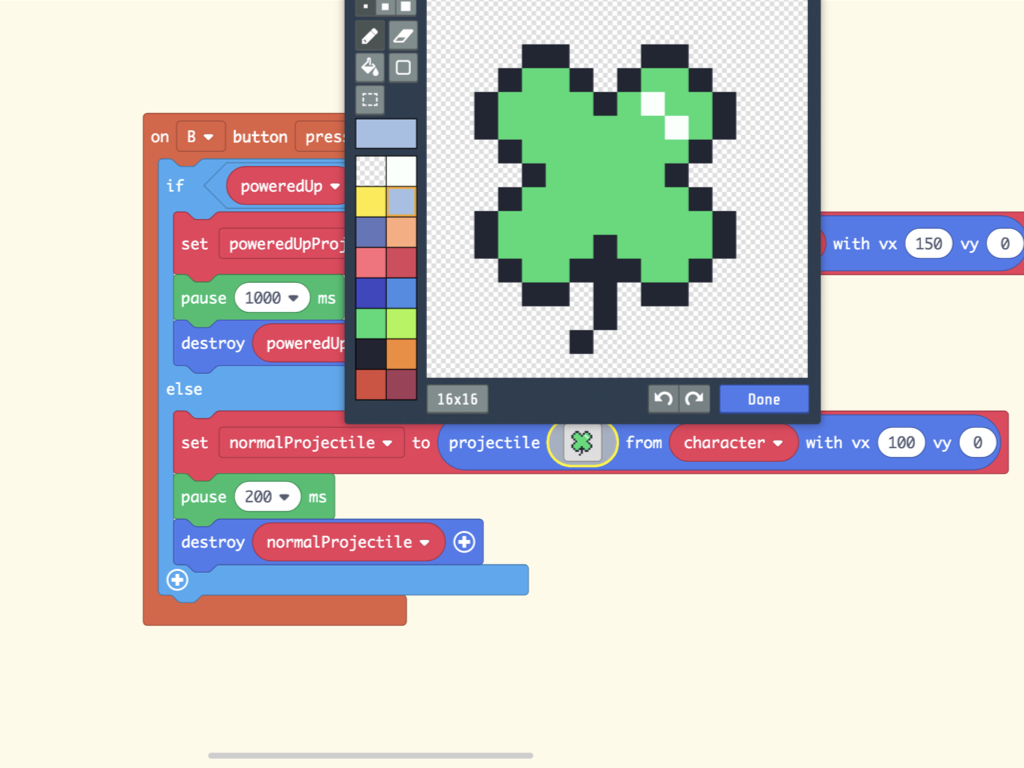
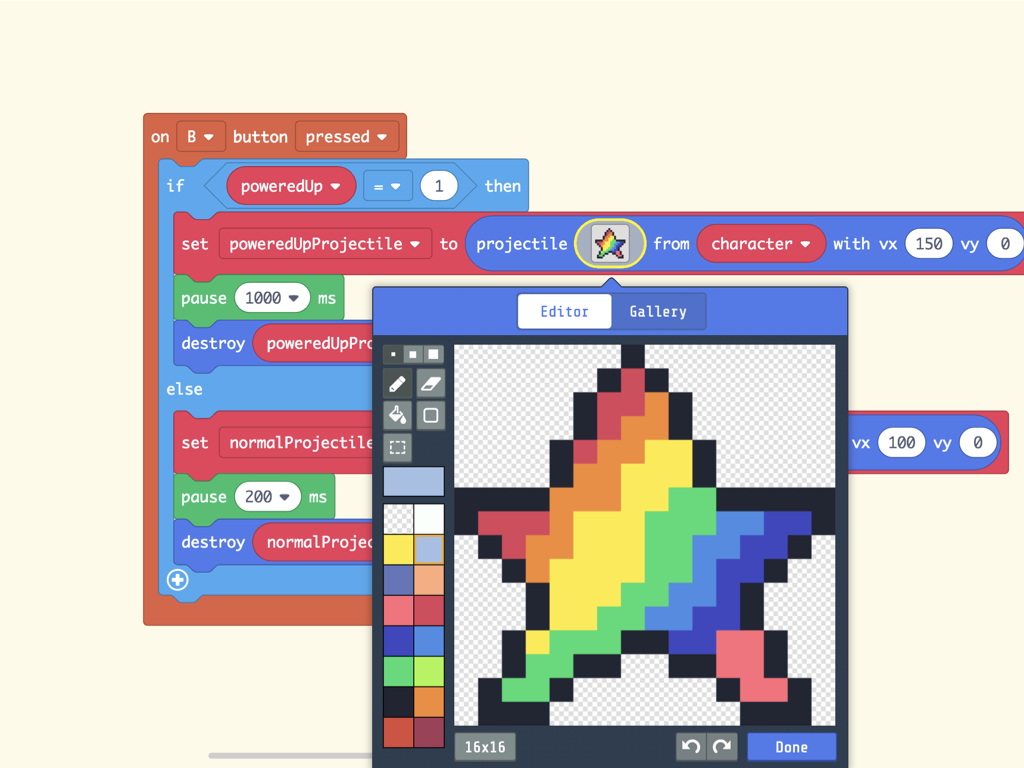
The on B button pressed block here will check to see if a power-up had been picked up. If so, the projectile sprite is swapped from a clover to a rainbow star. The vx (velocity along x axis) will be set to 150. This new projectile is fired from the character sprite, and then destroyed after a second. Doing so, it will stay in the game for a longer time, and will be more effective against enemy sprites.
If not, the normal projectile will be fired, at a vx of 100, and it is destroyed after 200ms.
Add a sound effect with a play sound ba ding block.
In this next section, we will now add Overlap Events. This can be used to determine what happens when certain sprites overlap other sprites in the game, allowing our projectile to destroy enemy sprites, for the player to collect coins, or any other interaction between colliding sprites.
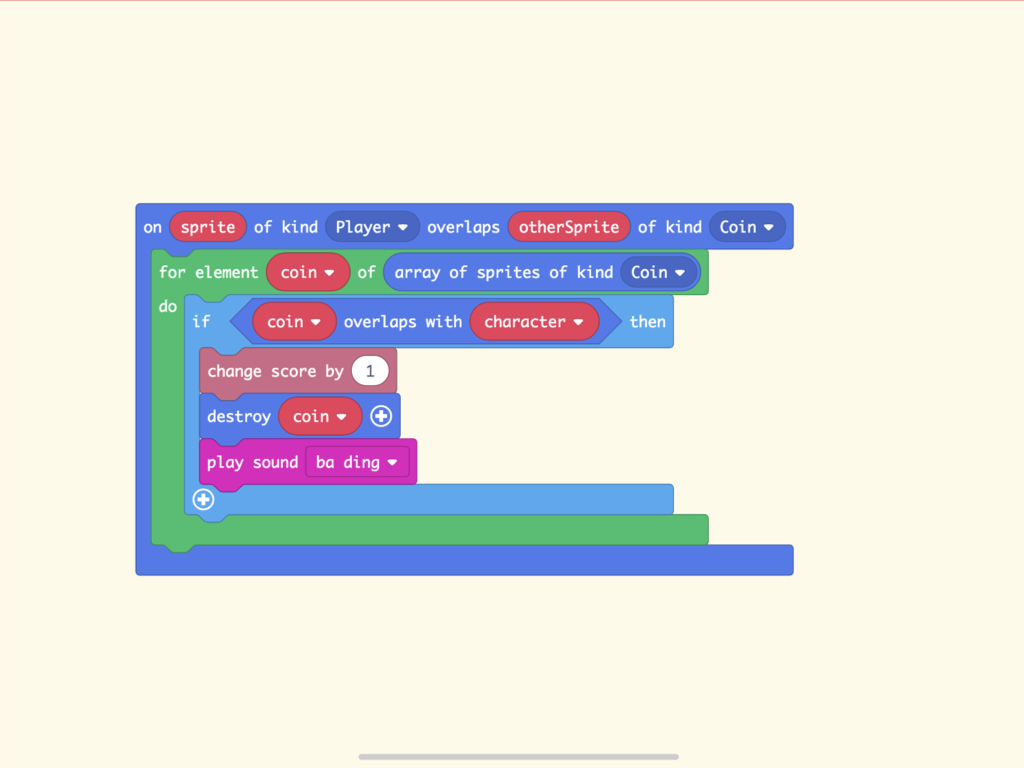
The on sprite of kind Player overlaps otherSprite of kind Coin block will trigger the coin within it as long as the player sprite overlaps any sprite of kind Coin. We added a for element coin of array of sprites of kind Coin do block within it, so that it will loop through each coin sprite within the array.
Use a if coin overlaps with character then block to check if any particular coin sprite had collided with the player. If so, change the game score by 1, then destroy that particular coin sprite.

The following code checks to see if the player sprite has collided with a sprite of kind Life, this would be the heart sprite created in on start. If it has, the player gains an extra life. This sprite can only be used once, then it is destroyed.
Add a sound effect with a play sound power up block.
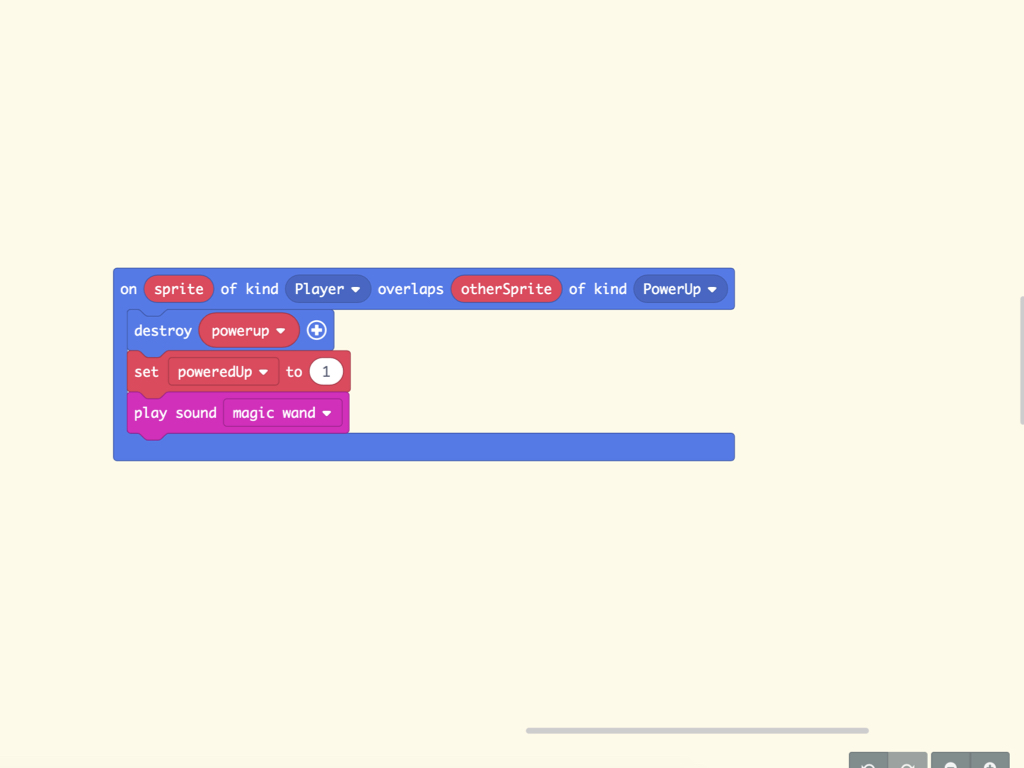
When the player collides with a power-up, the poweredUp variable will be set to 1. As it can only be used once, the power-up sprite is then immediately destroyed.
Add a sound effect with a play sound magic wand block.
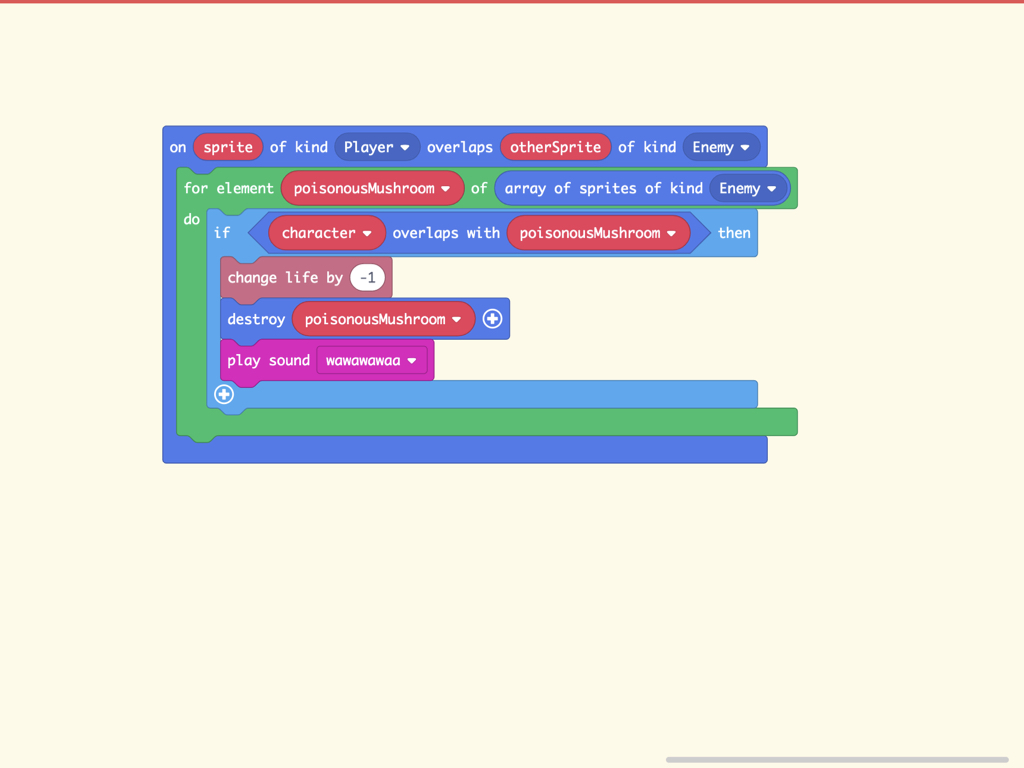
As there are multiple enemy sprites, we will need to loop through the enemyList array with a for element poisonousMushroom of array of sprites of kind Enemy block.
Then add an if ... then block into it to check to see if the character sprite has overlapped with an enemy sprite. If so, the player loses a life, The poisonousMushroom sprite is then immediately destroyed.
Add a sound effect with a play sound wawawawaa block.
To check if the player has collided with an enemy sprite, get out a on sprite of kind Player overlaps otherSprite of kind Enemy block.
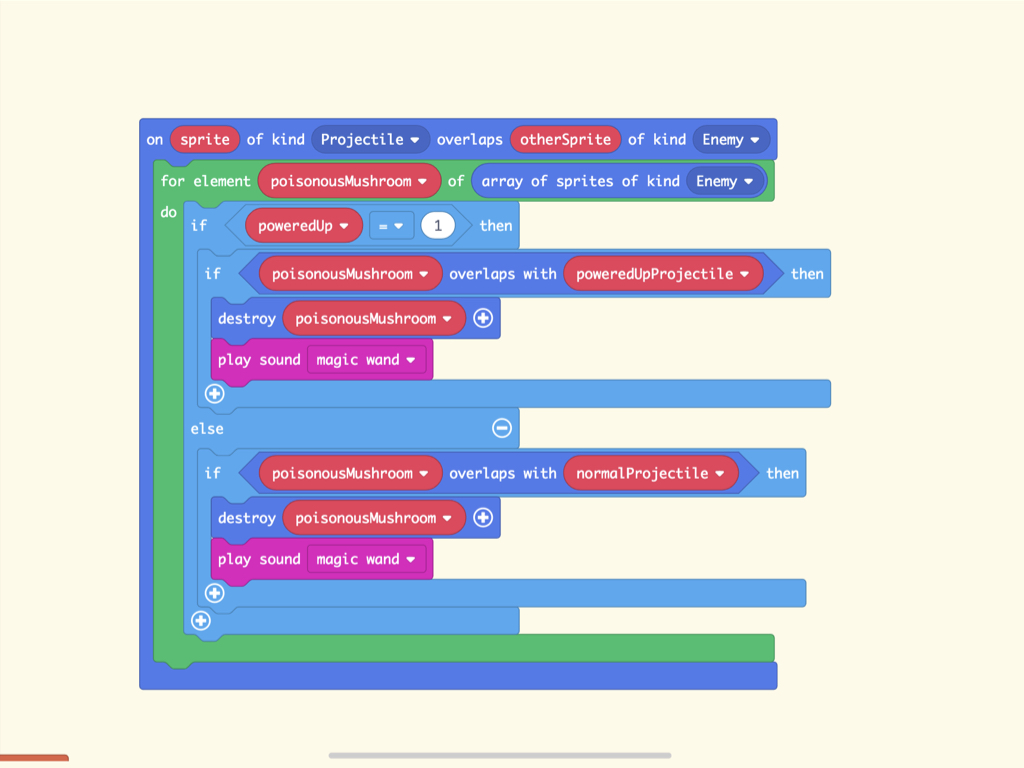
For our final overlap event, this checks to see if a projectile sprite has collided with an enemy sprite. Likewise, we've used a for element ... of array of sprites of kind ... block here.
We'll need to check to see if a power-up had been picked up before. If so, then check to see if the enemy sprite has overlapped with a powered up projectile, then the enemy sprite is destroyed and a sound effect is played. Otherwise, it will check to see if the enemy sprite has overlapped with a normal projectile sprite. If so, it will destroy the enemy sprite and play a sound effect.
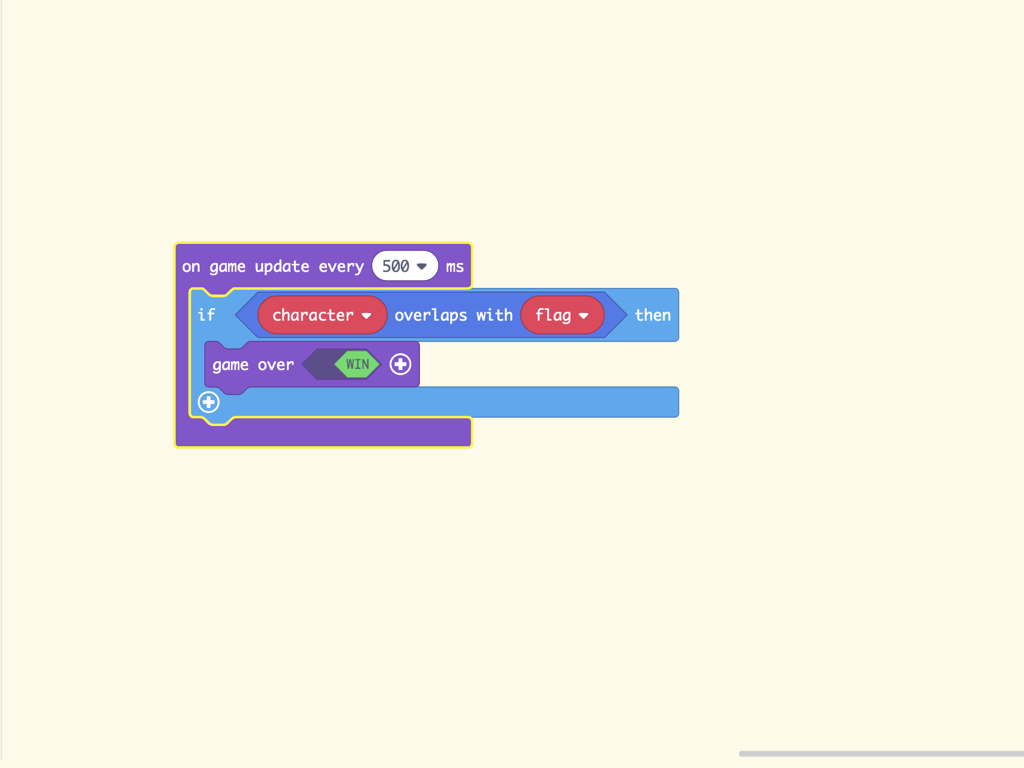
Finally, to create a win condition, add a on game update every ... ms block. We have set this to be 500ms.
In this block, add an if ... then block to check to see if the player sprite has overlapped with the flag sprite. If so, game over WIN is triggered.
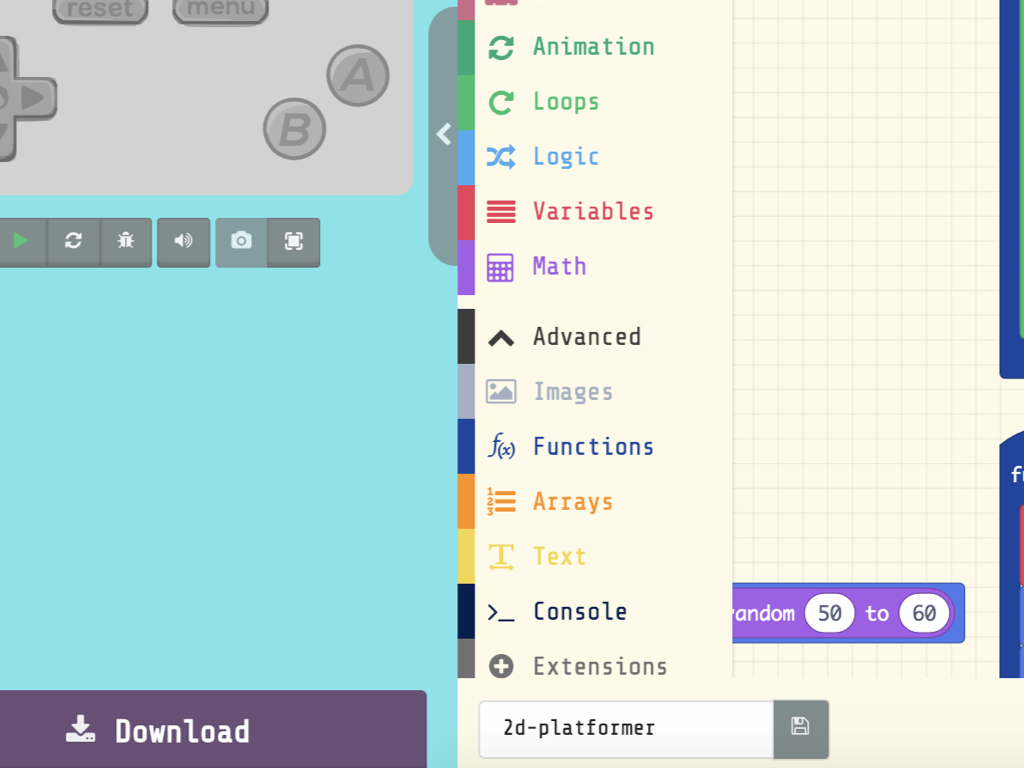
Click on the Download button
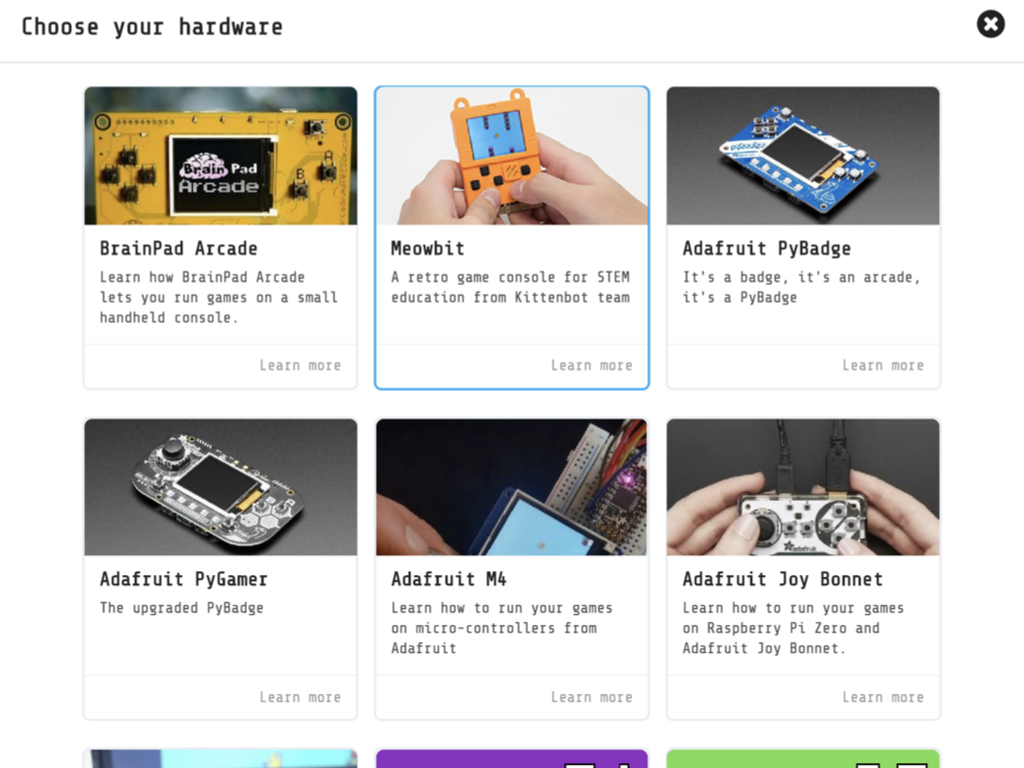
Click on Meowbit
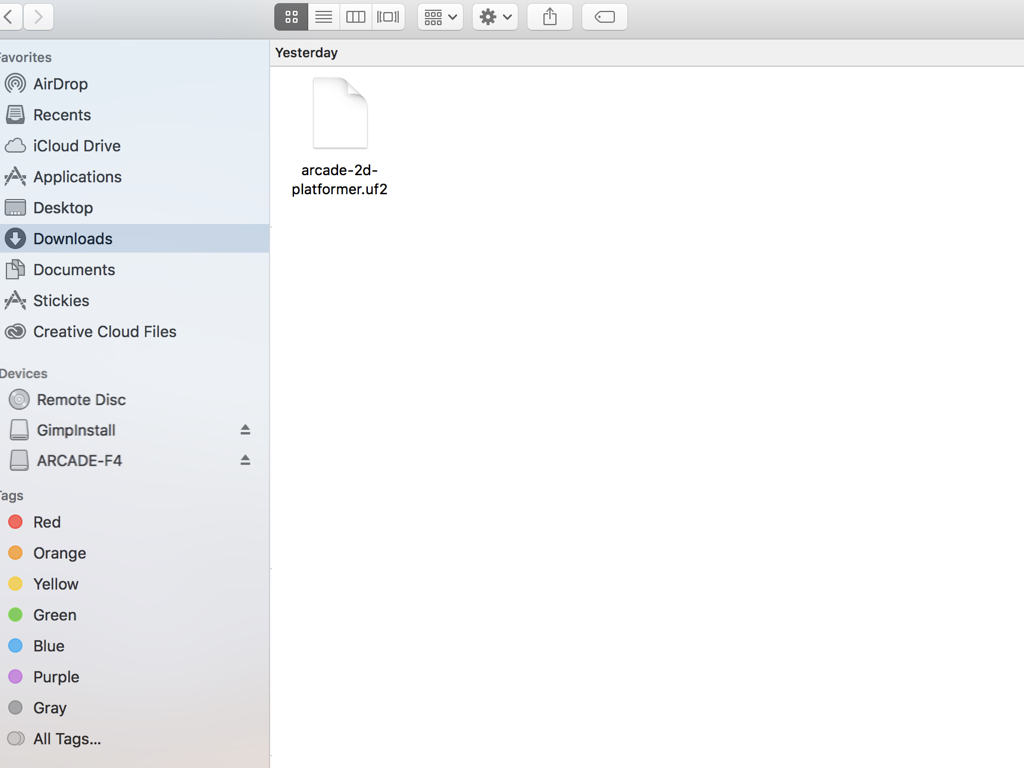
Drag and drop the arcade-2d-platformer.uf2 file to ARCADE-F4
Want the guide's .uf2 file? Feel free to download a copy of the game here.
Check out the guides over at https://www.littlebird.com.au/a/how-to/#micro-bit to learn even more. Happy gaming!
You're all done!
How can you modify this game to make it more fun? Some suggestions:
How can you modify this game to make it more fun? Some suggestions:
- Add player sprite animations
- Program the enemies to move
- Modify the power-up
- Create more levels