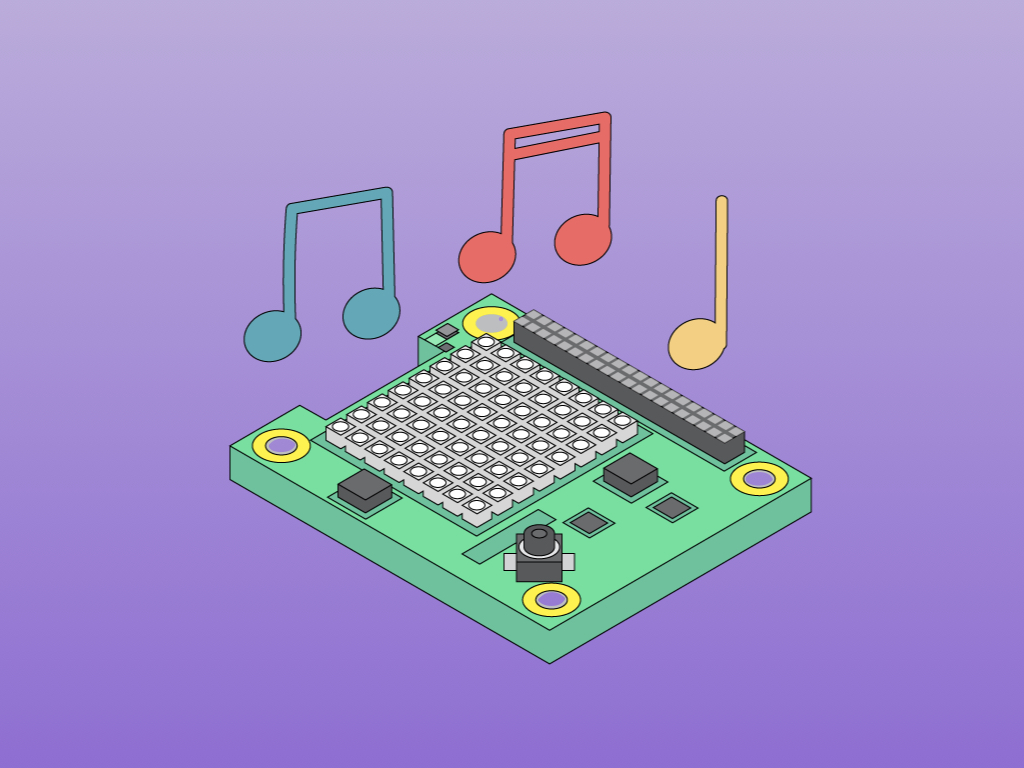
Music Player with Sense HAT
Turn the Raspberry Pi 4 into a music player with Scratch and Python programming
Written By: Cherie Tan
Difficulty
Medium
Steps
28
Build your own music player/visualiser with the Raspberry Pi and Sense HAT.
First we will show you how to do so using Scratch 3.0, then in the second part of this guide, we will show you how to create it with more advanced programming using Python.
Complete this guide to turn your Raspberry Pi 4 + Sense HAT into a music player.
First we will show you how to do so using Scratch 3.0, then in the second part of this guide, we will show you how to create it with more advanced programming using Python.
Complete this guide to turn your Raspberry Pi 4 + Sense HAT into a music player.
In this activity, learn to build a music player and visualiser with the Sense HAT and Raspberry Pi. You'll be able to change between tracks in your music playlist, adjust the volume, and display cool visualiser patterns on the LED matrix.
First, it will be programmed in Scratch 3, then we will show you how to take it a step further with Python programming.
As Scratch 3 needs at least 1GB of RAM to run, we recommend using a Raspberry Pi 4 with at least 2GB RAM. While you can use a Raspberry Pi 2,3, 3B+ or 4 with 1GB RAM, performance may be reduced or Scratch 3 may fail to run due to a lack of memory.
Scratch is a visual or block-based programming language that is super easy to start programming with! Earlier this year, Scratch 3 was released in an online version. Now, you can install and use Scratch 3 Desktop for offline use on the Raspberry Pi.
Back in our create a weather station with Raspberry Pi guide, we showed you how to program the LED matrix using Scratch 2. There wasn't an easy way to quickly create patterns on it, but there is now on Scratch 3 as well as a heap of other new features.
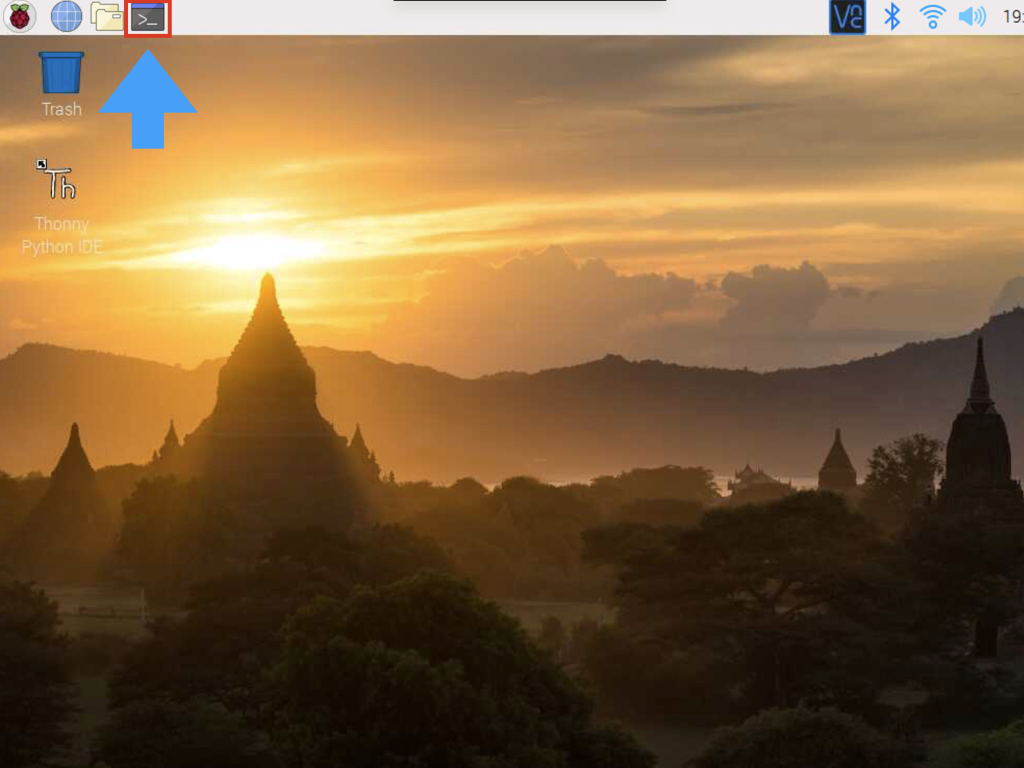
Once the Raspberry Pi has been powered up, you should see the PIXEL desktop. Click on the terminal window icon up on the top left hand corner.
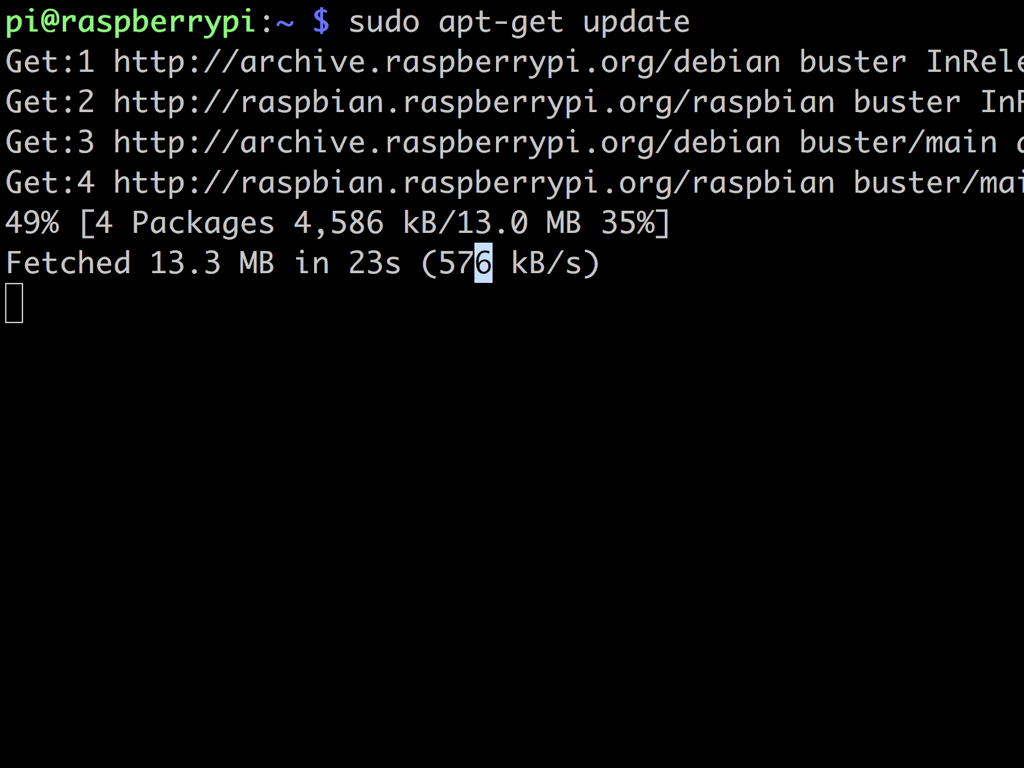
Before installing Scratch 3, enter the following command to download the packages list and 'update' them to get information on the newest versions of packages and their dependencies:
sudo apt-get update
sudo apt-get update
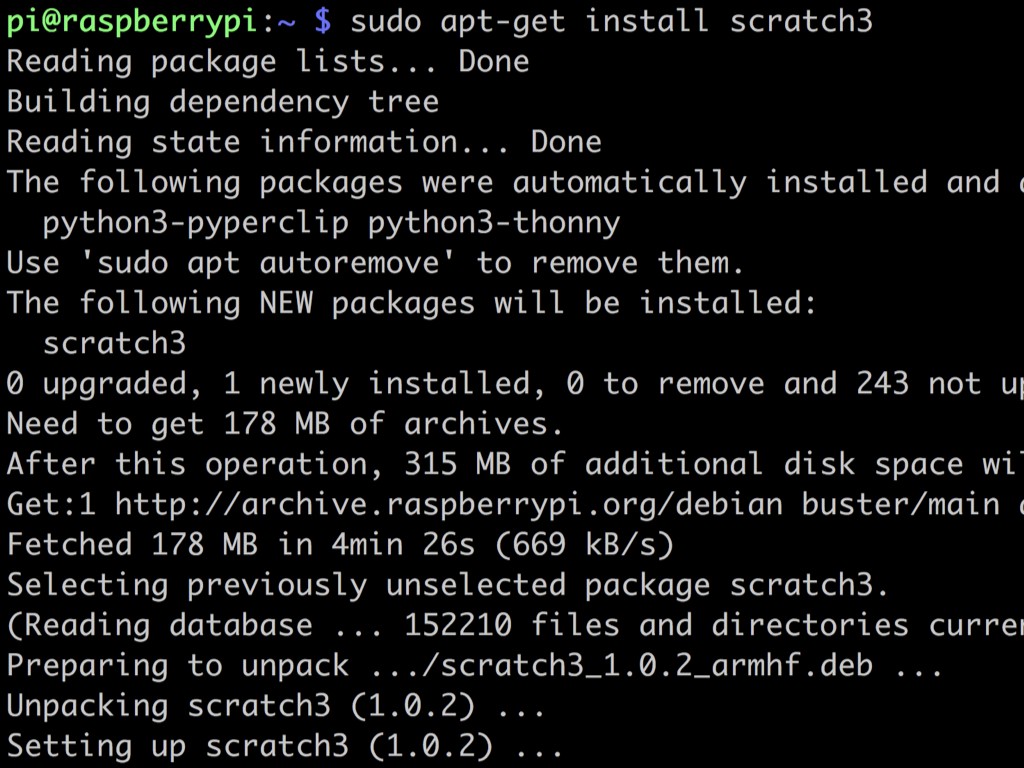
To install Scratch 3, enter the following in the terminal:
sudo apt-get install scratch3
sudo apt-get install scratch3
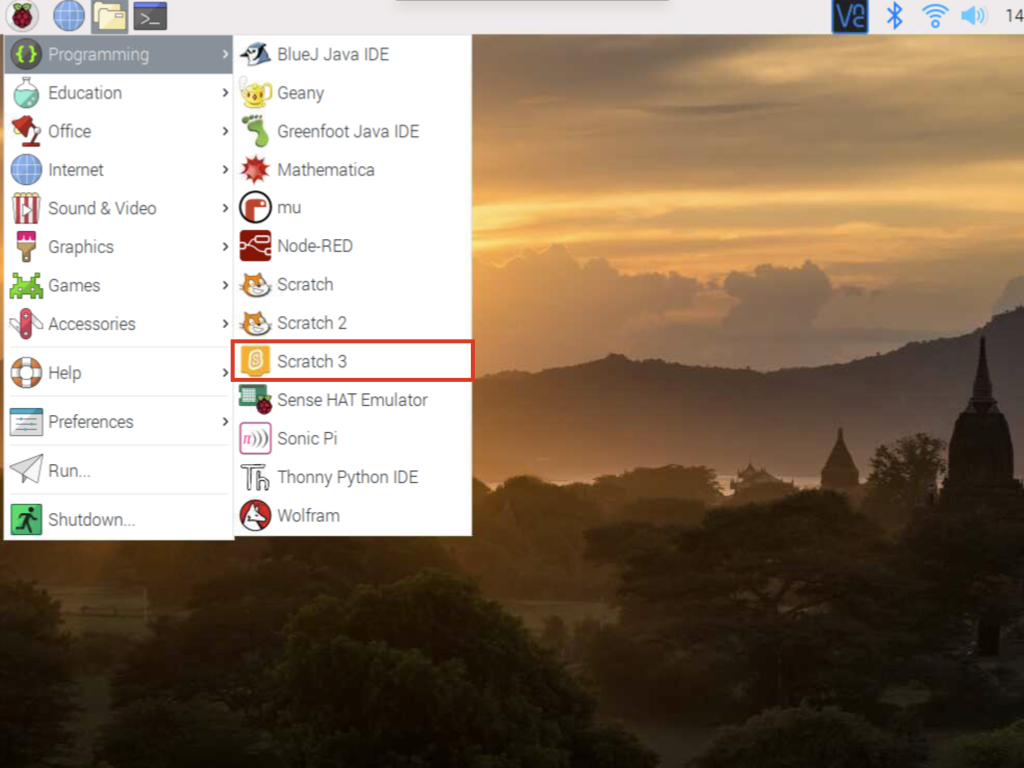
After installation is complete, navigate to the Raspberry Pi applications menu > Programming > Scratch 3
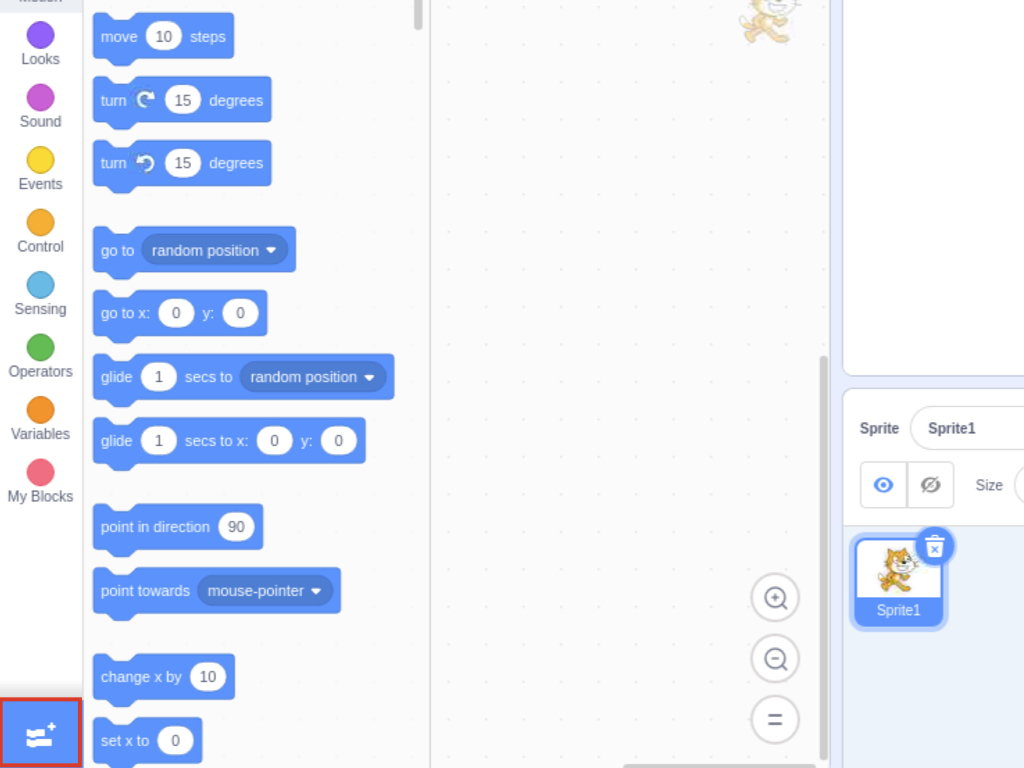
Click on the Add Extension button found on the bottom left hand corner of the Scratch 3 editor.
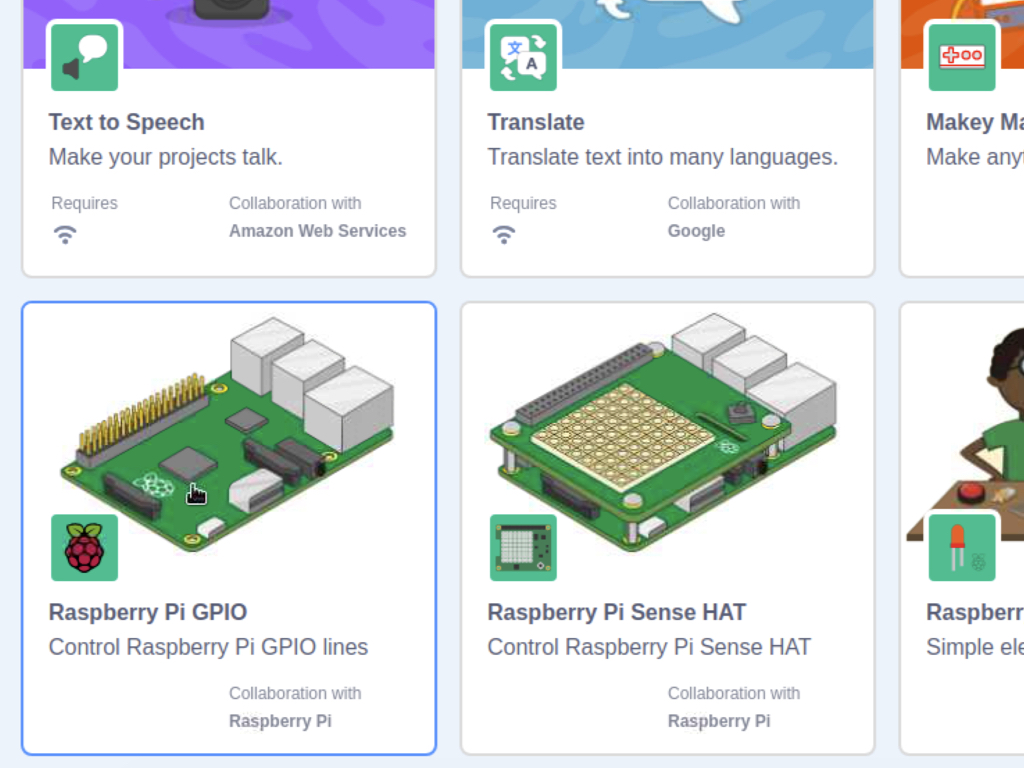
Click on Raspberry Pi GPIO
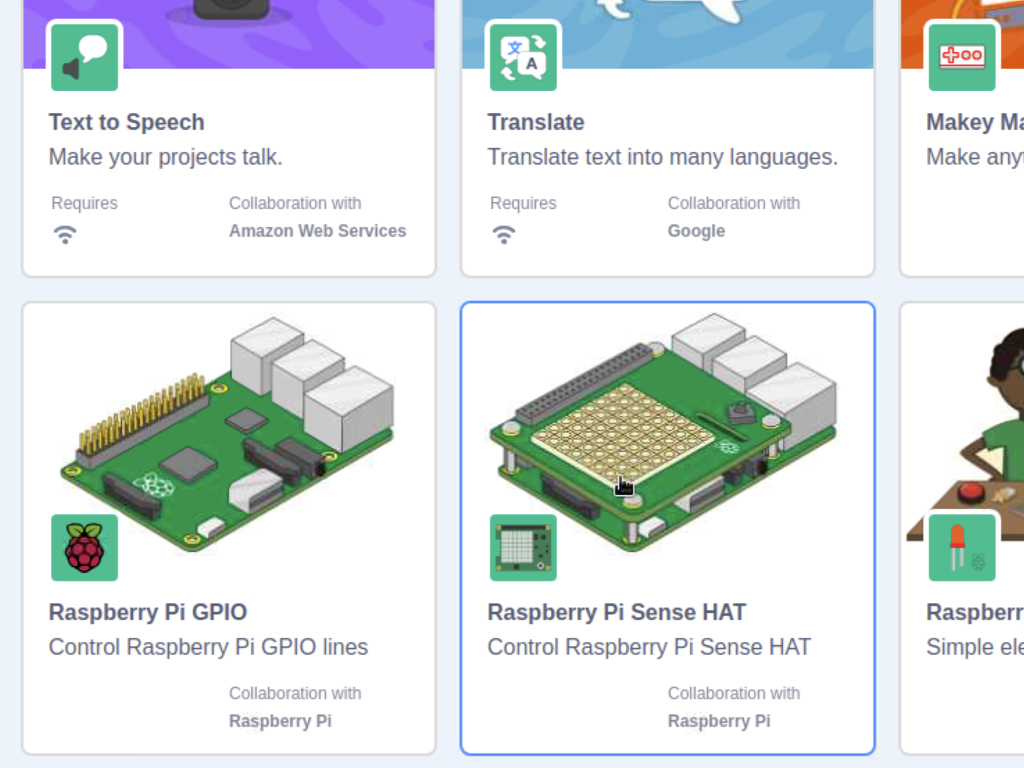
Repeat the previous step, this time clicking on Raspberry Pi Sense HAT


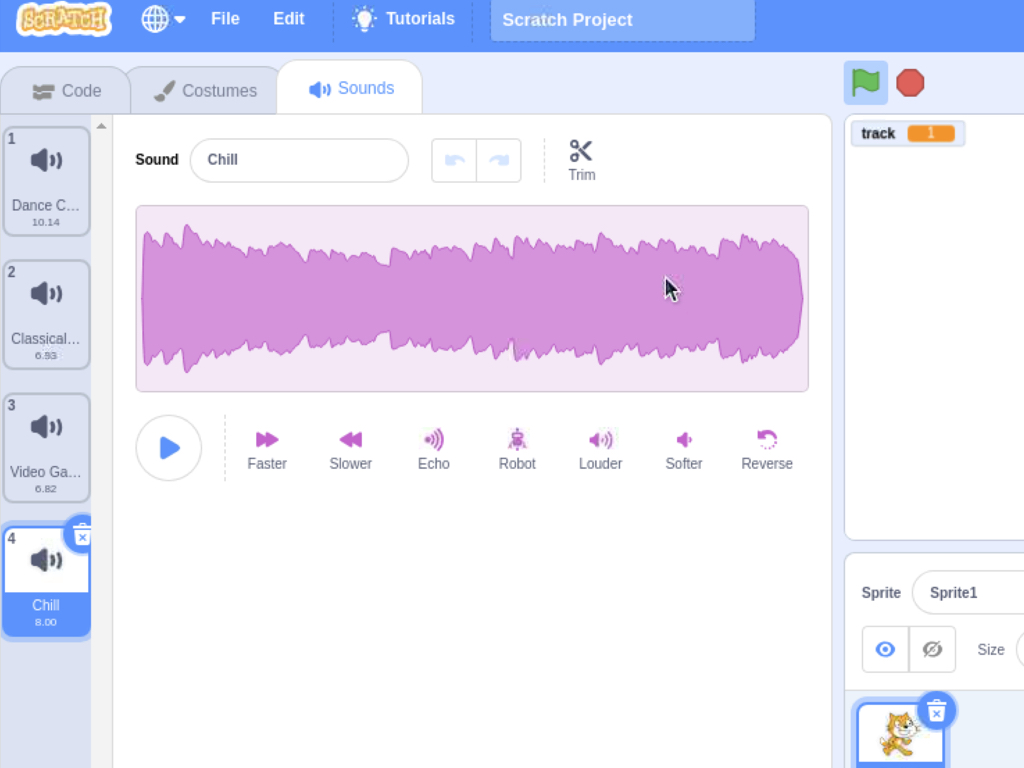
Click on the Sound tab on the top left hand corner of the editor
Hover the mouse cursor over the sound icon on the bottom left hand corner, then click on Choose a Sound
Choose the music for your player. In this guide, we have added four different sound loops.
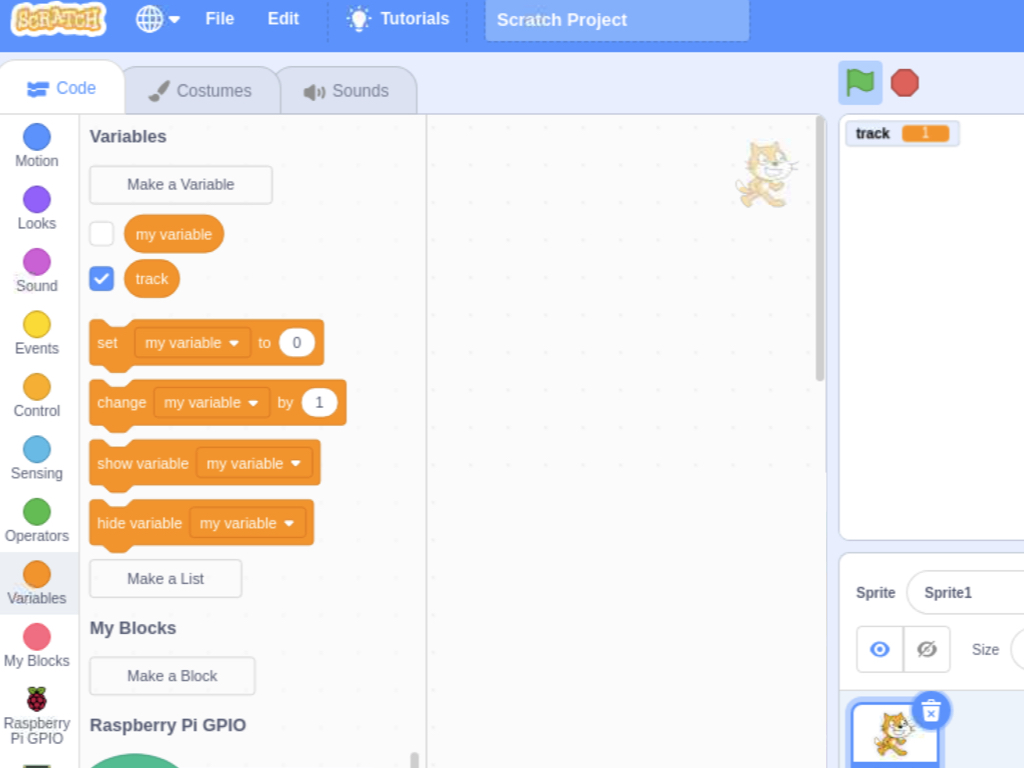
Click on Variables
Click on Make a Variable
Name this variable, track.
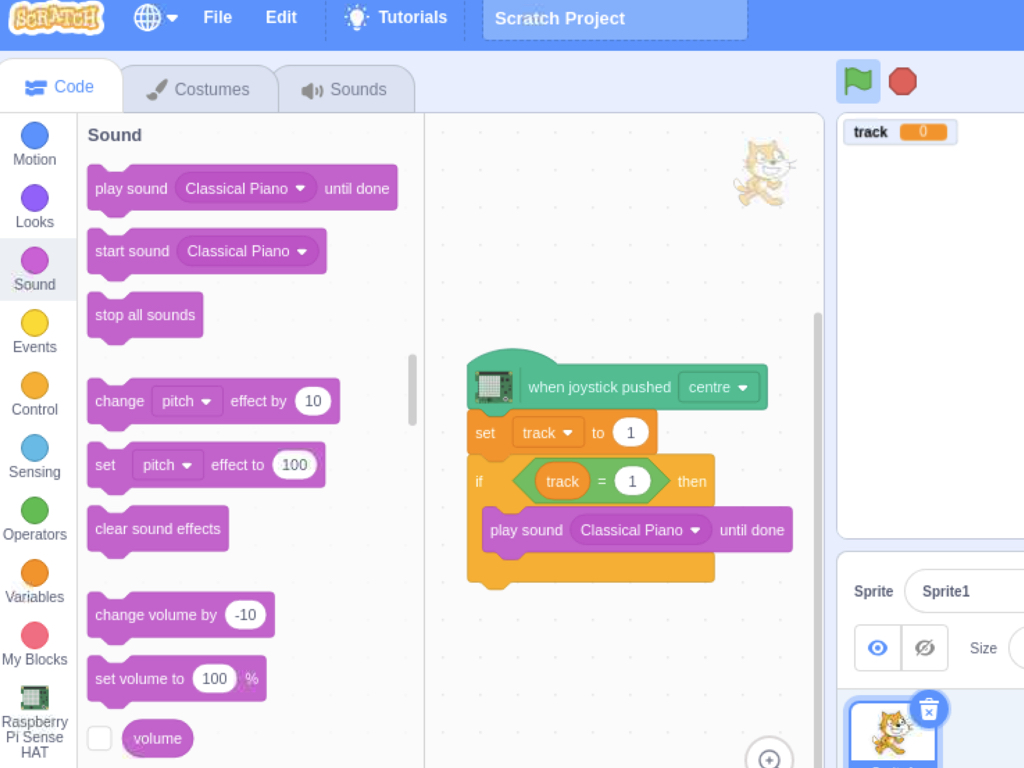
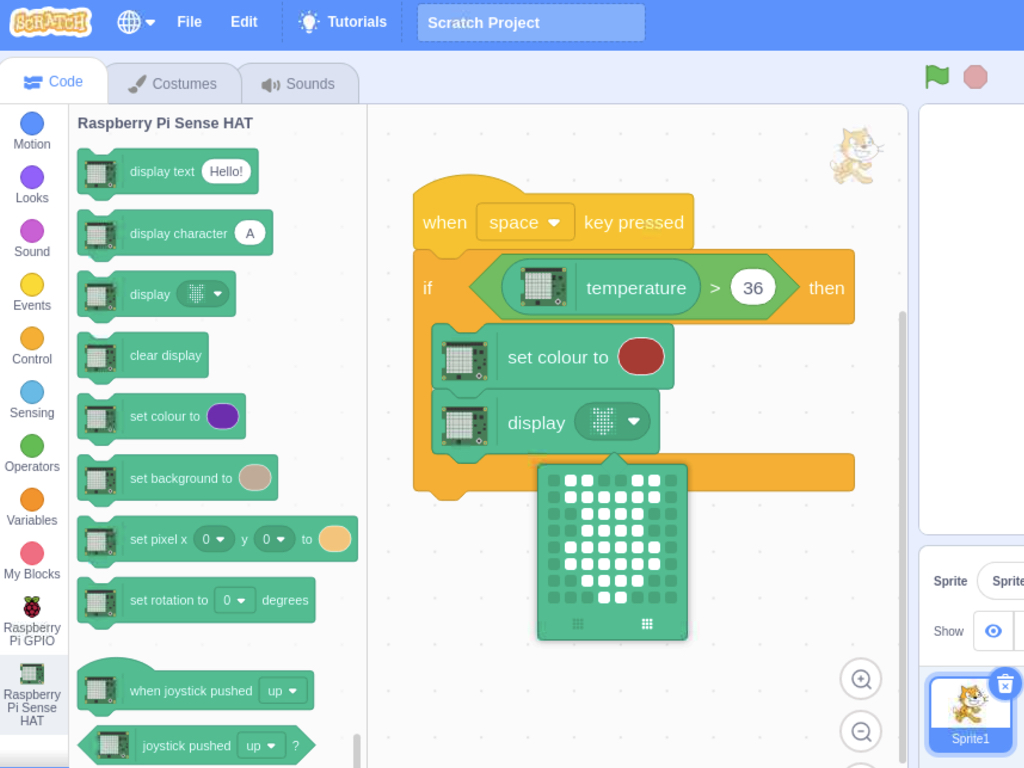
To make the music player play a tune, we'll need to create a condition.
Click on the Raspberry Pi Sense HAT category
Drag and drop a when joystick pushed ... block into the scripts area, and set it to centre.
From Control category, drag and drop a if ... then ... block.
Then from Operators add a ... = ... block and combine it with the if ... then ... block.
Add a track variable block within the operators block so that the conditions reads: If track = 1 then
Add a set track to 1 block
So if the track number is 1, let's get the music player to play the first song in our playlist with a play sound ... until done block found in the Sound category.
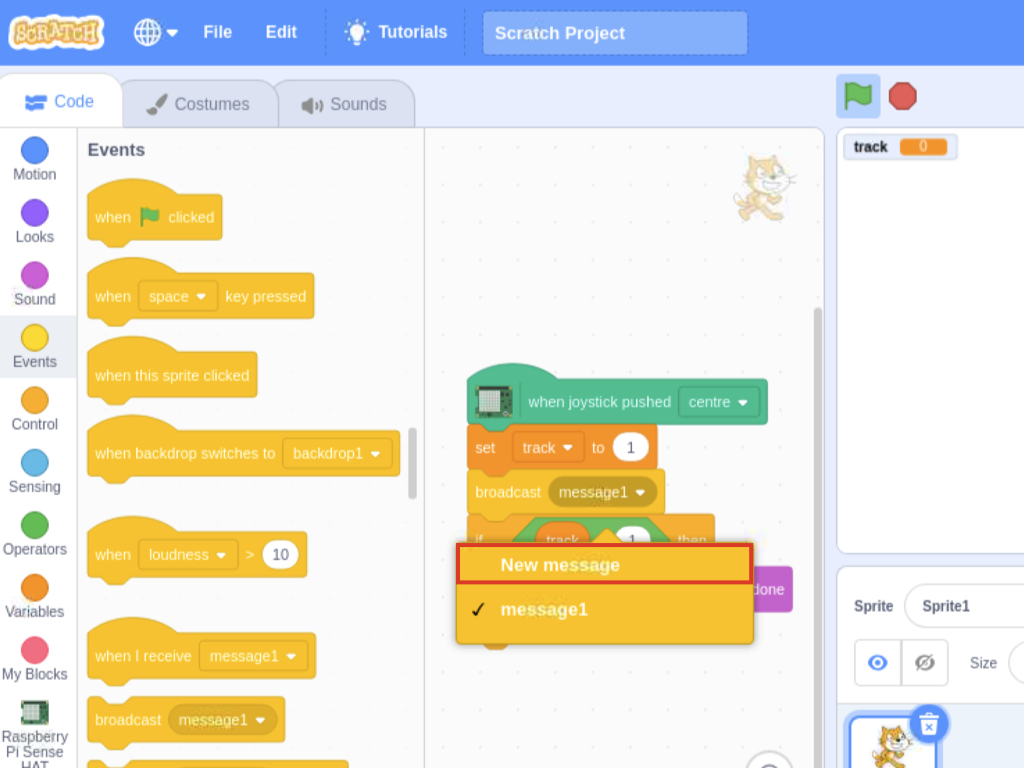
From Events, drag and drop a broadcast message1 block into the scrips pane.
Then click on message1 and choose New message
Call this new message, play.
Now that we've gotten the first tune to play, it's time to add some visualiser effects! Rather than build the program as one big piece, we can write separate procedures that you then put together. This will make your programs both easier to write and easier to test and debug. To do so, we will be using broadcasts.
The broadcast system works by broadcasting a message and you can call this message anything you like using the broadcast or broadcast ... and wait blocks that are found in Events.
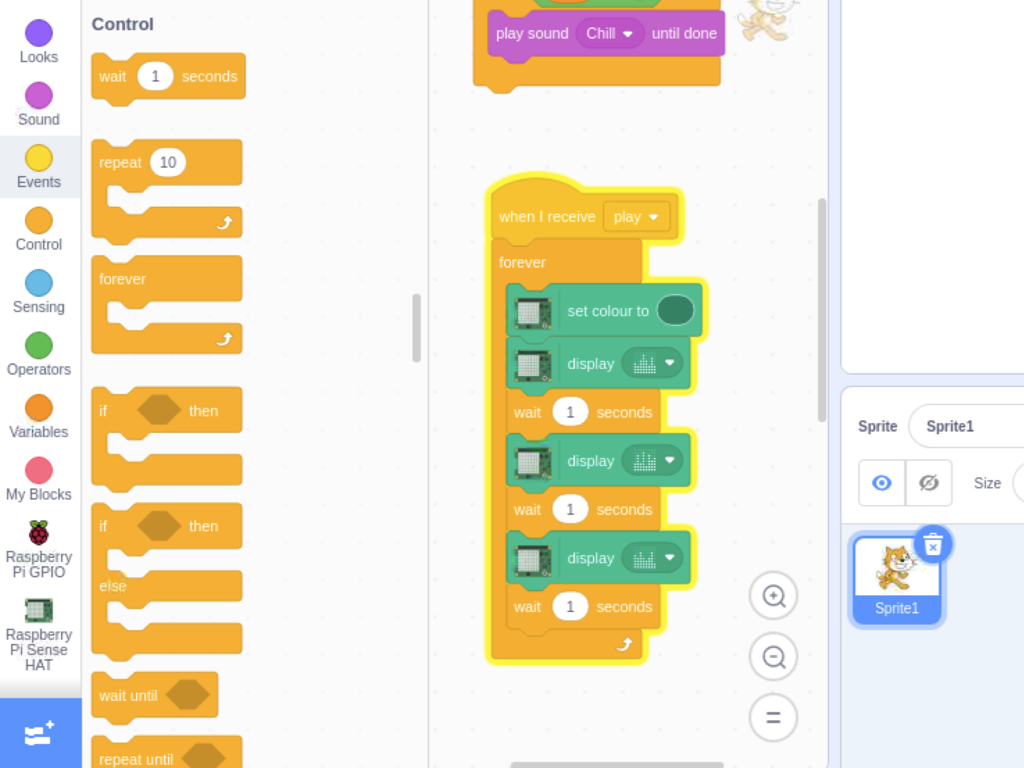
Add a wait ... seconds block between each change in display.
When the joystick on the Sense HAT is pushed downwards toward the centre, it will broadcast the message 'play'. To program the visualiser, first, drag and drop a when I receive play block into the scripts pane.
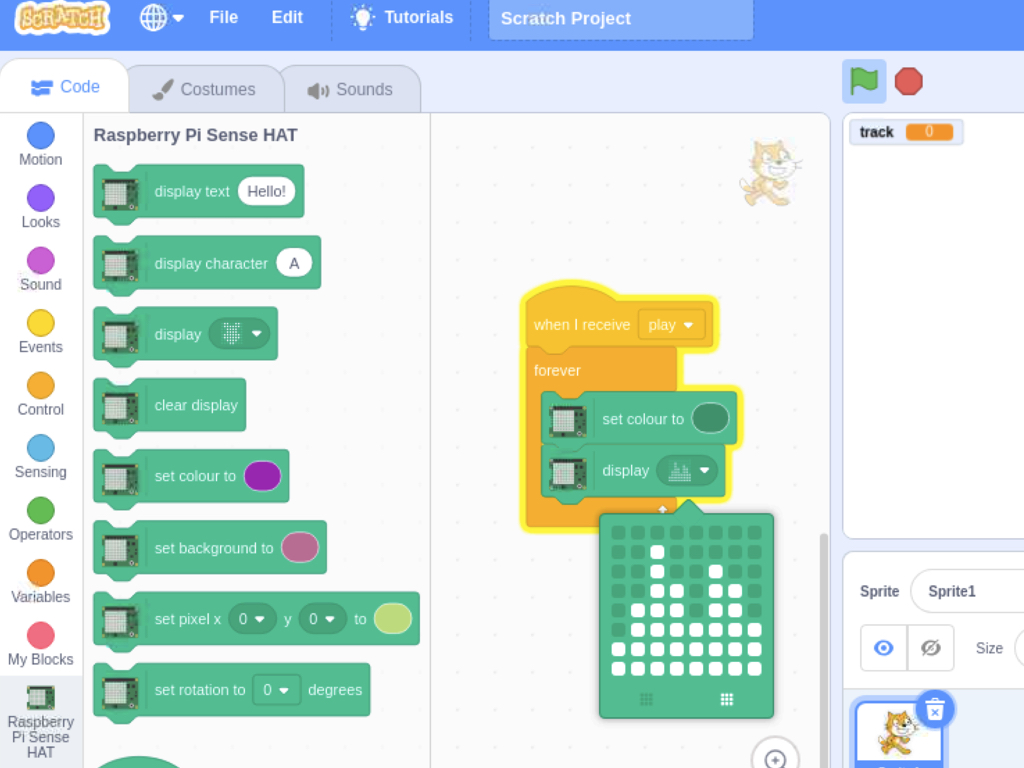
Attach a forever block with set colour to ... and display ... blocks found in the Raspberry Pi Sense HAT category.
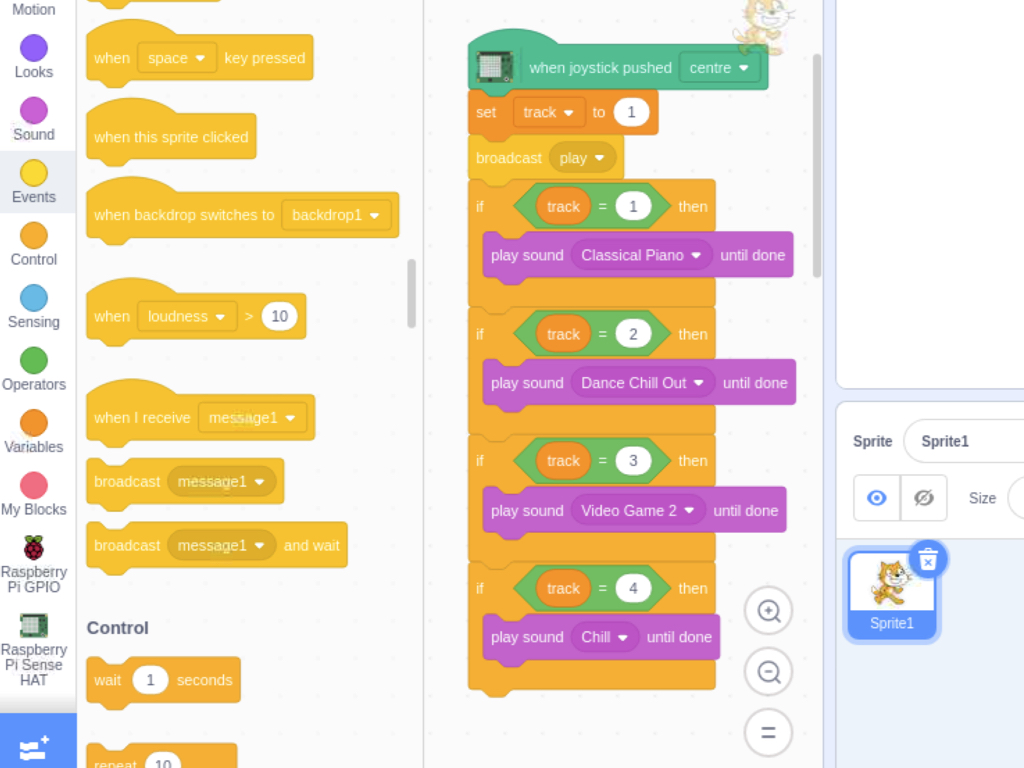
As we did before, this time add three more conditions to play the remaining songs in our playlist.
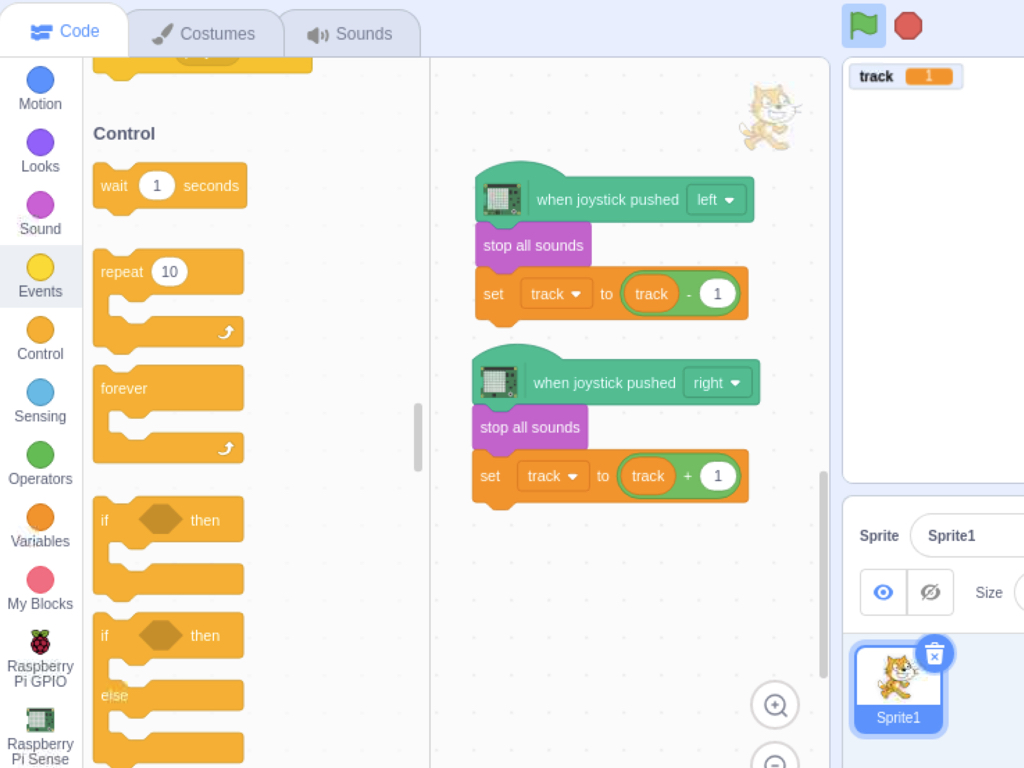
To change between tracks, we'll use the Sense HAT's joystick again. This time, set the when the joystick is pushed to the left.
Then add a stop all sounds block so that the current track will stop playing.
Next, decrease the value of track by 1. This will swap the track that is currently playing.
Likewise, when the joystick is pushed to the right, stop all sounds currently playing, and increase the value of track by 1.
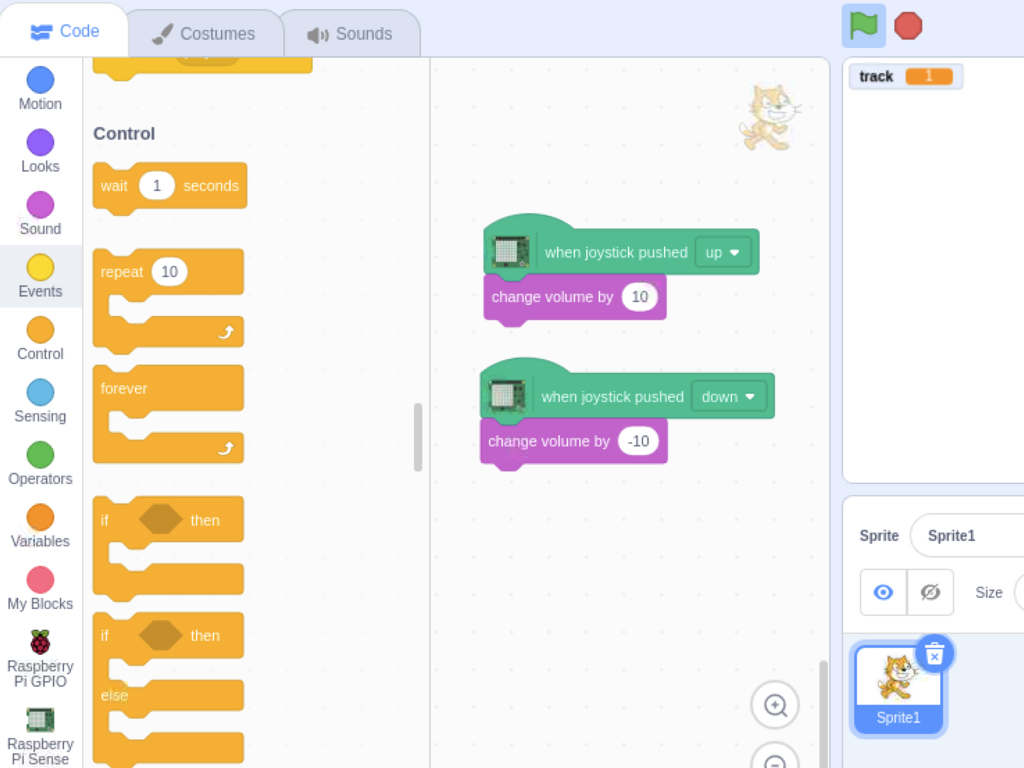
Finally, let's add the final feature of our music player: volume adjustment. As you may know by now, the Raspberry Pi treats the Sense HAT joystick in the same way as it does the arrow keys on a keyboard. By pushing the joystick up, let's get the music player to change the volume by first adding a when joystick pushed up block into the scripts pane.
Then from Sound, drag and drop a change volume by 10 block and attach it to it.
Likewise, add a when joystick pushed down block into the scripts pane, then add a change volume by -10 block to it.
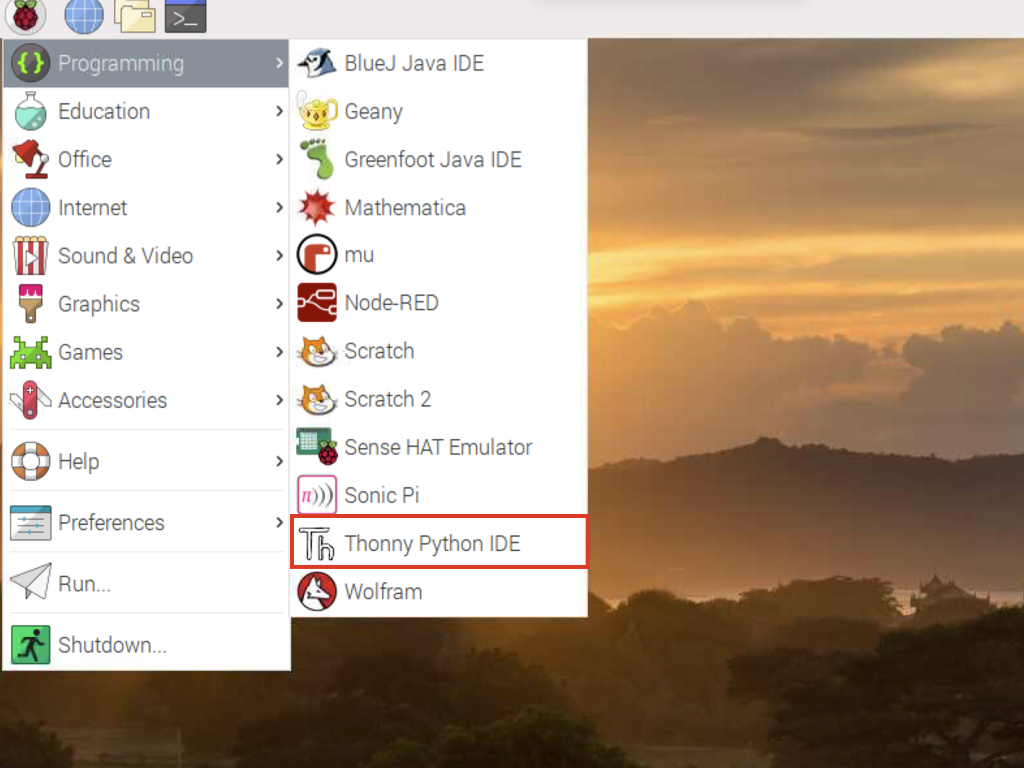
In the next part of this guide, we will show you how to create a music player with the Raspberry Pi and Sense HAT using Python. First, open up the Thonny IDE.
import time
import os
import pygame
from sense_hat import SenseHat
import glob
Make sure you have the following lines of code in your Python program to set up your connection with the Sense HAT and other necessary libraries we will be needing.
Pygame is a set of Python modules designed for writing video games, however it also can be used for audio playback by using its mixer music module.
Glob is a module that can find all pathnames matching a specified pattern and returned in an arbitrary order, which we will use in our Python program to find the .mp3 tracks of our playlist.
import time
import os
import pygame
from sense_hat import SenseHat
import glob

# Initialise pygame mixer
pygame.mixer.init()
Next, initialise the mixer module for sound loading an playback:
pygame.mixer.init()
pygame.mixer.init()
import time
import os
import pygame
from sense_hat import SenseHat
import glob

# Initialise pygame mixer
pygame.mixer.init()

# Create SenseHat object
sense = SenseHat()
Next, create a SenseHAT object with:
sense = SenseHat()
sense = SenseHat()
import time
import os
import pygame
from sense_hat import SenseHat
import glob

# Initialise pygame mixer
pygame.mixer.init()

# Create SenseHat object
sense = SenseHat()

R = [255, 0, 0]
O = [255, 165, 0]
Y = [255, 255, 0]
G = [0, 128, 0]
B = [0, 0, 255]
I = [75, 0, 130]
V = [139, 0, 255]
N = [0, 0, 0]
Next, create lists for the RGB colour values that we will be using on the Sense HAT LED matrix as part of our visualiser. In this guide, we will display a rainbow across the LED matrix. So go ahead and create seven lists that correspond to the colours of the rainbow.
The values used in each list is an RGB colour value that has three parameters which defines the intensity of the colour as an integer between 0 and 255. For example, [ 255, 0, 0 ] is rendered as red as the red parameter is set to 255 while the rest are set to 0.
Lastly, create one more list :
N = [ 0, 0, 0]
This will hold the values that will be used to turn the pixels off.
N = [ 0, 0, 0]
This will hold the values that will be used to turn the pixels off.
import time
import os
import pygame
from sense_hat import SenseHat
import glob

# Initialise pygame mixer
pygame.mixer.init()

# Create SenseHat object
sense = SenseHat()

R = [255, 0, 0]
O = [255, 165, 0]
Y = [255, 255, 0]
G = [0, 128, 0]
B = [0, 0, 255]
I = [75, 0, 130]
V = [139, 0, 255]
N = [0, 0, 0]

rainbow = [
  R, R, R, R, R, R, R, R,
  O, O, O, O, O, O, O, O,
  Y, Y, Y, Y, Y, Y, Y, Y,
  G, G, G, G, G, G, G, G,
  B, B, B, B, B, B, B, B,
  I, I, I, I, I, I, I, I,
  V, V, V, V, V, V, V, V,
  N, N, N, N, N, N, N, N
]
To display the visualisation, first create a new list and name it rainbow. This is the list that will contains the colour that will be displayed on each pixel of the LED matrix.
Later, to display the visuals on the LED matrix, the set_pixels command will be used. This command requires a list containing 64 smaller lists of [R, G, B] values (red, green, blue). Each R-G-B element must be an integer between 0 and 255, which is what we've created in the previously.
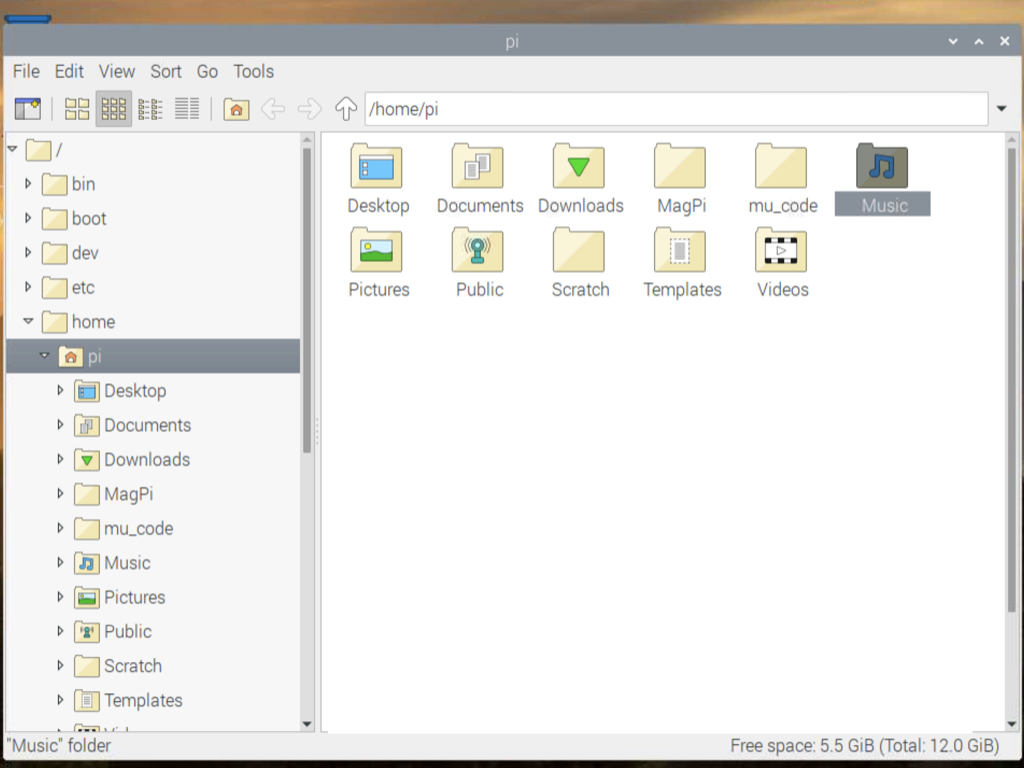
Next, add the .mp3 files of your music playlist into the Music folder found in home > pi > Music. The file transfer can be done via a USB stick or Samba File Server.
import time
import os
import pygame
from sense_hat import SenseHat
import glob

# Initialise pygame mixer
pygame.mixer.init()

# Create SenseHat object
sense = SenseHat()

R = [255, 0, 0]
O = [255, 165, 0]
Y = [255, 255, 0]
G = [0, 128, 0]
B = [0, 0, 255]
I = [75, 0, 130]
V = [139, 0, 255]
N = [0, 0, 0]

rainbow = [
  R, R, R, R, R, R, R, R,
  O, O, O, O, O, O, O, O,
  Y, Y, Y, Y, Y, Y, Y, Y,
  G, G, G, G, G, G, G, G,
  B, B, B, B, B, B, B, B,
  I, I, I, I, I, I, I, I,
  V, V, V, V, V, V, V, V,
  N, N, N, N, N, N, N, N
]

# Get a list of all the music files
path_to_music = "/home/pi/Music"
os.chdir(path_to_music)
music_files = glob.glob("*.mp3")
music_files.sort()
To swap between tracks, we will need a list of all the music files. Go ahead and create a variable that contains the path to the Music folder directory.
Change the current working directory to the music folder with the os.chdir method.
Next, use glob.glob(pathname) which will return a list of path names that match a string containing a path specification. It enables identifying files of a specific extension or files that have a specific pattern. In this case, we want it to return a list of files that contains the .mp3 extension within the Music folder.
import time
import os
import pygame
from sense_hat import SenseHat
import glob

# Initialise pygame mixer
pygame.mixer.init()

# Create SenseHat object
sense = SenseHat()

R = [255, 0, 0]
O = [255, 165, 0]
Y = [255, 255, 0]
G = [0, 128, 0]
B = [0, 0, 255]
I = [75, 0, 130]
V = [139, 0, 255]
N = [0, 0, 0]

rainbow = [
  R, R, R, R, R, R, R, R,
  O, O, O, O, O, O, O, O,
  Y, Y, Y, Y, Y, Y, Y, Y,
  G, G, G, G, G, G, G, G,
  B, B, B, B, B, B, B, B,
  I, I, I, I, I, I, I, I,
  V, V, V, V, V, V, V, V,
  N, N, N, N, N, N, N, N
]


# Get a list of all the music files
path_to_music = "/home/pi/Music"
os.chdir(path_to_music)
music_files = glob.glob("*.mp3")
music_files.sort()

volume = 1.0
current_track = 0
no_tracks = len(music_files)

while True:
  pygame.mixer.music.load(music_files[current_track])
  pygame.mixer.music.set_volume(volume)
  pygame.mixer.music.play()
  start_time = 0.0
  sense.set_pixels(rainbow)
  while pygame.mixer.music.get_busy():
    pygame.time.Clock().tick()
You may have noticed that we have added the following after the play function:
while pygame.mixer.music.get_busy()
pygame.time.Clock().tick()
This is because the play function is an asynchronous event. Once the program reaches its end, the pygame mixer object is destroyed which causes the music to stop; so the script stops instantly, not giving the music a chance to start at all.
To avoid that and in order to run the while loop until the music finishes, we have used pygame.time.Clock().tick().
get_busy() method is used to check if the music stream is playing.
Next, add a new variable volume and assign it the value of 1.0
Then create a new variable current_track and assign it a value of 0
Create a new variable no_tracks which will hold the length of the music_files list
Add the following code after to get the music player to start playing some tunes and display the visualisation.
Next display the visualisation on the LED matrix with set_pixels.
Play the music with pygame.mixer.music.play at start_time 0.0
Set the volume of the music with pygame.mixer.music.set_volume.
pygame.mixer.music.load will load the playlist tracks within music_files list, starting with the current_track which is at index '0' of the list, the first element of the list.
while True:
  pygame.mixer.music.load(music_files[current_track])
  pygame.mixer.music.set_volume(volume)
  pygame.mixer.music.play()
  start_time = 0.0
  sense.set_pixels(rainbow)
  while pygame.mixer.music.get_busy():
    pygame.time.Clock().tick()
    for x in sense.stick.get_events():
      if x.direction == 'right':
        current_track = current_track + 1
        if current_track >= no_tracks:
          current_track = 0
        pygame.mixer.music.stop()
        pygame.mixer.music.load(music_files[current_track])
        pygame.mixer.music.play()
        start_time = 0.0
      if x.direction == 'left':
        current_track = current_track - 1
        if current_track < 0:
          current_track = 0
        pygame.mixer.music.stop()
        pygame.mixer.music.load(music_files[current_track])
        pygame.mixer.music.play()
Changing tracks is simple -- we will use the Sense HAT's joystick to change between tracks! To do so, right after pygame.time.Clock().tick(), use the sense.stick.get_events() method.
This method returns a list of InputEvents representing all events that have occurred since the last call to get_events.
When the joystick is moved to the right, the value of current_track is increased by 1 as long as it is less than or equal to the value in no_tracks. Otherwise, current_track is set to 0. After that, the current track is stopped with pygame.mixer.music.stop before the next track is loaded and played at start time 0.0
Likewise, if the joystick is moved to the left, the value of current_track is decreased by 1.
while True:
  pygame.mixer.music.load(music_files[current_track])
  pygame.mixer.music.set_volume(volume)
  pygame.mixer.music.play()
  start_time = 0.0
  sense.set_pixels(rainbow)
  while pygame.mixer.music.get_busy():
    pygame.time.Clock().tick()
    for x in sense.stick.get_events():
      if x.direction == 'right':
        current_track = current_track + 1
        if current_track >= no_tracks:
          current_track = 0
        pygame.mixer.music.stop()
        pygame.mixer.music.load(music_files[current_track])
        pygame.mixer.music.play()
        start_time = 0.0
      if x.direction == 'left':
        current_track = current_track - 1
        if current_track < 0:
          current_track = 0
        pygame.mixer.music.stop()
        pygame.mixer.music.load(music_files[current_track])
        pygame.mixer.music.play()
      if x.direction == 'up':
        volume = volume + 0.05
        if volume >- 1.0:
          volume = 1.0
        pygame.mixer.music.set_volume(volume)
      if x.direction == 'down':
        volume = volume - 0.05
        if volume < 0.0:
          volume = 0.0
        pygame.mixer.music.set_volume(volume)
Let's add the volume control feature for our music player. This time, the joystick's up and down directions will be used for music adjustment.
If the joystick is moved in the upwards direction, increase the value of volume by 0.05. Otherwise, if the volume vaue exceeds 1.0, set it to 1.0. Then set the new volume with pygame.mixer.music.set_volume
Next, when the joystick is moved in the downwards direction, decrease the volume by 0.05.
Otherwise, if the volume is less than 0.0, set it to 0.0. Finally, as was done before, set the volume with pygame.mixer.music.set_volume.
Otherwise, if the volume is less than 0.0, set it to 0.0. Finally, as was done before, set the volume with pygame.mixer.music.set_volume.
Save the program and name it music-player.py
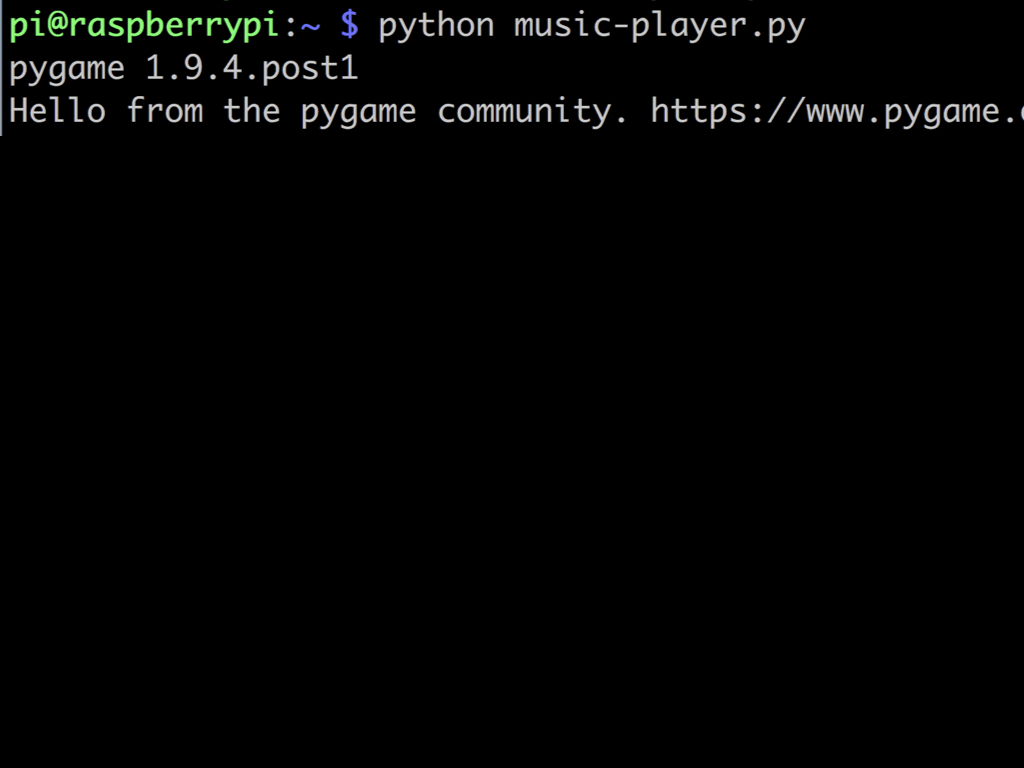
That's it! Your Raspberry Pi music player is complete! Type the following command into the terminal to run the music-player.py script:
python music-player.py
python music-player.py
Try changing tracks and adjusting the volume. Can you think of other features to add on to the music player? A few ideas:
- Shuffle tracks so that they play in a random order
- Pause and unpause functionality
- Start the music-player.py script immediately after the Raspberry Pi is booted up.
Check out the guides over at https://www.littlebird.com.au/a/how-to/#raspberrypi to learn even more. Happy hacking!
- Shuffle tracks so that they play in a random order
- Pause and unpause functionality
- Start the music-player.py script immediately after the Raspberry Pi is booted up.
Check out the guides over at https://www.littlebird.com.au/a/how-to/#raspberrypi to learn even more. Happy hacking!